HORIZONTAL PANORAMAS
Today I would like to walk you through the process of creating some aerial panoramas. The process is very simple; both taking the images and then processing them. But there are some tips and tricks to all of it.
First and foremost, always shoot in RAW or RAW & JPEG mode. You really want to have the .dng file available, as it contains much more data and you can really do some nice post-production work with .dng files.
In order to create a panorama you also need some stitching software. There are several ones, like Adobe Lightroom, Photoshop, even Adobe Bridge/Camera RAW has a stitching feature. PTGui is another one. If you are not familiar with any of these products, there are great tutorials online.
Now let's review my process and perhaps there are some helpful information in it for you.
I usually have an idea of what I want to capture in my aerial panorama. However, there are times when I have an idea and then I am up in the air and I see something completely different. I love when that happens. So have an open mind.
Once I am ready to start my panorama, I let my aerial platform hover for a couple of seconds so it levels out. I yaw to the beginning of my panorama, the area where I want it to start. That can either be on the left or the right side. I then check my exposure settings; I tend to slightly underexpose my images as it is easier for me to bring out the shadows than to calm down the highlights. Depending on the light situation, I may even go into the 3 or 5 image bracket setting.
Let's say I am taking an aerial panorama that has the setting sun behind a beautiful building and I want to preserve both the highlights of the sky but also the shadows/dark areas of the building. I would do the 3 or 5 image bracketing feature and take each image of the panorama that way.
Anyway, after the first picture I yaw the platform careful to the side, but use a 1/3 overlap. In the DJI Go app you can active the Grid function (Photo/Video Menu, under the Tool section). That grid helps you with keeping enough overlay. Make sure you only rotate/yaw your aircraft and that you don't move out of position (up/down, forward/backward or left/right). You keep doing that until you have the images for your panorama. Always keeping a 1/3 overlap between shots.
Now don't think you can only do one row. At the end of the panorama, you can tilt the camera up (for more sky) or down (for more ground), and make your way across again. That will give you two rows of images to stitch together.
1.Sunrise Panorama

Here is a simple panorama with a little another Inspire flying through it. In order for the Inspire to show up, you actually have to make sure that the Inspire is only in one picture and that the other pictures that cover and overlap that area, are cutout at that area. Otherwise the moving object will not show up in your final panorama.
2.Very Wide Panoramas

There are times I really enjoy doing a very wide panorama - even a 360 degrees. That's really fun as you flatten the "circle" into a continues picture and you can do some interesting things. I like to keep a subject closer to the camera than the rest. In this example the mountain peak to the left is closer and so it gives some depth.
3.Low to the Ground Panorama

Panoramas don't always have to happen high in the sky. Sometimes being lower to the ground, but still noticeably above eye level, provides for a very nice view. In this panorama here the leading lines of the train track and the walking path, as well as the road on the left, makes your eyes wander towards the center of the image. There the viewer gets to explore and see what is going on. Using leading lines helps to keep, or to direct, focus on a certain area.
4.Panorama Turned into Tiny Planet

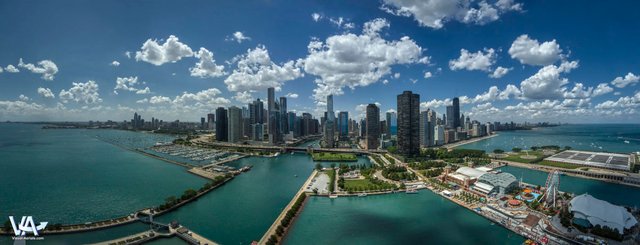
There are times I use a panorama and turn it into a Tiny Planet. I love the look and feel of a Tiny Plant and that is especially the case when you have a panorama where some of the structures go above the point of view. In this case the building of the skyline are higher than the location the panorama was taken. When turned into a Tiny Planet, that will look really good. Let's see what comes out of it.
5.Panorama Turned into Tiny Planet

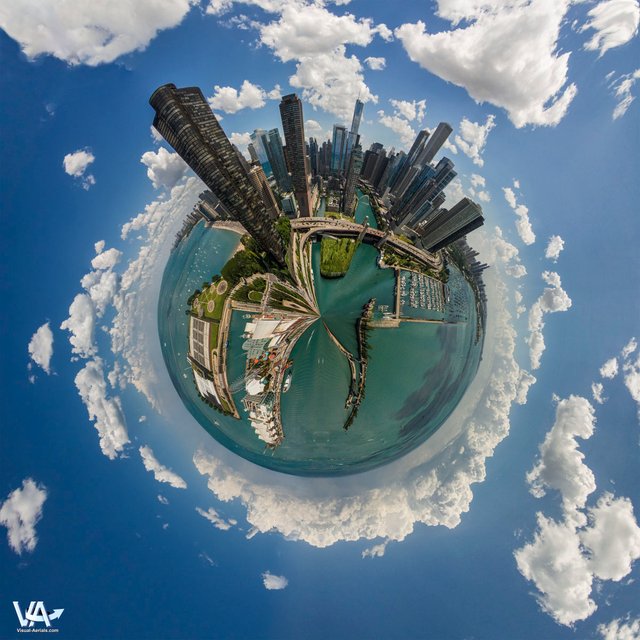
And here it is - by turning the image into a Tiny Planet, you can create some fun views, allowing the viewer to think that this place is its own little world.
6.Straight Lines in Panoramas

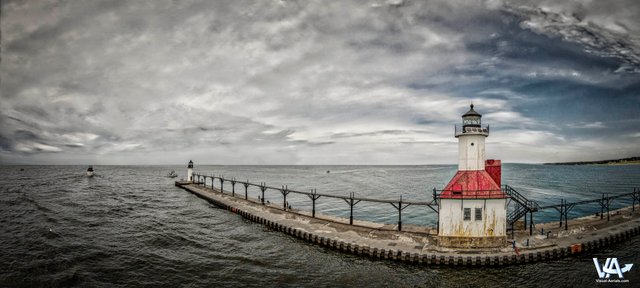
Due to the way of taking a panorama (hovering and only yawing the platform left to right or right to left) means that objects in front of the platform change due to the viewing angle. What in reality is a straight line, will become a curved one in a panorama. I personally enjoy that because it allows for some creativity. Here I placed the Phantom right in front of the light house and then yawed to the left. During stitching the pier become "bend", leading into the ocean.