Education. School Project. Kids make an Egyptian sarcophagus.
As part of an ancient history topic we decided to make a full scale replica of Tutankhamen's sarcophagus- well to be specific, we made the inner most coffin that directly held the body of King Tutankhamen's body.
First we needed to learn that the sarcophagus was made up of 4 parts. Technically speaking a sarcophagus refers to the large stone tomb. Inside this stone tomb are 3 coffins. The largest is made from gilded wood- inside this is another, slightly smaller, but a little more 'decorated' wooded tomb. In this coffin is the smaller, and much more beautiful, gold coffin.
The stone sarcophagus measured about 9ft in length and 5ft wide- a little too big for a class art project. The smaller gold coffin measured just 6ft and was proportionately narrower.
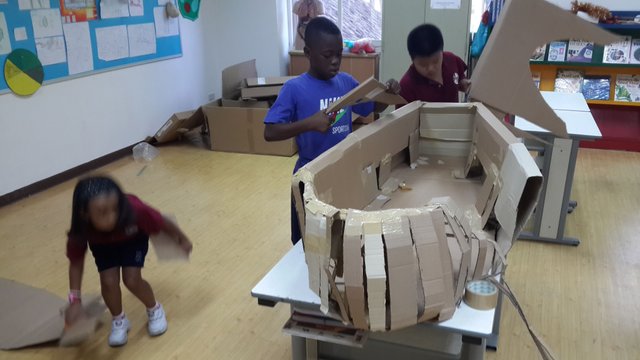
The school had recently purchased some new furniture and the cardboard packaging was recycled to form the shape of our coffin.
.png)
Once students had roughly marked out the size of the coffin, they began to build the sides. They did this all the way around before building the lid.

To create a curved or rounded edge, students were taught the benefits of layering the cardboard in strips- as seen in the photo above. Cardboard was taped on but didn't provide any real strength. This concern was raised by the students soon after they started building.

.png)
The intention was to cover the entire coffin in a paper-mache skin. More layers and thicker glue could be stuck to the areas that needed more strength.
.png)
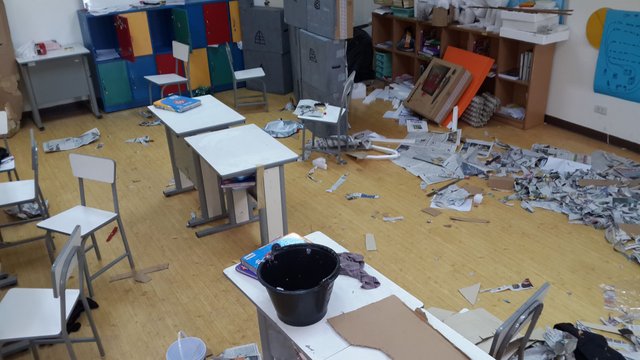
Fortunately we were allowed to use an old classroom that wasn't currently in use. This meant we could continue the project over a number of days and come back to it when ever we had time- without having to clear away each time- just as well, because there was always a huge mess!

Paper-mache was really fun for the kids and they quickly finished the first part of the coffin. Next was to create the lid and famous bust of the Pharaoh's coffin.
.png)
This was done in exactly the same was at the base- Strips of cardboard were arched over to create that full, 3D appearance. The mask was made by pulping up the paper-mache into a lumpy, mold-able mixtures to allow the students to build a face.
To help the gluey paper dry faster, it was left outside in the hot sun. Most of the mask- which, at this stage was the last part to have been completed, dried quickly. It wasn't long before the students could see their master piece come together and started to wonder how a Pharaoh could fit inside!
.png)
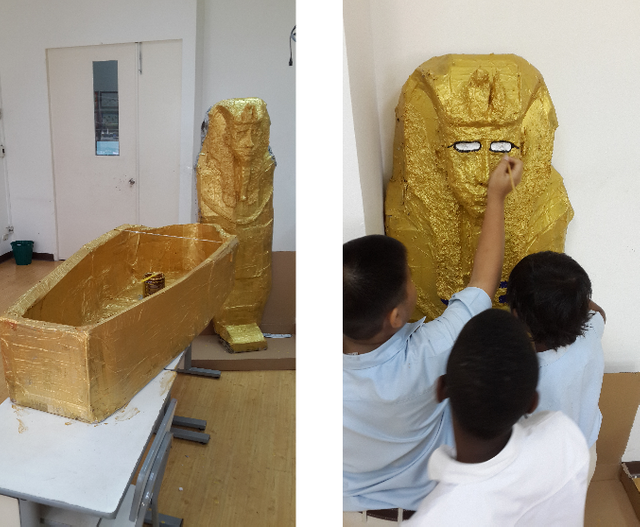
Gold paint was covered to every part of the coffin by the students before details were added. For the finer details, such as the eyes and headdress, only 2 of the students decided to take on this task. The rest acted as onlookers who gave constant commentary on how good their painting was!
With some touch ups of gold paint, the 2 students corrected any slips or mistakes they made. The finished outcome was amazing and our Tutankhamen coffin replica stood center stage as the class gave a primary assembly. Well done kids.

Hope you enjoyed the read and please don't forget to follow and upvote for more :)
This post has been added to the latest "Six of the Best" New Mapster Contest.
This is to showcase the work of new MAP members.
You can request to join MAP here.
Voting takes place within the MAP chatroom, but everyone can upvote their favourite articles by going to the MAP32 page.
That little project was great!
The sarcophagus at the end looks really neat.
I am sure those kids had a blast participating in this.
Cheers @thinkit!
It was great fun and a little different from our regular art/social studies classes. Thanks
This is very cool!!! Found you through the Map project!!