Jupyter Notebook, getting started.

This is a brief tutorial on Jupyter Notebook for beginners. How to install and run it.
What is it..?
The Jupyter Notebook is an open source web application that works as an interactive computer environment that allows you to create and share documents that contain live codes, equations, interactive widgets, formulas, graphics, images, videos and narrative texts. Jupyter Notebooks are made up of cells containing executable code, Author narrative text using the Markdown and more. It is saved .ipynb extension and easily shared in JSON format .
- Supports more than 40 programming languages, such as Julia, Python, R, Haskell, Go, Javascript, Scala, PHP, ...
- It can be shared with others using email, Dropbox, GitHub and the Jupyter Notebook Viewer.
- It can be exported to HTML, LaTeX, PDF, and Slide Shows.
- Big data integration.
"Jupyter" is a acronym meaning Julia, Python, and R.


What is it good for..?
Ideal for scientific research, academic or professional activities. For example:
- STEM Education
- Learn and try Python or any other language
- Data Processing
- Calculation and Numerical Simulation
- Statistical Modeling
- Machine Learning
- Big Data
Installation:
It is strongly recommended to follow the following steps:
- Prerequisite installation: Python 3

Python 2 or Python 3 ..? The projected end-of-life for Python 2 is 2020. Python 3 is the version that will continue to be developed and supported.
Jupyter Notebook executes code in many programming languages, but Python is required for its installation.
- Installing Python and Jupyter using the Anaconda Distribution.

Anaconda ..? It is a open source distribution includes Python, the Jupyter Notebook, and other commonly used packages for scientific computing and data science. conda is the package manager for Anaconda.
1° Download Anaconda’s latest Python 3 version. https://www.anaconda.com/download/
2° Install the version of Anaconda which you downloaded, Follow the instructions of "How to Install ANACONDA" on the download page.
3° To Run the Notebook, run the following command at the Terminal (Mac/Linux) or Command Prompt (Windows):
jupyter notebook
Running:
The previous instruction Starts the Notebook Server first and then the Notebook is opened in your browser.
Information about the Notebook Server in your Terminal

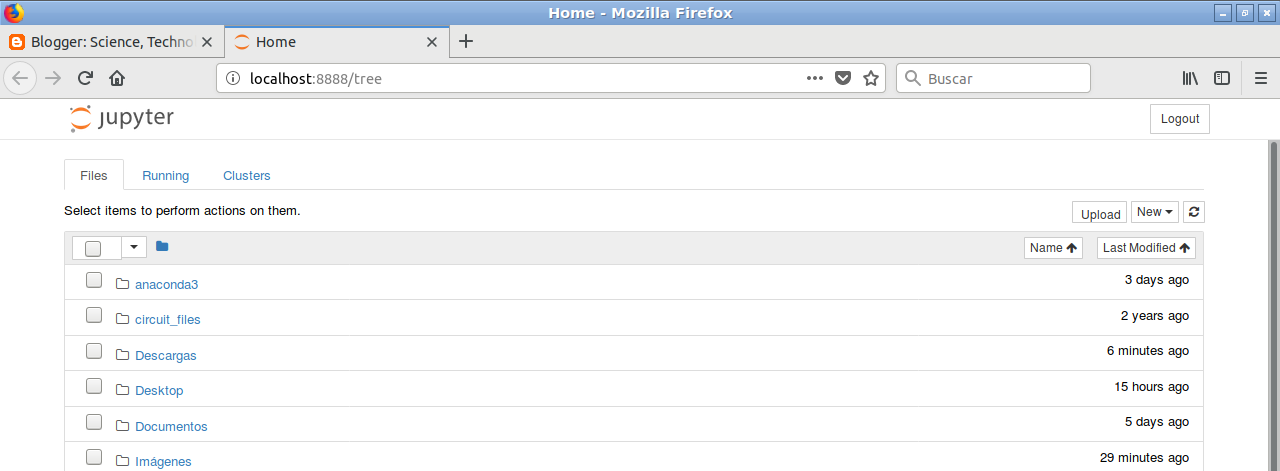
The Notebook opens in your browser, and shows Notebook Dashboard, which will show a list of the Notebooks, files, and subdirectories in the directory where the Notebook Server was started.

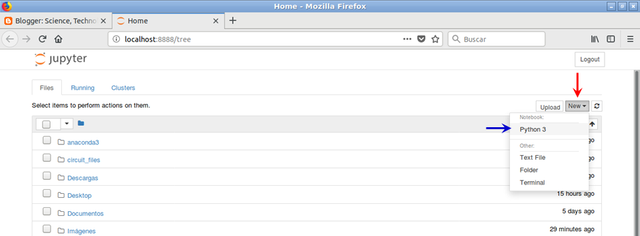
Creating a new Notebook, click on the "New" button (indicated with the red arrow). Select option Python 3 to open a new Jupyter Notebook for Python (indicated with the blue arrow).

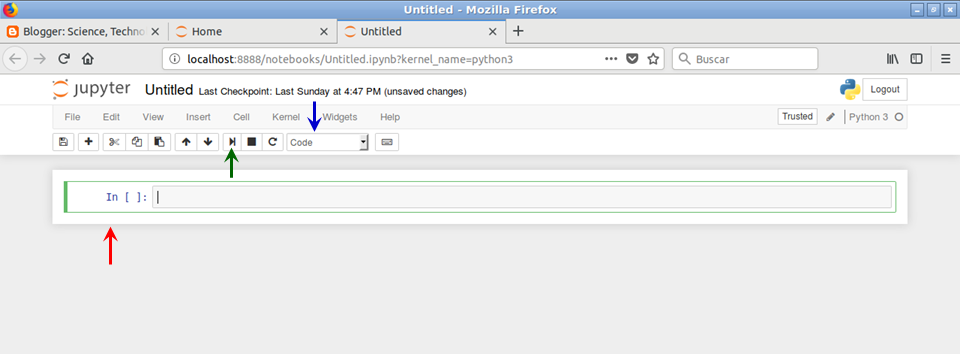
The Notebook is created and show a first empty Cell is already available(indicated with the red arrow). This Cell is of type Code and you can start typing in Python code directly. Executing Code in this Cell can be done by clicking on the Run Cell button (indicated with the green arrow).

Next Post:
This will be about the advantage of using Jupyter Notebook in STEM Education.

References
Project Jupyter website:
https://jupyter.org/
Documentation for Project Jupyter:
http://jupyter.readthedocs.io/en/latest/index.html
Jupyter Notebook Viewer:
http://nbviewer.jupyter.org/


I find this information very useful, thanks!
Thanks!
Congratulations @rcuriel! You received a personal award!
Happy Birthday! - You are on the Steem blockchain for 1 year!
Click here to view your Board
Congratulations @rcuriel! You received a personal award!
You can view your badges on your Steem Board and compare to others on the Steem Ranking
Vote for @Steemitboard as a witness to get one more award and increased upvotes!