Build your own BANK on the blockchain

This post describes how you can issue your own crypto currency using the Ethereum blockchain.
Hi there, your friend Lucky Digger here. In the following I am going to describe how you can create your own cryptocurrency on the Ethereum blockchain according to Alex Van de Sande's tutorials, in simple steps so that you should be able to follow. I have reedited most of the content to either correct it or simplify it.
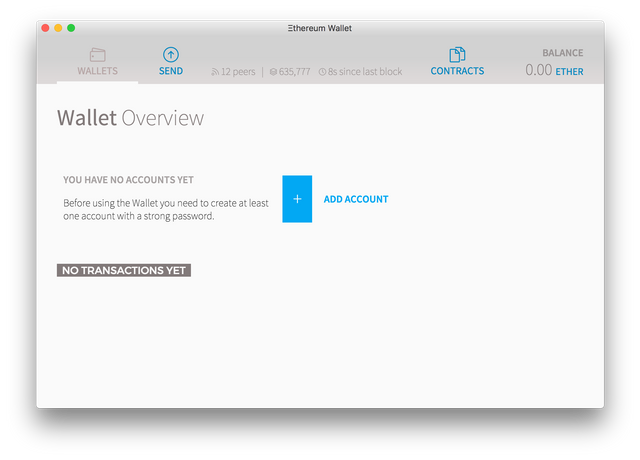
1. Download Wallet
Download the latest version of the Ethereum Wallet and create an Ethereum account (just use a strong password). In order to do anything you’ll need to put in some ether, but hey, you don’t need much. Most of the contracts here will cost less than a cent (EUR, USD, AUD). If you are just testing it, I recommend you switch to the testnet: go to the menu "develop > network > testnet (morden)" and then on "develop > start mining".
After a few minutes you’ll have enough ether to test anything, so you can turn the miner off again. The wallet only allows basic mining on the testnet, but if you want to try the real net then you can try the AlethOne miner.
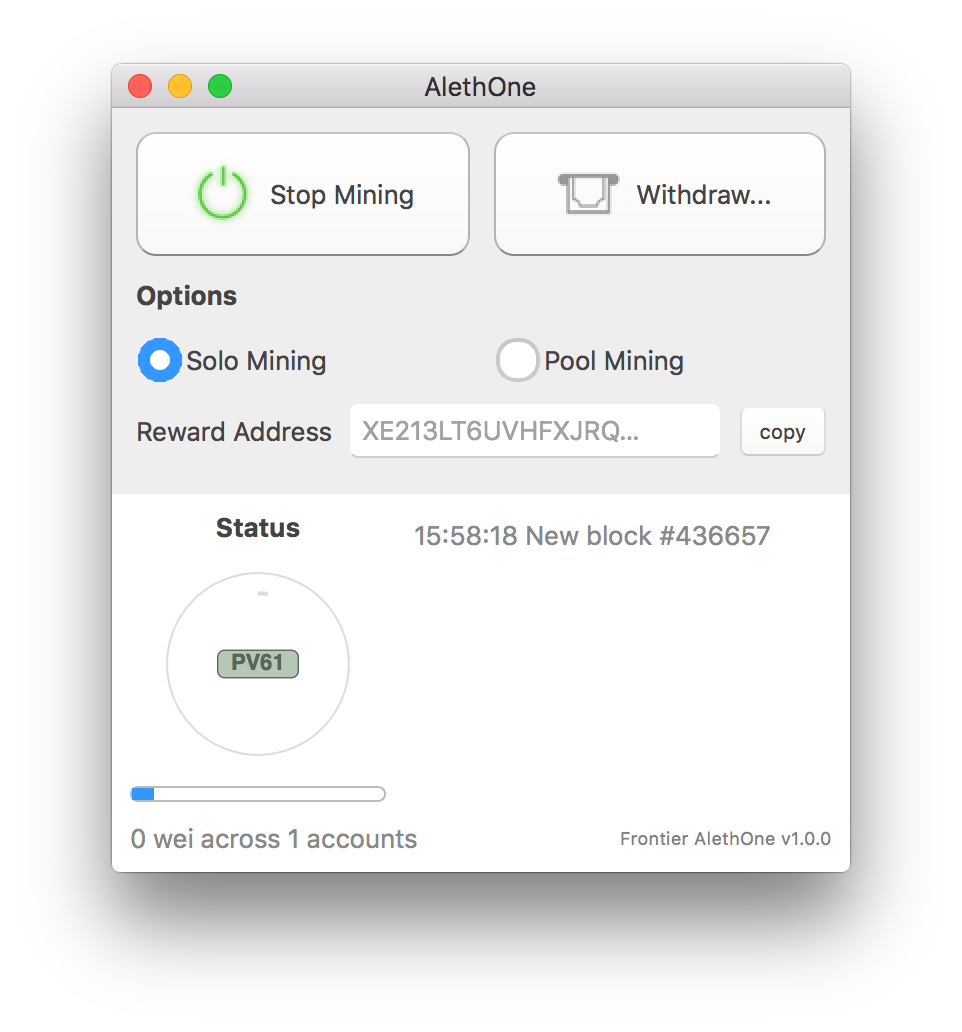
The AlethOne miner is tool with two buttons: Click to start mining with your GPU and click to deposit any rewards in a wallet. Download it from the Turbo Suite.
If you want to create smart contracts or tokens on the live network and can’t mine you’ll still need some Ethereum. You can have a friend send it to you or you can exchange it for Steem on a cryptoexchange.
2. Create a token
Tokens in the ethereum ecosystem can represent coins, loyalty points, gold certificates, IOUs, in game items, etc. Since all tokens implement some basic features in a standard way, this also means that your token will be instantly compatible with the ethereum wallet and any other client or contract that uses the same standards.
Go to the contracts page and then click “deploy new contract”.
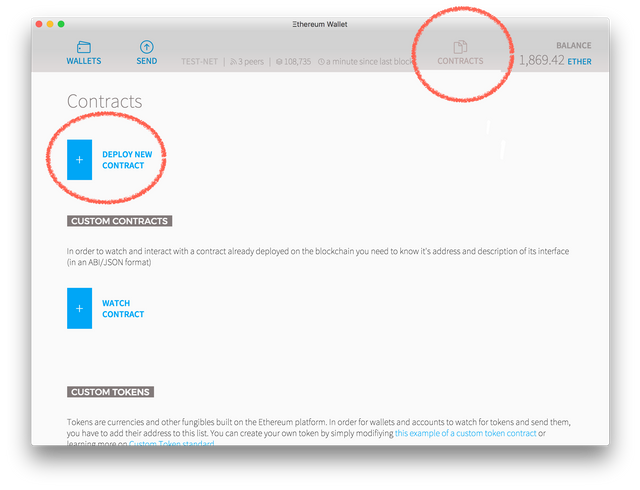
Now take the token code from here and paste it into the “Solidity source field”. If the code compiles without any error, you should see a “pick a contract” drop down on the left. Get it and select the “MyToken” contract. On the right column you’ll see all the parameters you need to personalize your own token. You can tweak them as you please, but for the purpose of this demonstration just pick these parameters: 10,000 as the supply, any name you want, “%” for a symbol and 2 decimal places. Your app should be looking like this:
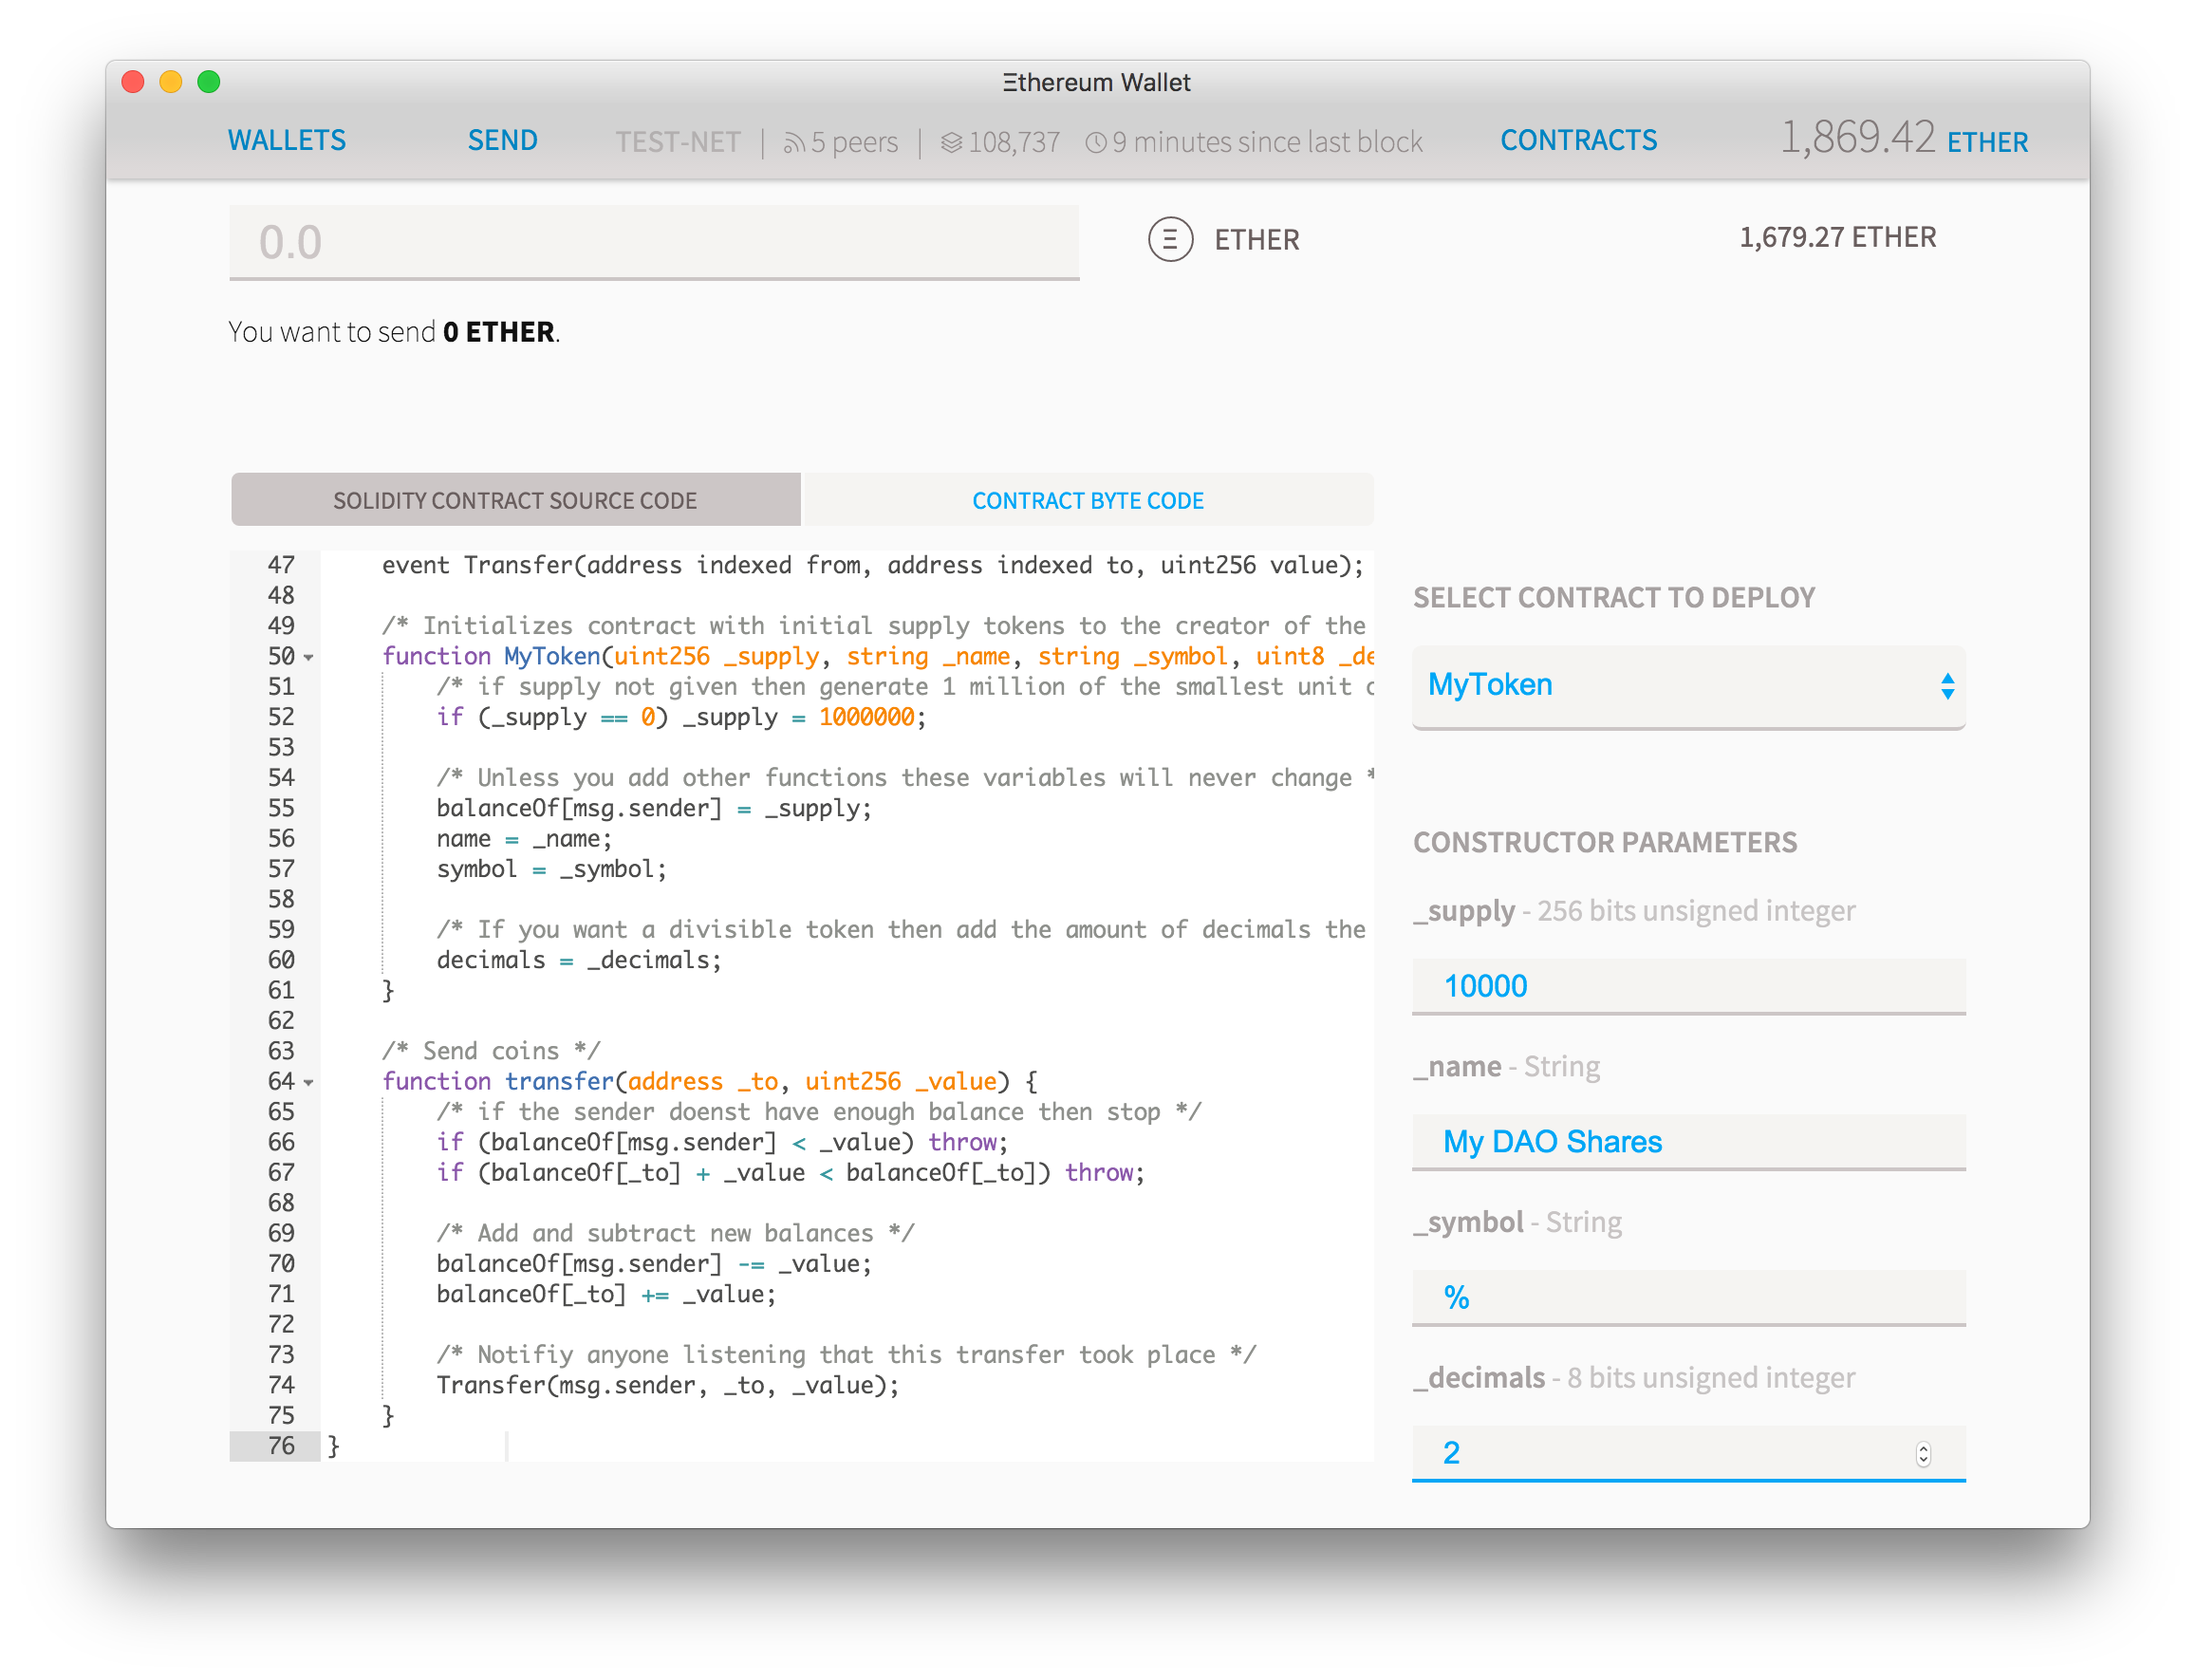
Scroll to the end of the page and you’ll see the computation cost of that contract and you can select a fee on how much ether you are willing to pay for it. Any excess ether you don’t spend will be returned to you so you can leave the default settings if you wish. Press “deploy”, type your account password and wait a few seconds for your transaction to be picked up.
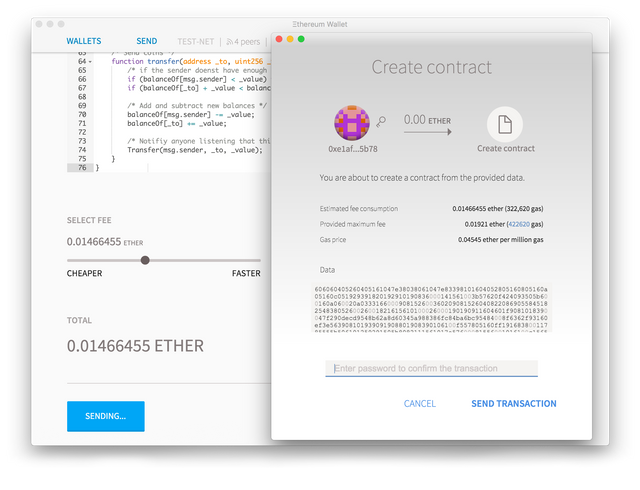
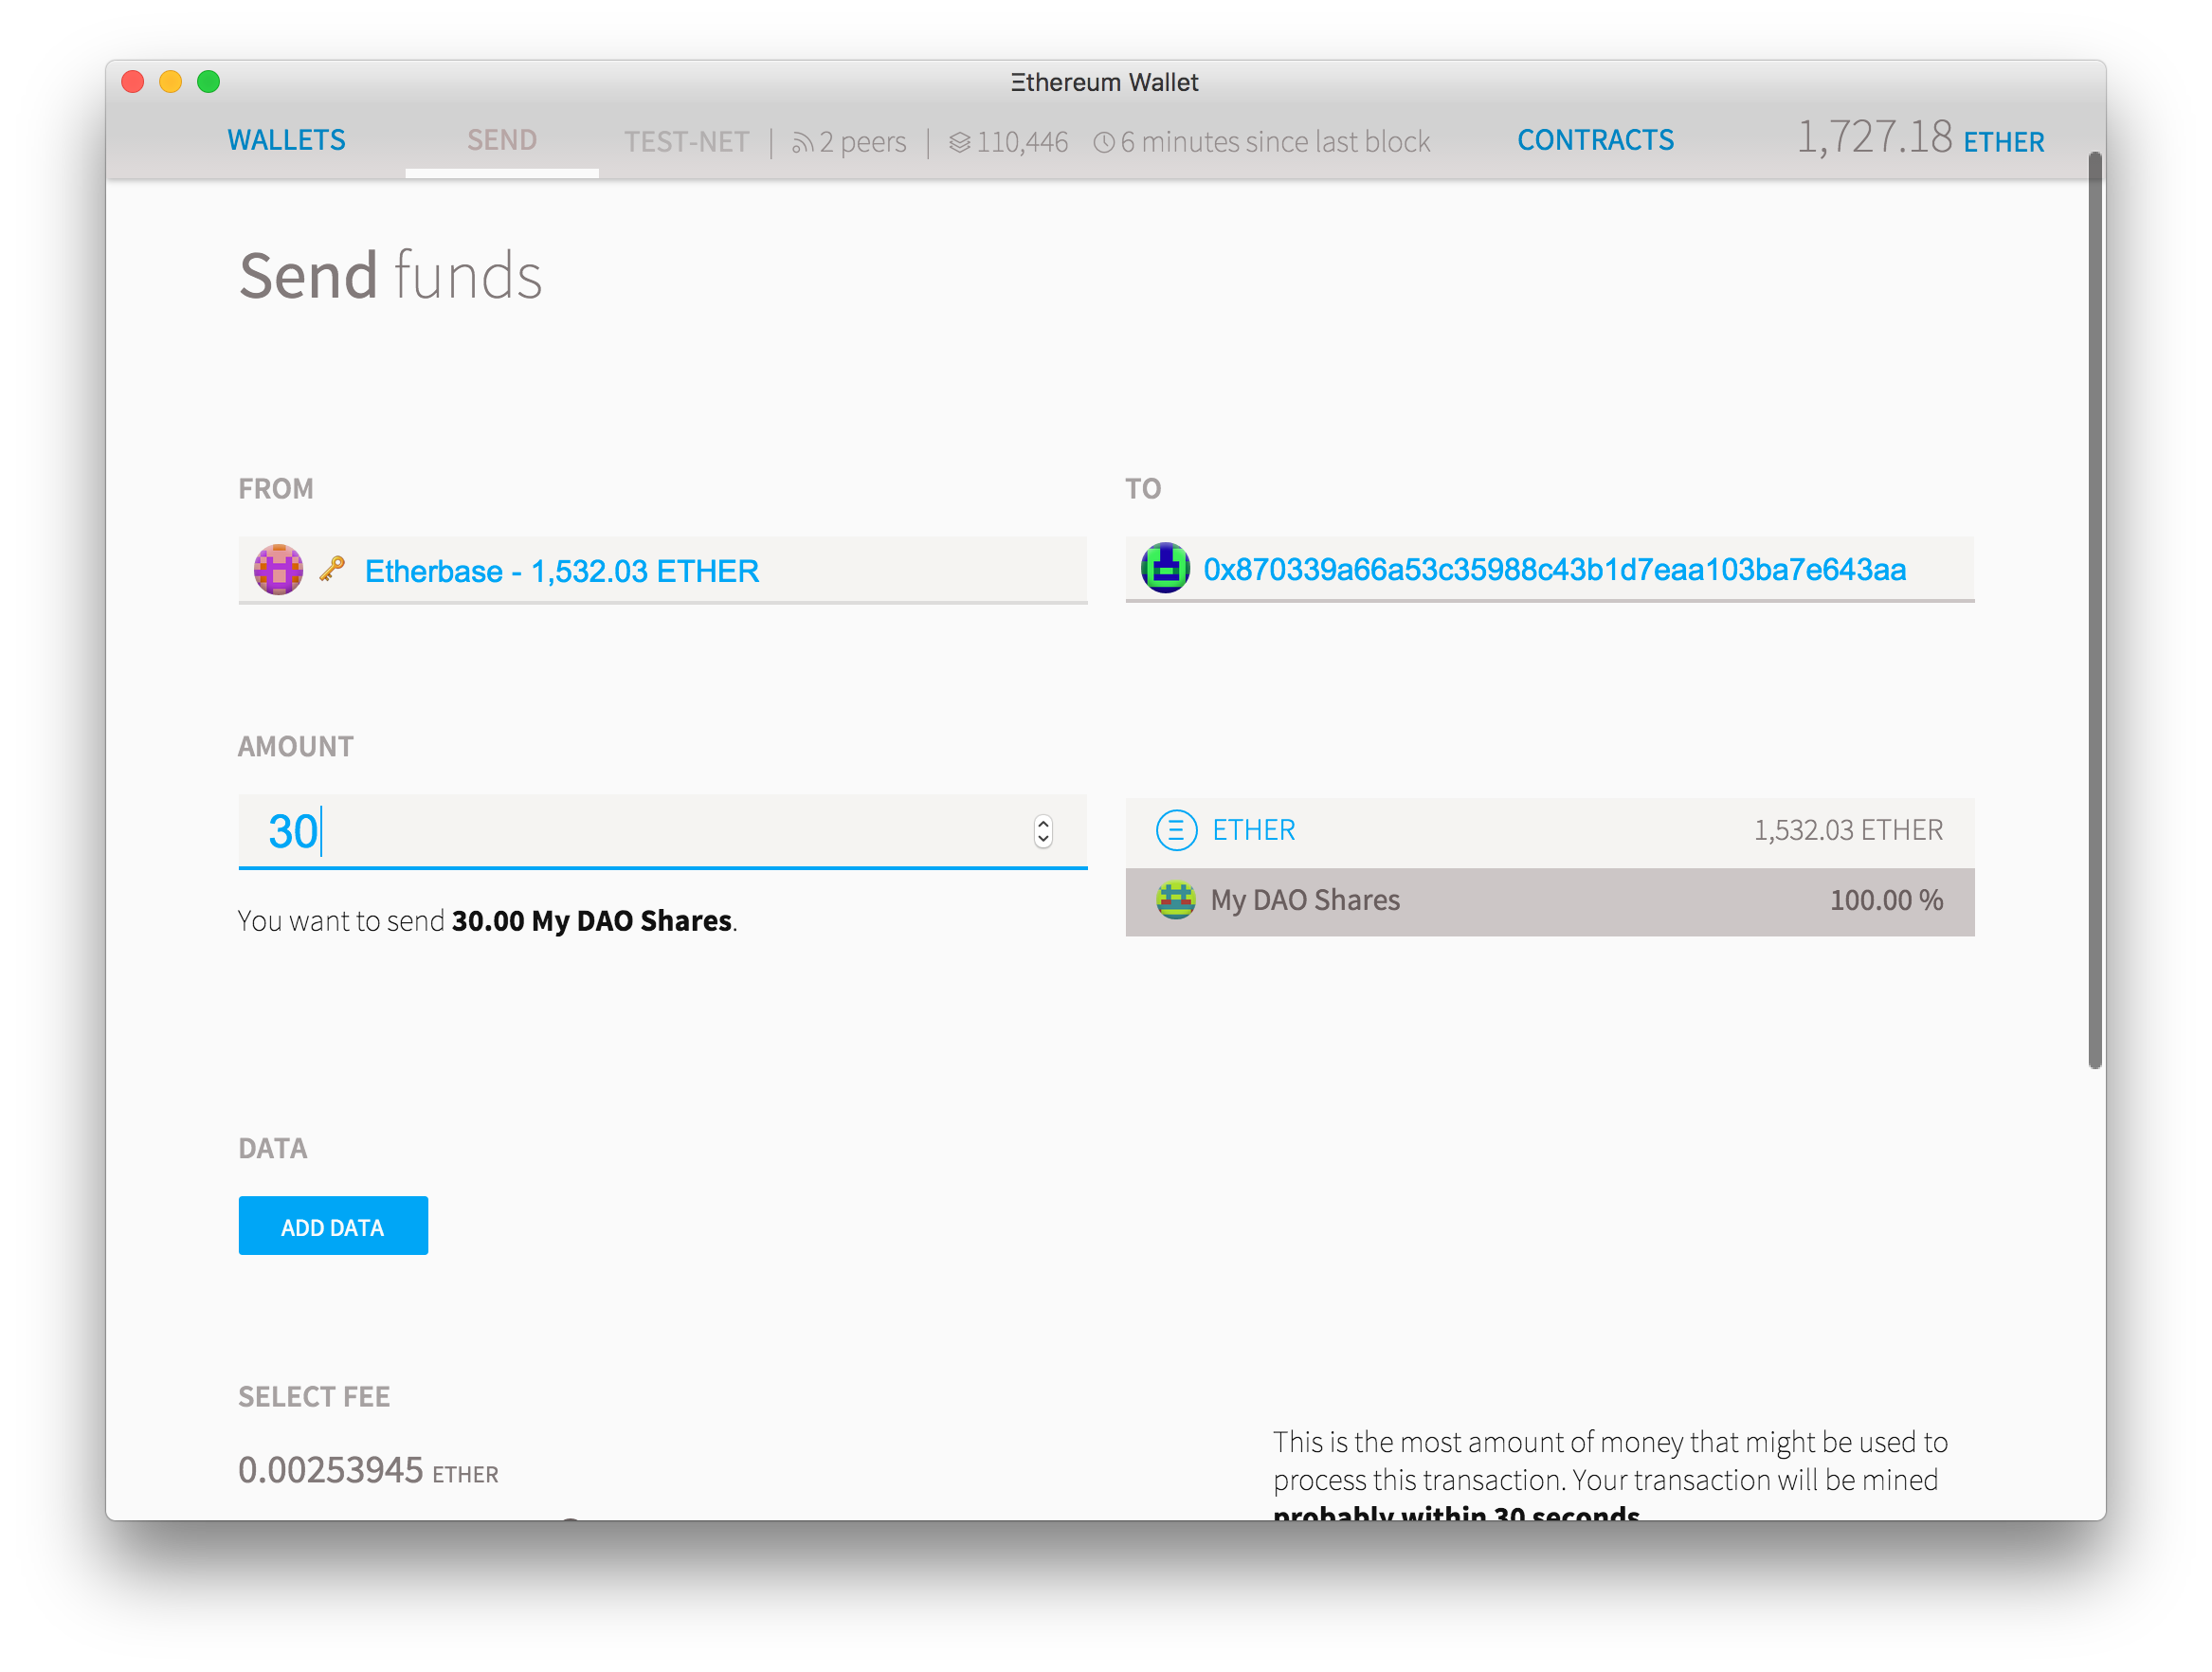
You’ll be redirected to the front page where you can see your transaction waiting for confirmations. Click the account named “Etherbase” (your main account) and after no more than a minute you should see that your account will show that you have 100% of the shares you just created. To send some to a few friends: select “send”, and then choose which currency you want to send (ether or your newly created share), paste your friend’s address on the “to” field and press “send”.
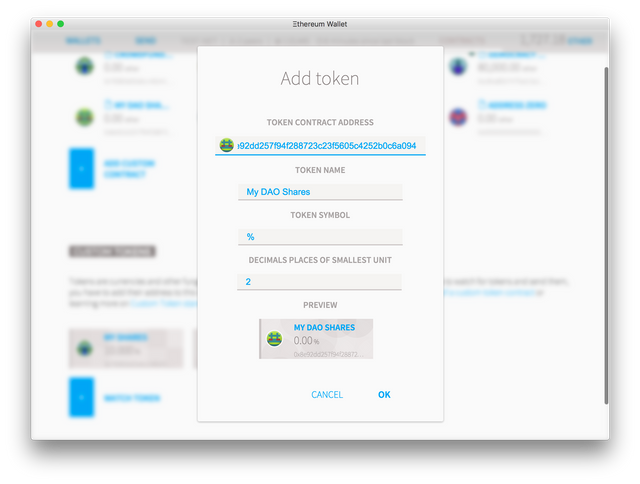
If you send it to a friend, they will not see anything in their wallet yet. This is because the wallet only tracks tokens it knows about, and you have to add these manually. Go to the “Contracts” tab and you should see a link for your newly created contract. Click on it to go to it’s page, then click “copy address” and paste the contract address in a text editor (like notepad), you’ll need it shortly.
To add a token to watch, go to the contracts page and then click “Watch Token”. Paste the contract address in the popup. The token name, symbol and decimal number should be automatically filled, but if it’s not you can put anything you want (it will only affect how it displays on your wallet). Once you do this, you’ll automatically be shown any balance you have of that token and you’ll be able to send it to anyone else.
Now you already have your own crypto token!
Tokens by themselves can be useful as value exchange within local communities, ways to keep track of worked hours or other loyalty programs. This currency can be associated with an intrinsic value by making it useful. Tokens can be used as voting system in order to make collective decisions on the use of funds by creating a Democratic organization that lives on the blockchain and that anyone holding a share token will be able to vote on proposals.
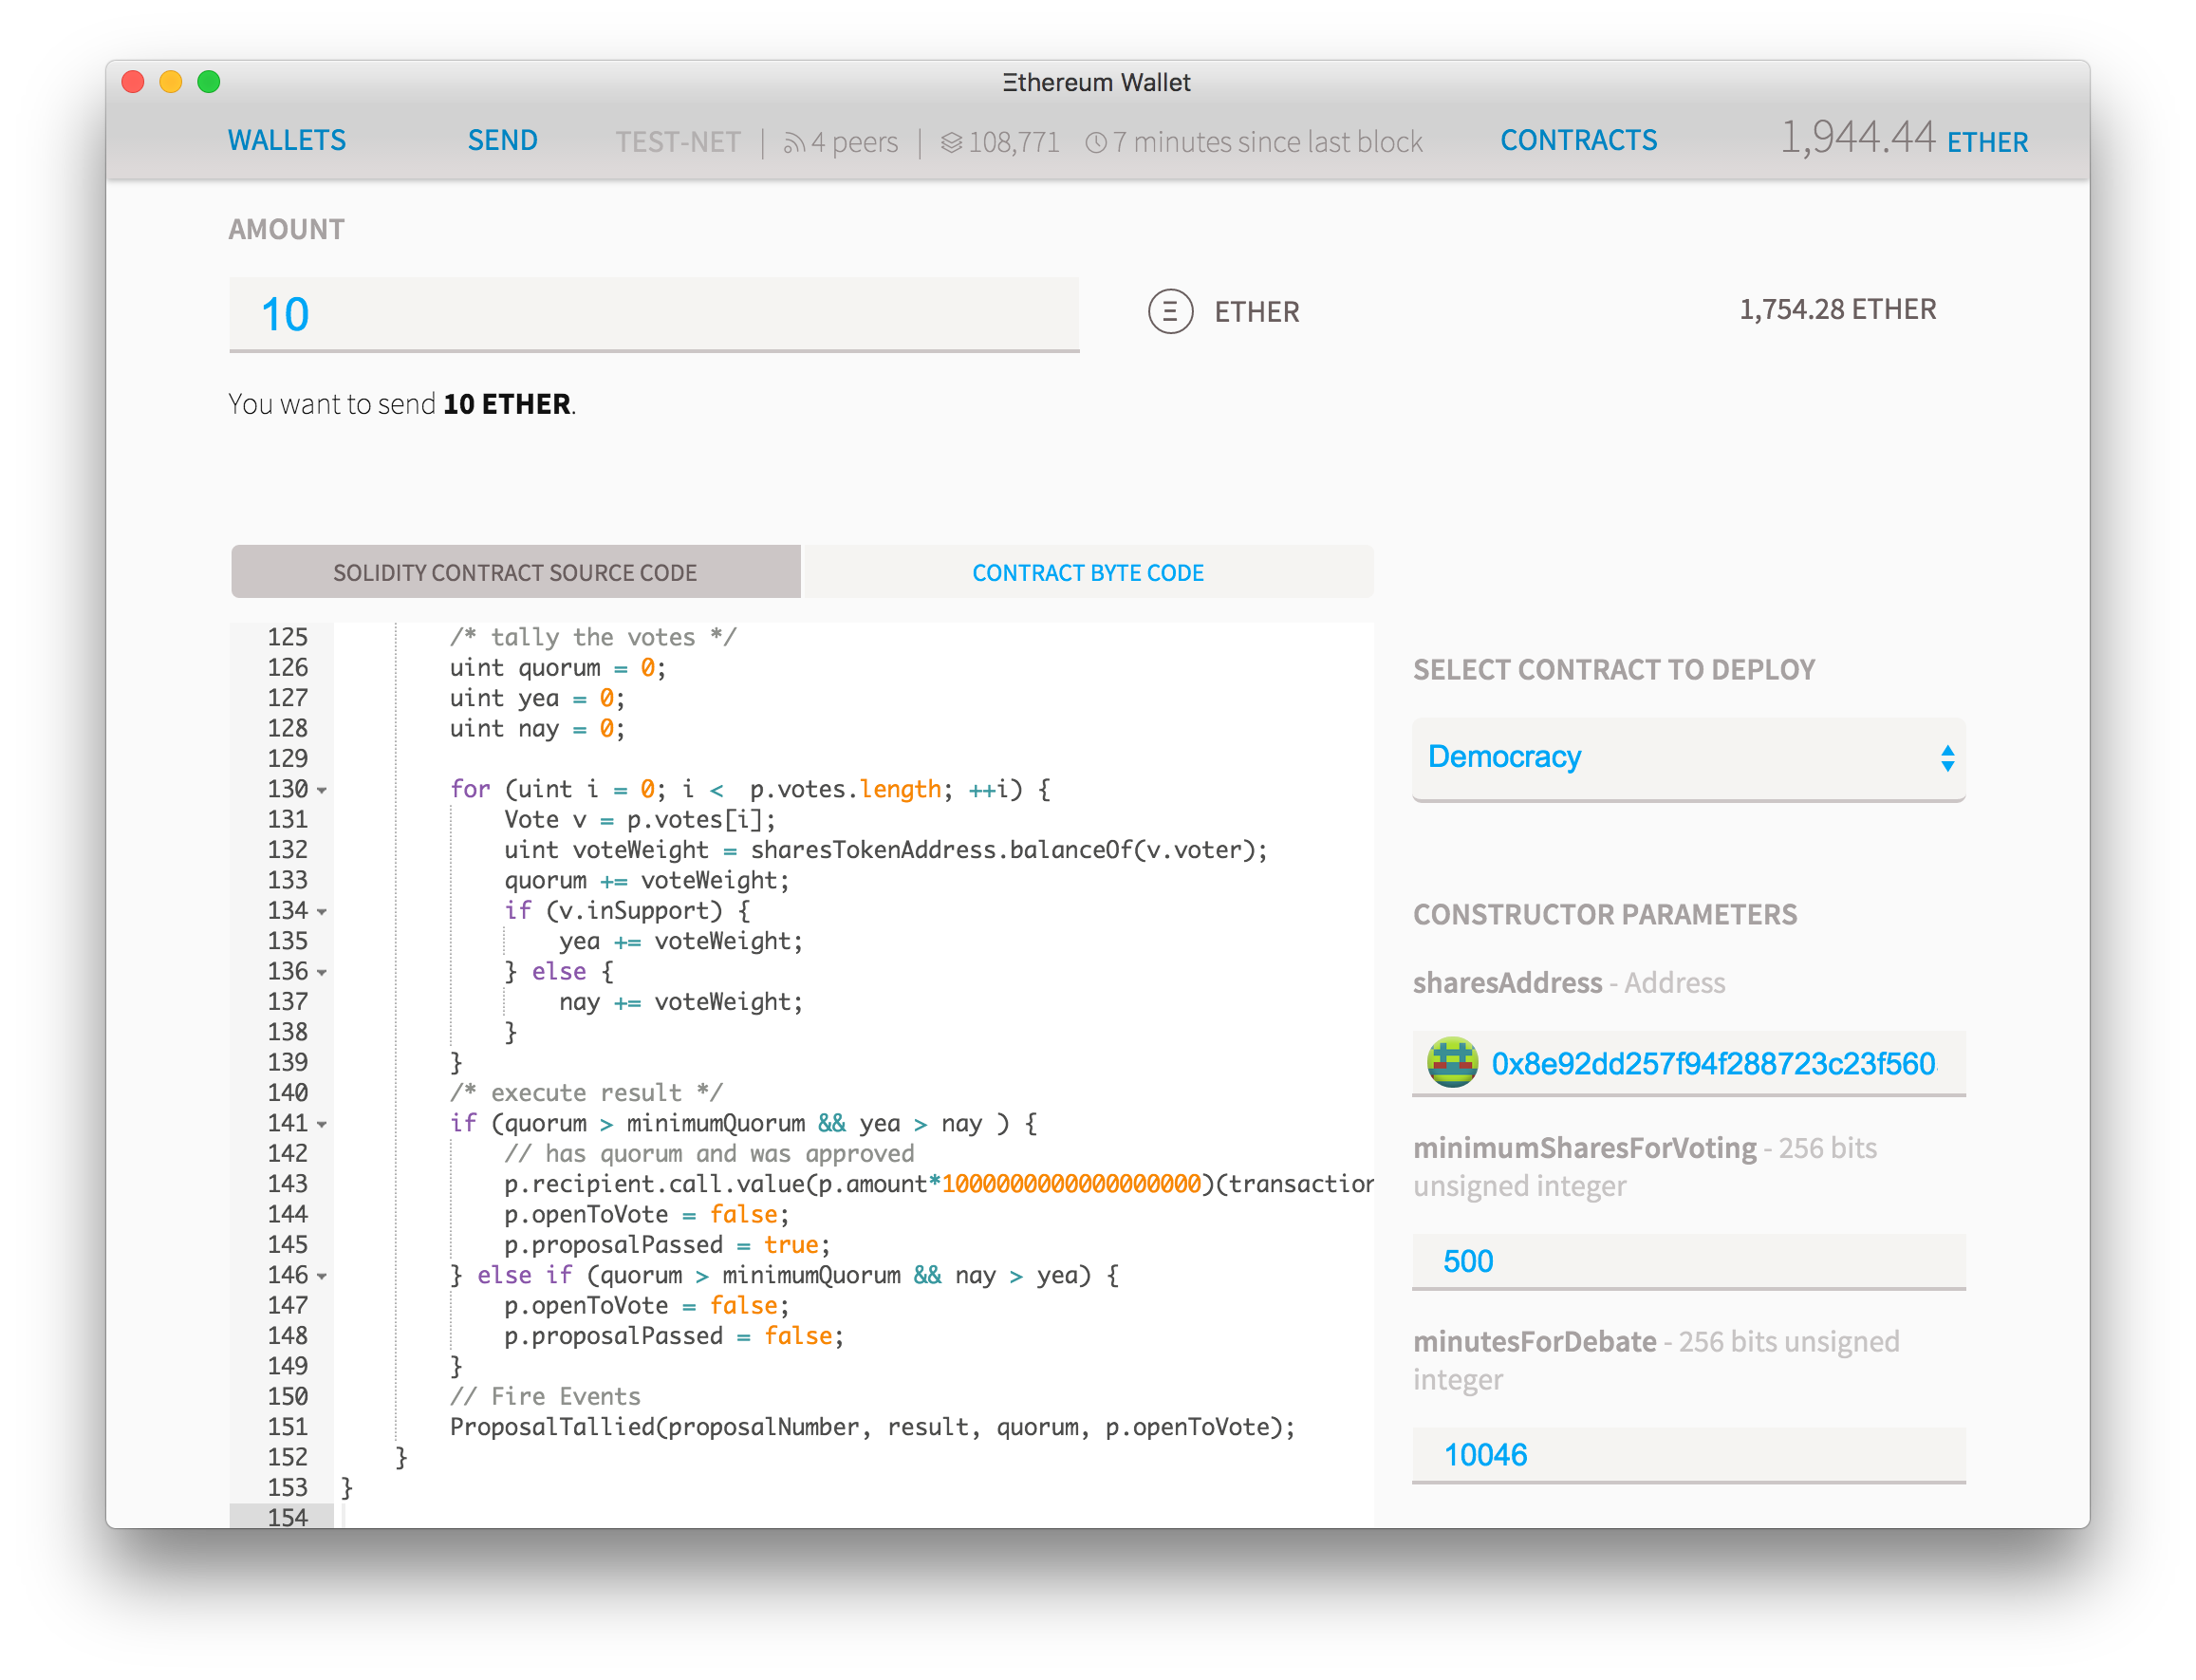
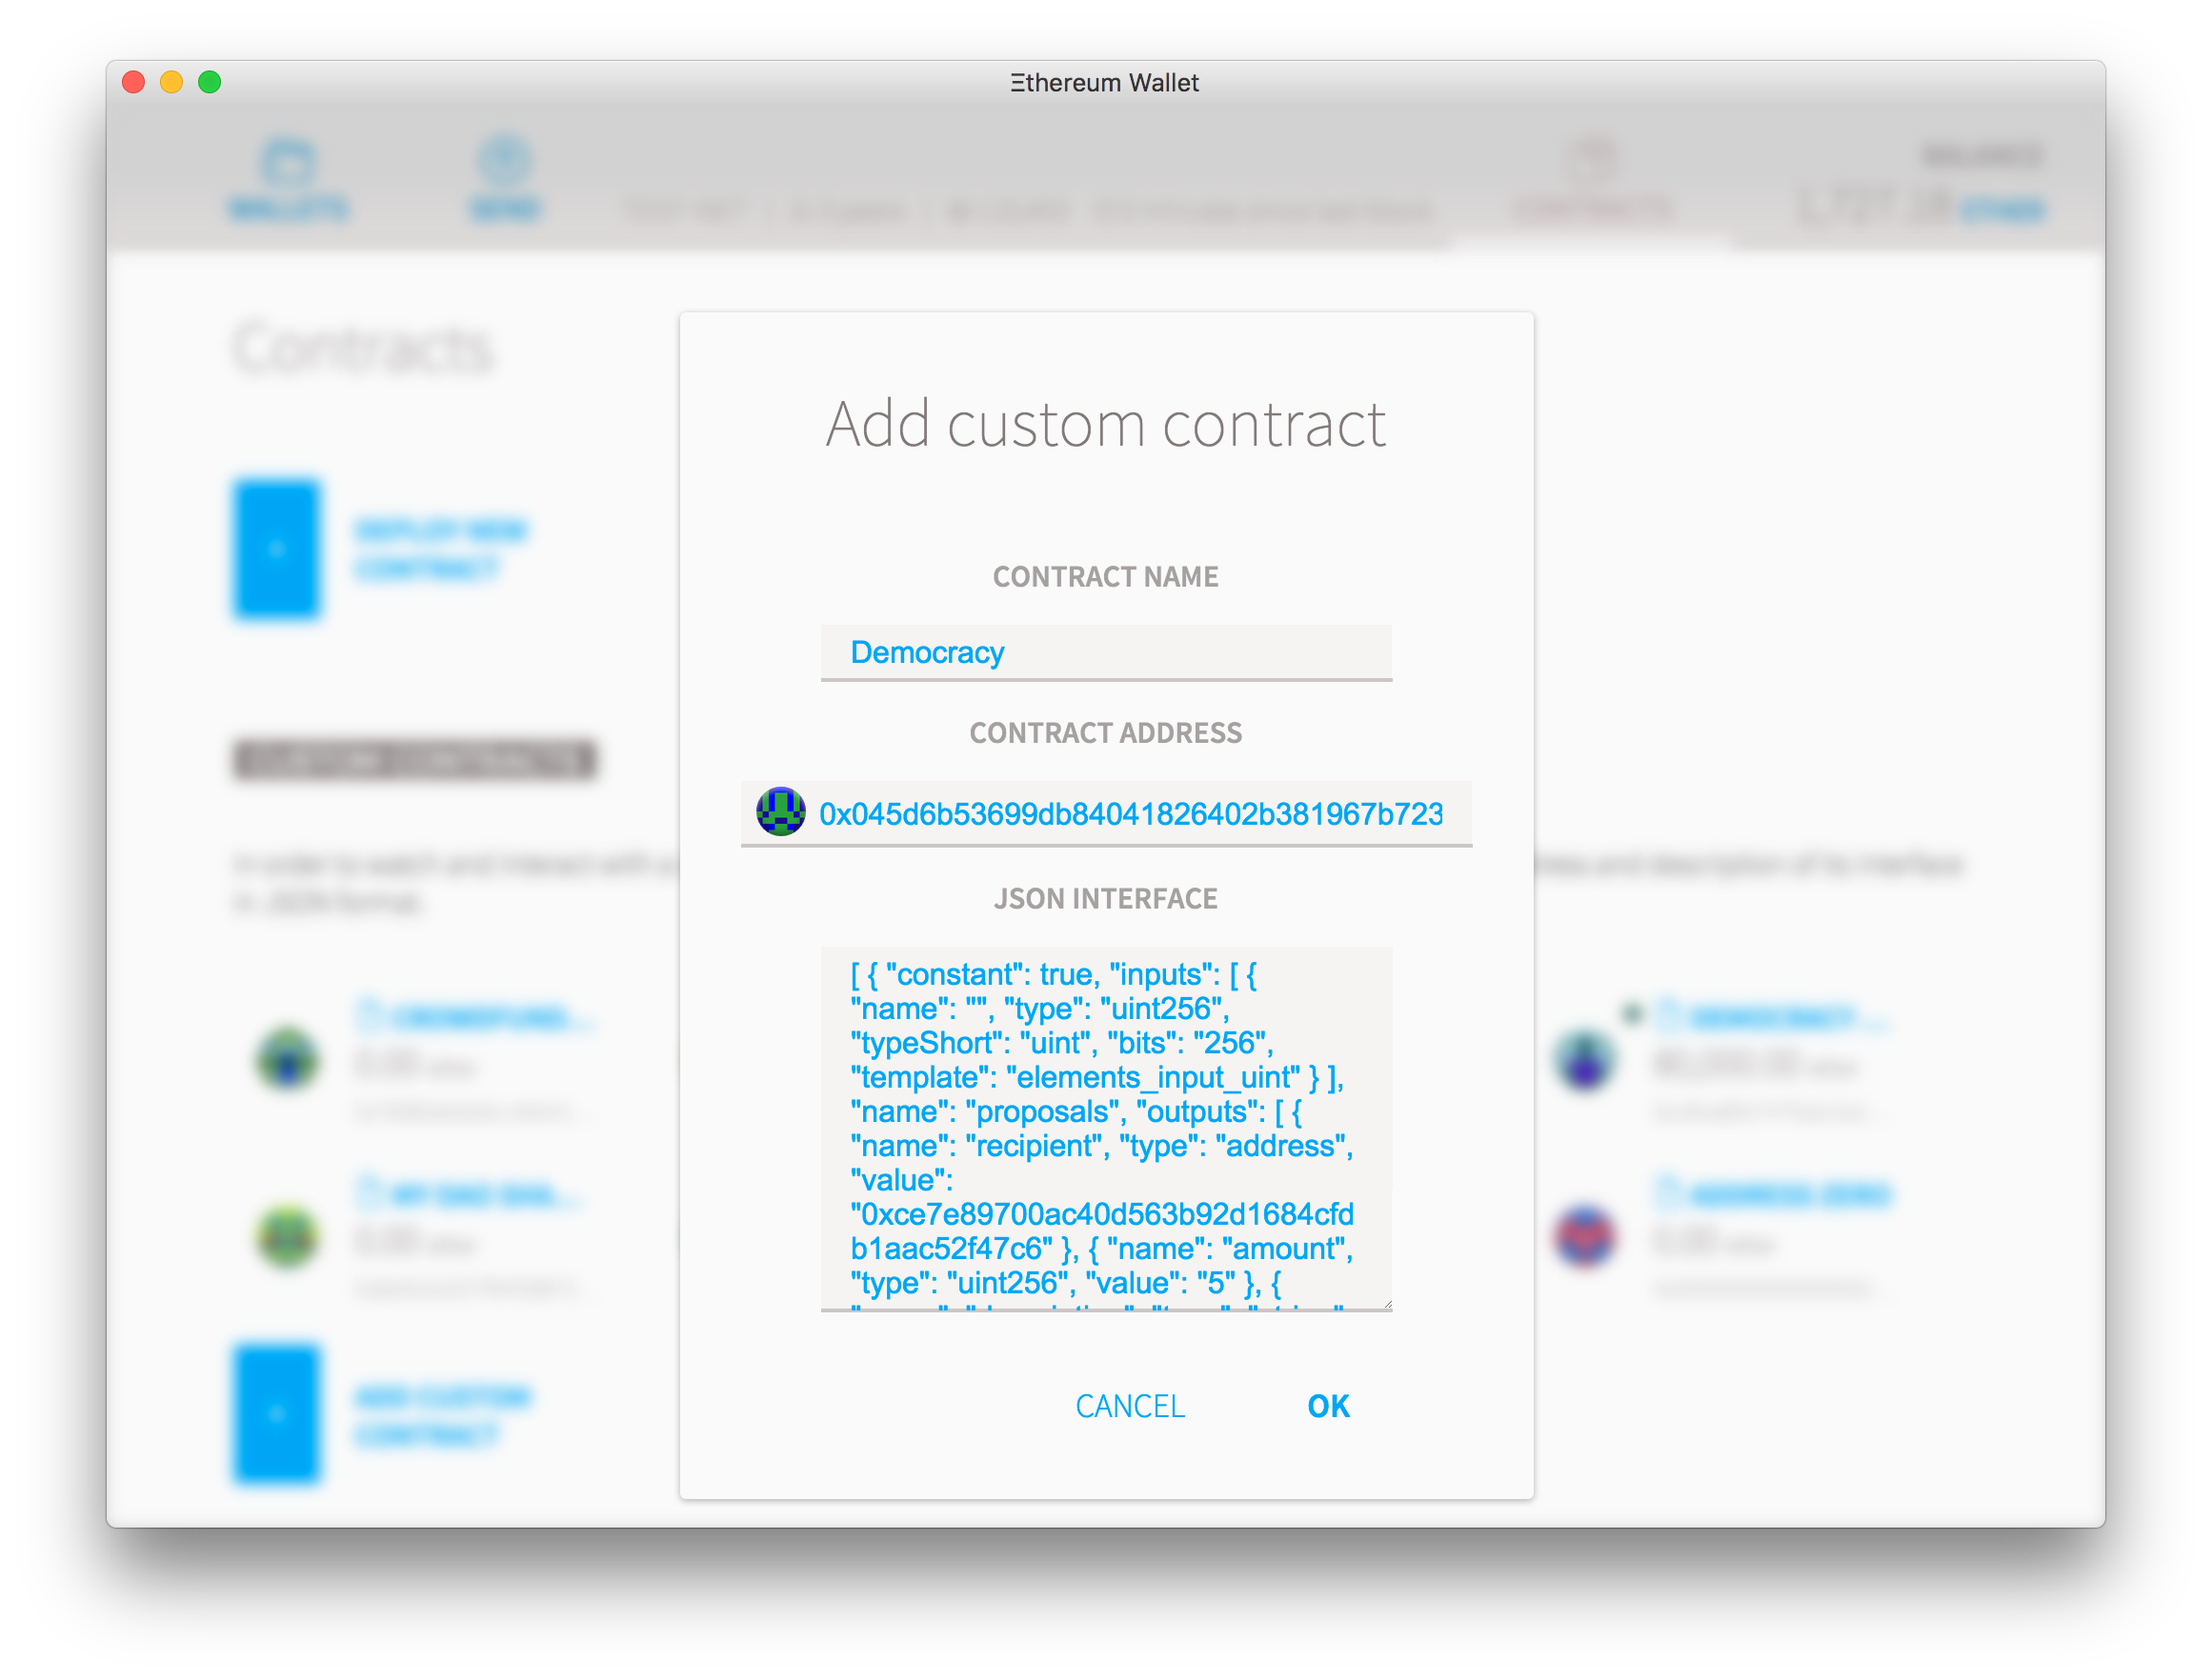
Go back to “Contracts” and then “Deploy Contract” and paste the DAO source code on the “Solidity Source” field. Choose the contract “Democracy” on the Picker and then select these parameters:
In the "amount field" you can add any ether amount you want your DAO to start with. Since you can send ether to it at any time in the future, keep the amount at 0 and send the money later.
In the "shares address field", paste the address of the token contract you just created. Pay attention to the icon and color of the little circle that appears by the side of the address. If it doesn’t exactly match the one for the contract you created previously, then there’s an error.
In the "minimum shares for voting" choose the minimum quorum of shareholders that need to vote on an issue before it passes. Here you must put the integer number of the minimum token possible, so if you created a token with 2 decimal places, putting 500 here will mean that in order for a proposal to be executed then the number of votes must be more than 5% of the total shares of the company.
"minutes for debating" is the minimum time that a proposal must be discussed and voted on before the results can be tallied up. Put a small number like 10 minutes if you want just to create something for testing, but put something like 20,000 if you want to store large amounts of ether, so all proposals must stay there for at least two weeks.
Your contract should be looking something like this:
After a few seconds you’ll be redirected to a the dashboard where you’ll see your new contract being created:

You can also see the link to the new contract on the “Contracts” tab. If it’s not there (for example: if you are adding a contract that you didn’t create), then you’ll have to add it manually. To add that you’ll need the contract’s address and it’s JSON interface, a string of text that explains to the wallet how to interact with the code. You can chose any name you want and hit OK.
Click your new contract box and you’ll see a contract page. If you haven’t deposited any ether on that contract, click on deposit and transfer a small amount of ether so you can test how this particular democracy works. If the contract already has some funds, click the “show contract info” button.
In the “read from contract” you can see all the functions you can execute for free on the contract. Here you can see, for instance, that the “shares token address” is indeed the correct address or that there are currently 0 proposals on the contract.
In the “write to contract” you have a list of all the functions that will attempt to do some computation that saves data to the blockchain, and therefore will cost ether. Select “new proposal” and it will show all the options options for that function.
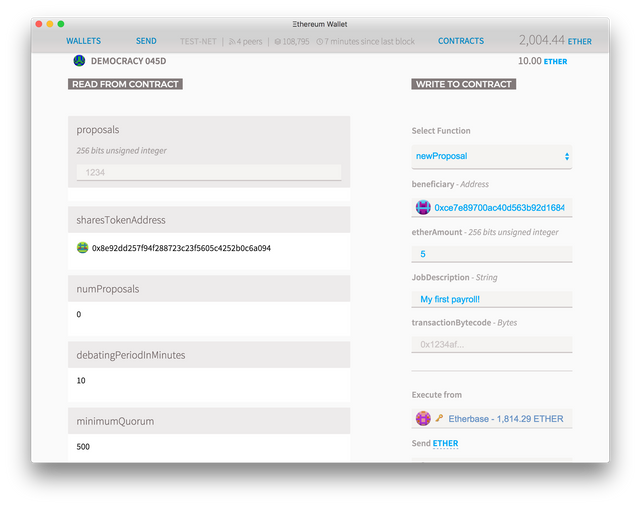
For “beneficiary” add the address of someone you want to send ether to, then put how many ethers you want on the “etherAmount” (must be an integer) and finally some text describing the reason you want to do this.
Leave "transaction byte code" blank for now. Click execute and type your password. After a few seconds the "numProposals" will increase to 1 and the first proposal, number 0, will appear on the left column. As you add more proposals, you can see any of them by simply putting the proposal number on the “proposals” field and you can read all about it.
Voting on a proposal is also very simple. Choose “vote” on the function picker. Type the proposal Number on the first box and check the “Yes” box if you agree with it (or leave it blank to vote against it). Click “execute” to send your vote.

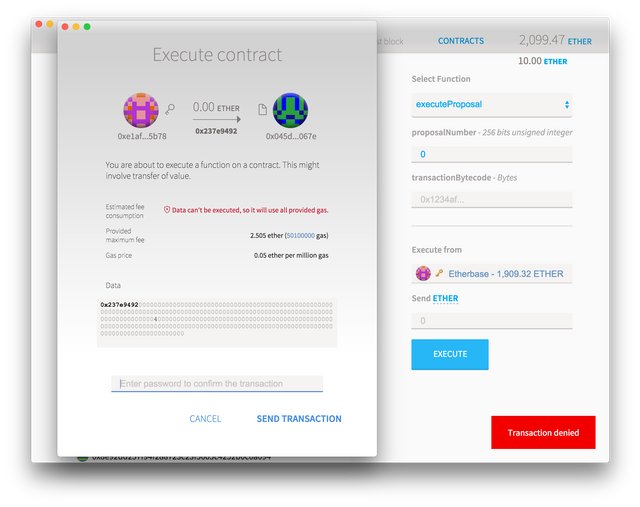
When the minimum voting time has passed, you can select “executeProposal”. If the proposal was simply sending ether, then you can also leave the “transactionBytecode” field blank. After pressing “execute” but before typing your password, pay attention to the screen that appears. If there is a warning on the “estimated fee consumption” field, then this means that for some reason the function called will not execute and will be abruptly terminated. It can mean many things, but in the context of this contract, this warning will show up whenever you try to execute a contract before its deadline has passed, or if the user is trying to send a different bytecode data than the original proposal had.
For security reasons, if any of these things happen, the contract execution is abruptly terminated and the user that attempted the illegal transaction will lose the all the ether he sent to pay transaction fees.
If everything went well you should be able to see the results of the vote in a few seconds. The “openToVote” parameter on the first box will turn to false while the "proposalPassed" will reflect if the proposal has been accepted or not. You should also be able to see that the Ether balance of the contract will go down and the equivalent ether will be sent to the beneficiary of the ether you wanted to send.
You just created an organization that only exists on the blockchain, that obeys votes based on completely digital tokens, but yet it can move real value around and create a very real impact on the world. Also notice that the organization is not under your control anymore: it will execute only the exact code you used to create it, forever.
You can’t bribe it, you can’t manipulate it and the same rules apply regardless if you are moving 0.01 or 1,000,000 ethers.
Can it get any better than this? Actually, it can. Further you can explore how you can use “transactionBytecode” to allow the DAO to execute any kind of ethereum transaction, even owning or creating other contracts. You can modify the token code to allow the DAO to control the amount of a token that exists in circulation and how to send it forward.
To finally create your very own token that is controlled by your own organisation (you are then a bank), please visit https://blog.ethereum.org/2015/12/07/ethereum-in-practice-part-3-how-to-build-your-own-transparent-bank-on-the-blockchain/ where Alex Van de Sande exploits the possibilities in closer detail.
If you liked my post, found the information useful, then please upvote, follow and resteem.
Great post LD. Will resteem for future reference. SK.
Highly appreciated.
While the above is a good explaination, I have to warn that downloading the Ethereum Wallet takes considerable time at the moment, and there may be easier less complicated methods.
1.) Download Metamask and integrate it as an app into your Chrome browser. https://metamask.io/
2.) Go to https://tokenfactory.surge.sh/#/
All you have to do is punch in the relevant properties and you have your own crypto currency - It takes 10 minutes.
This post received a 2.2% upvote from @randowhale thanks to @lucky.digger! For more information, click here!
This is an excellent post for anyone wanting to learn some of the basics of cryptocurrency - a real "hands-on" example of how & what to do. Thank you for preparing this article! Followed. Re-Steemed.
Add the #whalepower tag to your posts to receive even more support from that community.
Look me up @bi5h0p whenever you have the need for assistance.
While the above is a good explaination, I have to warn that downloading the Ethereum Wallet takes considerable time at the moment, and there may be easier less complicated methods.
1.) Download Metamask and integrate it as an app into your Chrome browser. https://metamask.io/
2.) Go to https://tokenfactory.surge.sh/#/
All you have to do is punch in the relevant properties and you have your own crypto currency - It takes 10 minutes.
im trying to add peoples to this social network and nothing happen , they don't give them approve... what is going on?!
I see you already have 155 followers. Well done. I am also quite new here and looking to connect to others.
i follow you, how much time it took to steemit to approve you?! send you an email that your account was approved..?
It took 20 days.
omg.. it took me half hour.. ok so it's not so easy to bring new peoples to here
have a good luck my friend.. do u have facebook?!
follow me
Please in the reply
Check out my views on story crypto https://steemit.com/cryptocurrency/@newmarket65/is-cryptocurrency-your-get-rich-quick-scheme
Thanks Follow me and i will follow You