SLC-S23W6- Create Story Creating Mistake checking and translatation Website Complete
I welcome you to the Steem Learning Week 06 and the Technical Club.Today we will learn something new, just like in our previous posts in this same club.In his previous posts, we learned how to make a 3D form of a credit card.SLC S23W5 -3D Edit Card Form- Learn How to make using |HTML CSS JAVASCRIPT
And I taught you how to create a modern restaurant website in a previous post on this account.SLC S23W6-Modern Restaurant Website Complete With Admin Panel and Learning New Things.

And in today's post, we will learn how we can create a website for story creation, mistake checking, and translation.And I have completed this website and I will upload all the data of Github and give you its link in the post below. You will be able to download it from here and edit it. Well, I don't think you will need to edit it, yes, it is a little bit, you will definitely have to change API Key.
About My Website
I created this website using HTML, JavaScript and CSS.
Note for Checker this post
I did not copy this website from anywhere, nor is it a template, but I have created this website myself. In addition, I want to inform you that I have used Google Studio's API in it. When you check my website thoroughly, please let me know so that I can delete and disable my API. I think you understand
We create this website
Lets start creating
To create this website, first of all we have to create a website environment and for that I have created a folder in my Laptop and inside that I will create the website and I use Visual Studio to create the website and you can also use it.Visual Studio Free for any one
I am using Visual Studio to create the site, so I will follow the same process, so you will need to open this folder inside Visual Studio.
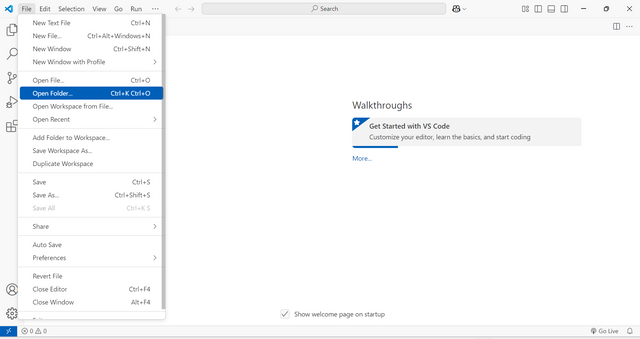
To do this, open your Visual Studio. You will see a file option on the top left. When you click on the file, a button to open the folder will appear, something like this.As you can see in the screenshot above.
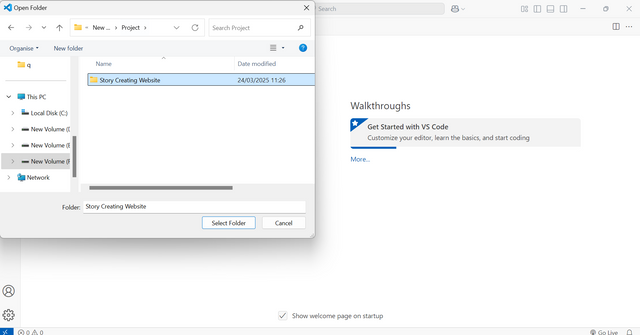
Just as I have selected my folder where I want to create my website, you too should select a folder of your own.
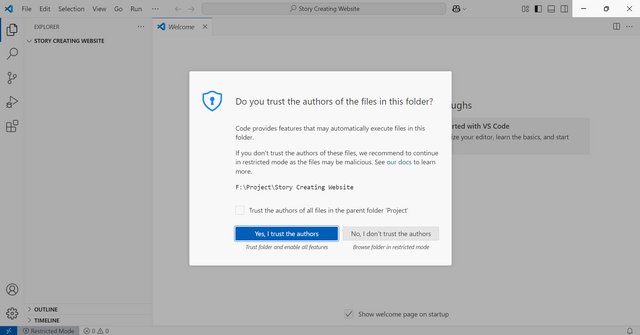
If you create a folder, Visual Studio will ask you for permission and you have to authorize it.and create inddex.html file.
.png)
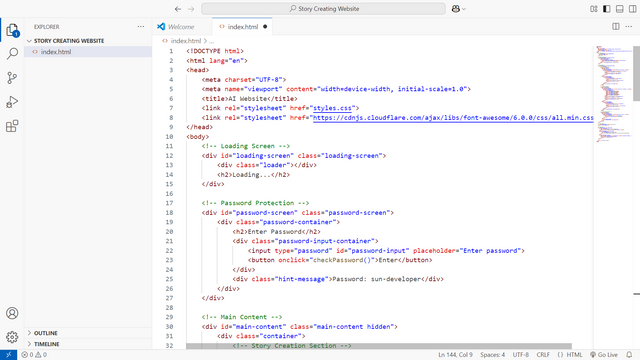
Understanding the index.html File
The index.html file is the main structure of our website. Let me break down each section and explain what it does:
And really, if I explain it in detail, it will be really easy for you to understand. And if you want to make any changes in it, you will be able to do it easily. You will understand every section correctly with this guide of mine.
Basic Structure
<!DOCTYPE html>
<html lang="en">
<head>
    <meta charset="UTF-8">
    <meta name="viewport" content="width=device-width, initial-scale=1.0">
    <title>AI Website</title>
    <link rel="stylesheet" href="styles.css">
    <link rel="stylesheet" href="https://cdnjs.cloudflare.com/ajax/libs/font-awesome/6.0.0/css/all.min.css">
</head>
This is a standard HTML5 document structure. It uses UTF-8 encoding to display text correctly. A viewport meta tag is included to ensure that the website looks good on mobile devices. Additionally, a custom CSS file and Font Awesome are included for styling and icons.
Loading Screen
<div id="loading-screen" class="loading-screen">
    <div class="loader"></div>
    <h2>Loading...</h2>
</div>
This will create a very beautiful loading animation that will appear at the start of the website. It really looks great, that's why I added it. If you don't want to do it, you can't.
Password Protection
<div id="password-screen" class="password-screen">
    <div class="password-container">
        <h2>Enter Password</h2>
        <div class="password-input-container">
            <input type="password" id="password-input" placeholder="Enter password">
            <button onclick="checkPassword()">Enter</button>
        </div>
        <div class="hint-message">Password: sun-developer</div>
    </div>
</div>
With this code I have applied a password protection after loading. Actually this is not a password protection. It is a good design that gives the website a better and better look. On it I have placed a single passport which will remain for everyone. This is not a form for some people or other.
sun-developer password
Main Content
And I have divided my website into three main sections using this code, one for translation, another for error checking, and the third for story creation.
Story Creation Section
<section class="section">
    <h2>Create Story</h2>
    <div class="input-container">
        <textarea id="story-input" placeholder="Enter your story idea..."></textarea>
        <div class="button-group">
            <button onclick="startVoiceInput('story-input')" class="voice-btn">
                <i class="fas fa-microphone"></i> Voice Input
            </button>
            <button onclick="createStory()" class="create-btn">
                <i class="fas fa-magic"></i> Create with AI
            </button>
        </div>
    </div>
    <div class="output-container">
        <div class="output-header">
            <div class="output-actions">
                <button onclick="copyStory()" class="copy-btn">
                    <i class="fas fa-copy"></i> Copy
                </button>
                <button onclick="rewriteStory()" class="rewrite-btn">
                    <i class="fas fa-redo"></i> Rewrite
                </button>
            </div>
        </div>
        <div id="story-output" class="output"></div>
    </div>
</section>
Through this code, I have created a story creating section, within which it will create a story according to the idea you give, and I have also added the copy and repost buttons with this code.
Translation Section
<section class="section">
    <h2>AI Translation</h2>
    <div class="input-container">
        <textarea id="translation-input" placeholder="Enter text to translate..."></textarea>
        <div class="button-group">
            <select id="language-select">
                <option value="Spanish">Spanish</option>
                <option value="French">French</option>
                (html comment removed:  More language options )
            </select>
            <button onclick="translateText()" class="translate-btn">
                <i class="fas fa-language"></i> Translate
            </button>
            <button onclick="speakTranslation()" class="speak-btn">
                <i class="fas fa-volume-up"></i> Listen
            </button>
        </div>
    </div>
    <div class="output-container">
        <div class="output-header">
            <div class="output-actions">
                <button onclick="copyTranslation()" class="copy-btn">
                    <i class="fas fa-copy"></i> Copy
                </button>
                <button onclick="rewriteTranslation()" class="rewrite-btn">
                    <i class="fas fa-redo"></i> Rewrite
                </button>
            </div>
        </div>
        <div id="translation-output" class="output"></div>
    </div>
</section>
In this section, like the previous section, I have created a section using this code and this code will convert your article or whatever you speak or write into different languages and it also has the option to copy and re-translate so that it is easy to copy and re-translate.
Mistake Checking Section
<section class="section">
    <h2>Check Mistakes</h2>
    <div class="input-container">
        <textarea id="mistake-input" placeholder="Enter text to check..."></textarea>
        <div class="button-group">
            <button onclick="checkMistakes()" class="check-btn">
                <i class="fas fa-check-circle"></i> Check Mistakes
            </button>
        </div>
    </div>
    <div class="output-container">
        <div id="mistake-output" class="output"></div>
    </div>
</section>
And similarly, I have also created a mistake checking section in which you can check any article or data you provide, and after checking the mistake, it will also give you a score of how much your article has scored.
Support Chat
<div class="support-button" onclick="toggleSupport()">
    <i class="fas fa-headset"></i>
</div>

<div id="support-chat" class="support-chat">
    <div class="chat-header">
        <h3><i class="fas fa-robot"></i> Website Support</h3>
        <button onclick="toggleSupport()"><i class="fas fa-times"></i></button>
    </div>
    <div id="chat-messages" class="chat-messages">
        <div class="message bot">
            <div class="sender-name">sun-developer</div>
            Hi! I'm your website support assistant. How can I help you with the website today?
        </div>
    </div>
    <div class="chat-input-container">
        <input type="text" id="chat-input" class="chat-input" placeholder="Ask about the website...">
        <button onclick="sendMessage()" class="send-btn">
            <i class="fas fa-paper-plane"></i>
        </button>
    </div>
</div>
After that, after the website loads, when you go inside the website, you will see a support button on the right side, when you click on it, you will get a score section in a nice layout like an iPhone, and I have created that support section through this code and you can also make any changes in it. Yes, I have mentioned to my API that it will only answer questions inside this website and will not answer any questions outside it. This is really a very good section and you can benefit from it. If you have any questions or difficulties in understanding, then
Script Loading
<script src="script.js"></script>
- Links to our JavaScript file for functionality
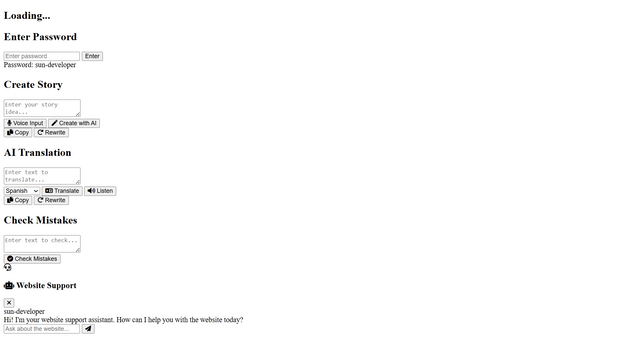
And with that we see the output of the HTML, what is happening, I would like to tell you one thing, you cannot do this by first creating the index.html file and then creating the other file, you have to create the entire file at the same time, because I am telling you this to explain. I have created the entire file at the same time because the feature that I used to add inside the HTML, I also used to design it and set its function with JavaScript. At the same time, it is very easy for the coder to do it at the same time. If we create it separately, we forget which function we have designed and where.
Output index.html
.png)
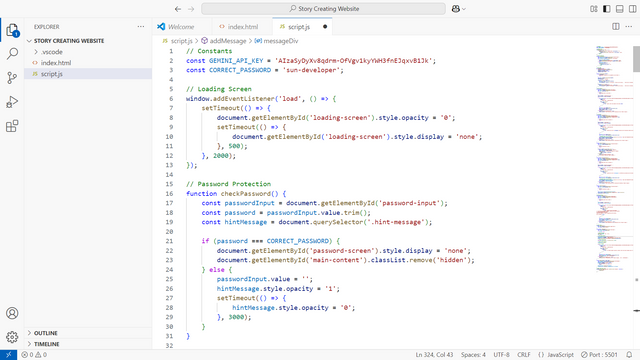
Script.js
.png)
// Constants
const GEMINI_API_KEY = 'AIzaSyDyXv8qdrm-OfVgv1kyYWH3fnEJqxvB1Jk';
const CORRECT_PASSWORD = 'sun-developer';

// Loading Screen
window.addEventListener('load', () => {
    setTimeout(() => {
        document.getElementById('loading-screen').style.opacity = '0';
        setTimeout(() => {
            document.getElementById('loading-screen').style.display = 'none';
        }, 500);
    }, 2000);
});
At the top of the script.js file, you will see the Google Studio API that I have installed. If you want to use this website yourself, then change that API to your own API because after checking this website, I will disable my API because it is not shared publicly. Yes, if you want to use it, you can install your own API, you will get it free of charge, but with some limitations.
Google AI Studio et APIYou can create your own API by going to this link and using it. Yes, I will not disable my API for a few days until this post of mine is checked.
.png)
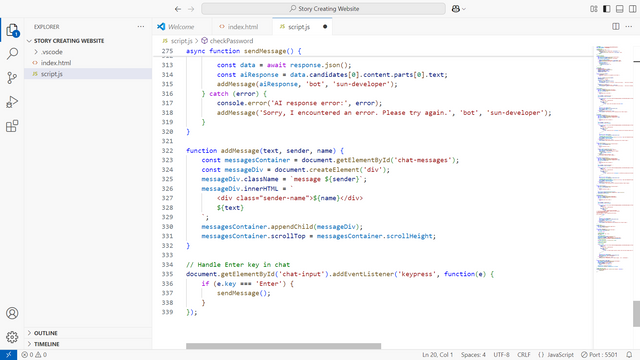
Apart from this, the script.js file contains all the functions that I have mentioned in the index.html file. These have been enhanced and functions have been added. This file is really big and I cannot write it in this post. Yes, I will definitely upload it to the Github repository and the link will be available below. I have already talked about it before.
OutPut script.js+index.html
.png)
Although this website is operational, it is still not appealing to the eye. Imagine a car, once the engine and important parts are added, the car can run. In the same way, this website has all the required functionalities. But just like a car requires a good paint job to be appealing, the website needs a styles.css file to look nicer. Without styling, all the functions operate properly, but injecting CSS will make the design a lot more sophisticated and appealing to the eye.
style.css
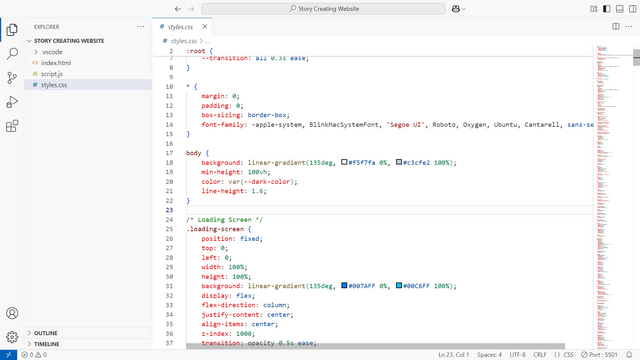.png)
While creating this file, I would like to give you a piece of advice that you have to create a file of styles.css and not of style.css, that is, you have to put the S. The real reason is that if we create any CSS file and give this data inside it, it will work. But the name with which we create this file, we also have to connect this name with the HTML file. So in the back, we have connected the styles.css file. That is why we should create a file with the name of styles.css. If we create another one, the code will not work.
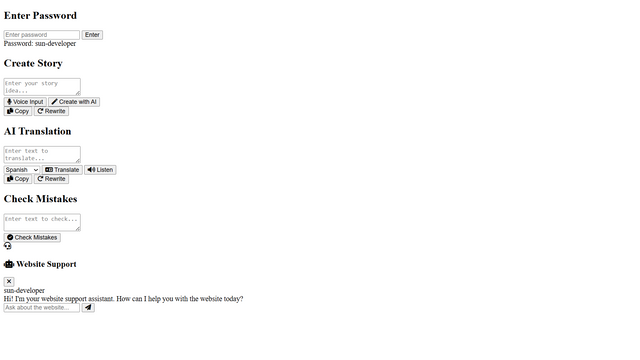
Output styles.css+script.js+index.html
Complete Website Output
This video contains the entire output of this website, including the code, and along with it, I have used the entire website once and shown how it is used. But I am saying this first that I will soon disable my API. When you want to use it, put your API in it.
Github Repository
How many days spend creating this website
It didn't take me days to create this website, it took me four hours to create this website, and it took me three hours to post it.By the way, it could have taken many days to create it, or it would have definitely taken one day, but I worked hard for four hours straight to create it, and I have created such a website before, so it was easy for me to create it.
Thanks for Reading and learning
God willing, we will discuss another topic tomorrow in this account.
@sun-developer really thi is interesting and use full website.
Thanks for creating