Access Everything Securely
Public IP Address Updater (PIAP)
Hey there people! What's up? After 3 days of thinking, I finally found an interesting topic on which I can blog! As the title says, access everything securely. So basically, I will be explaining how can you access your files over the Internet, securely and *free. Say goodbye to Dynamic DNS.
Requirements: Raspberry Pi, decent Internet connection, Ethernet cable
This will require a little knowledge of how Internet really works. DHCP, Port Forwarding, mail server, relay hosts.
Let's get started
Internet Service Providers (ISPs) give their customers an IP address on lease. The leasing time is approximately 24 hours (well, in Mauritius it is). So the assigned IP address is your public IP, that is, devices connected to the Internet around the world can communicate with your devices using this IP address.
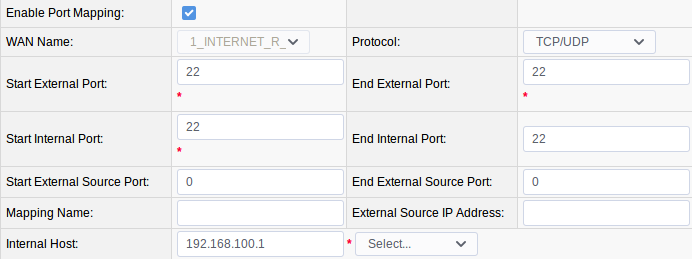
Port Forwarding is a feature found in your router. It allows you to communicate to your local devices from another network. Port 22 is the default SSH port, if I try to SSH to my Raspberry Pi, it will not work. In order to make it work, I will have to open a forward request (in other words, Port Mapping) on Port 22. This will forward ANY request made on Port 22 of my router to the selected device (in this case it will be a Raspberry Pi).

As a measure of security, you can change the External Port to one that the router is not using.
The internal host is the IP address of the Raspberry Pi. For this, you may want to assign a static private IP to the Raspberry Pi so that you don't have to keep changing it on each reboot.
Cloning the git repo
I have written a script which will send your Public IP via e-mail (you can of course SMS technique for this).
Cloning the repository:
git clone "https://github.com/shravanSD/publicip.git"
Open the cloned directory:
cd publicip
Create an empty file "ip.txt":
touch ip.txt
Copy the path of the empty file created. For example mine is:
~/Desktop/publicip/ip.txt
Using your favorite text editor, open the script publicip.sh:
vim publicip.sh
Find the line starting with IPFILE = (Line 6), paste the path of the empty file here
IPFILE =~/Desktop/publicip/ip.txt
Next modify the code at line 47, insert your email address.
Hit Esc and press :wq to save and quit vim.
Installing Required Packages
sudo apt-get install mailutils
sudo apt-get install postfix
Once both are installed and configured, we need to make some small changes.
Change directory:
cd /etc/postfix
Open main.cf
vim main.cf
Locate relay host and use the appropriate host for your country: mx1.intnet.mu for Mauritius.
Go to the cloned directory: cd ~/Desktop/publicip/
Make the script an executable one: chmod +x publicip.sh
Test the script: ./publicip.sh
It should work.
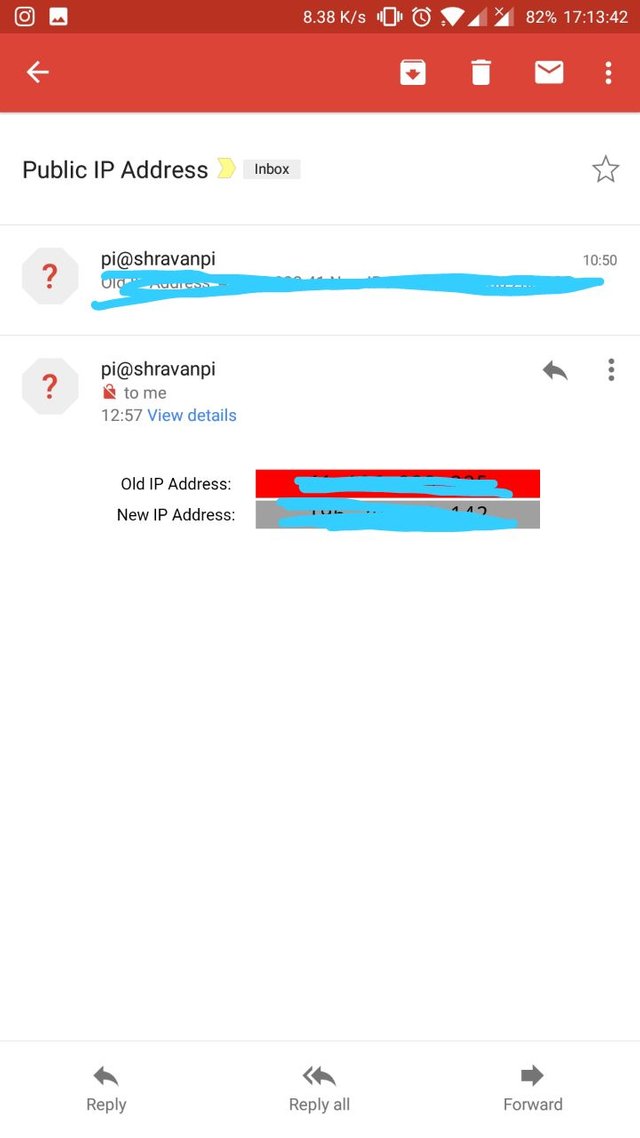
Tested on Mail app on Android:

Let me know in the comments if it works or not, I shall assist you.
There you have it. You can connect your external hard disk to your Raspberry Pi and start browsing it from the Internet.
*you will need to have Mobile Data or to connect to a WiFi network.