ULOG #2 : Fan Art - Anne Curtis, a step-by-step Illustration
Okay, this is the first time I'll be posting an artwork and I'm kind of nervous but I'll be happy to share it to the whole world. And I just want to make things clear that I am not a pro in this. It has only been a year since I started sketching.
So before going to to the step-by-step illustration of my fan art, I will first show you my output and I hope you guys will love it.
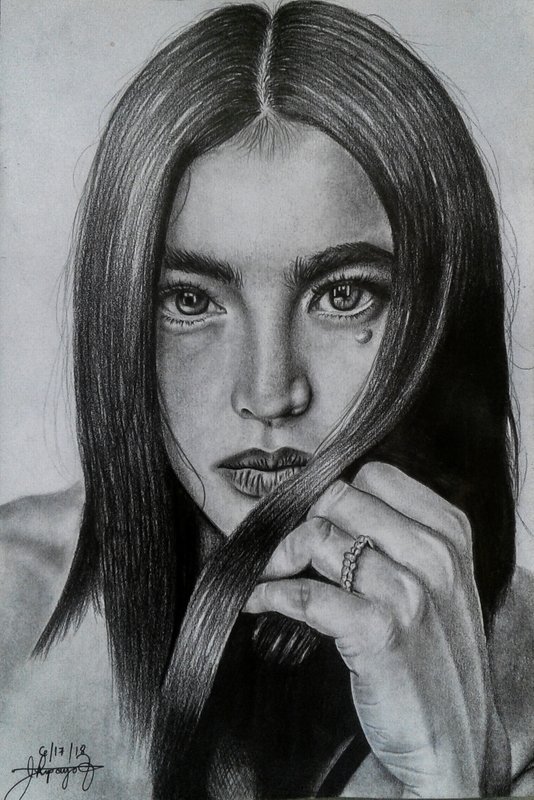
So this is Anne Curtis. She is an actress and also a host here in the Philippines and I am a fan of hers because she is witty and pretty and pretty and pretty and have I already said that she's pretty?
And now it is time to start my step-by-step illustration of my fan art.
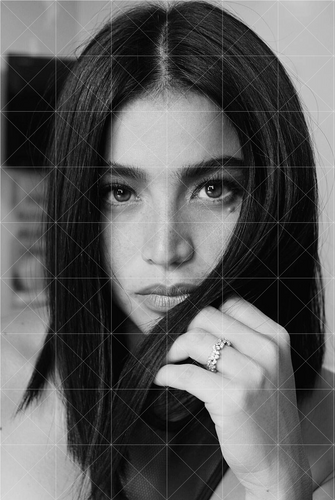
The first thing that you need to have is a reference photo and you have to make sure that your reference photo is clear enough for you so that you will be able to see small details and in my case having a clear reference photo is very important because my vision is not clear enough.

The next thing that you need to have is your drawing materials and I have to tell you guys that having the right materials will surely make your work a lot more better but do not be sad if you don't have the complete materials because i also don't have enough materials. And in the photo that you see starting from the left, that is a blending stump wich will help you in smudging or blending the graphite to create a more softer looking shade. Next are the graphite pencils. I have a B pencil, HB pencil, 2B pencil, 4B pencil, 5B pencil and 8B pencil, respectively. Usually the HB, B and 2B pencil are only for the base or the lighter parts of the sketch while 4B and up is used to add more depth into the drawing. Next I have is an eraser and a kneaded eraser. The difference between an eraser an a kneaded eraser is that an eraser will erase a lot of your graphite while the kneaded eraser will only erase some of the graphite thus making the kneaded eraser important when making highlights. And last but definitely not the least is my Canson Sketchpad.
Now let us proceed to the next step.

As you can clearly see in this photo, there are grid lines. And these grid lines are called diagonal grid lines. There are actually three ways of drawing. First is a freehand where you don't use any grid lines as your guides to make a sketch. The next one is using a normal grid line where all you can see is just squares on the picture. And the third one would be using a diagonal grid, which I really prefer to use because I would be able to make a better and more precise output when I use this kind of grid and as you can see on this photo, I am using a diagonal grid. But since I am not a pro, I am really not sure if that is all the kinds or ways on how to draw but you can search some up. Anyway, it will always be up to you on how you would prefer on drawing! You have to discover and explore yourself!
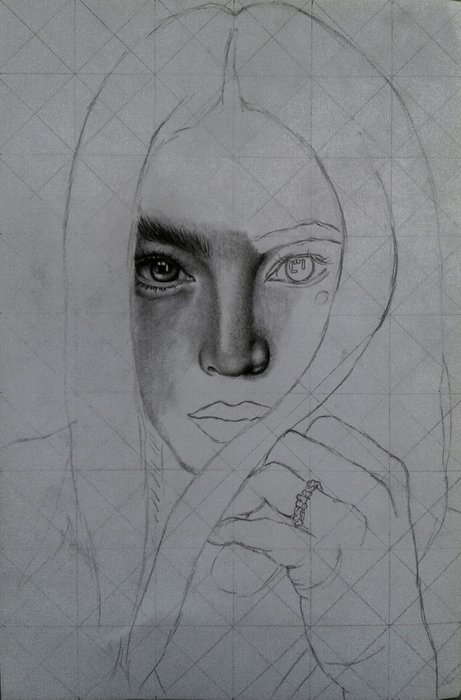
Now, once you are done with the grid lines, you would then start to outline the face, the hair and everything that you want to copy on the reference photo. In my case, I only made an outline of her and I did not include anymore those that are on the background. And as you can see here I have already started adding some shade to her eyes and added some shadows. Also, when you start working on the nose, you should not outline the nose line very hard using a pencil, instead you should use shading to form the nose. And while adding some shadows, you have to make sure that you don't apply a lot of graphite to areas where there is evident highlight. But if you happen to forget that part, there is no need to worry because you can just use your eraser and erase some arts where the highlights should be.
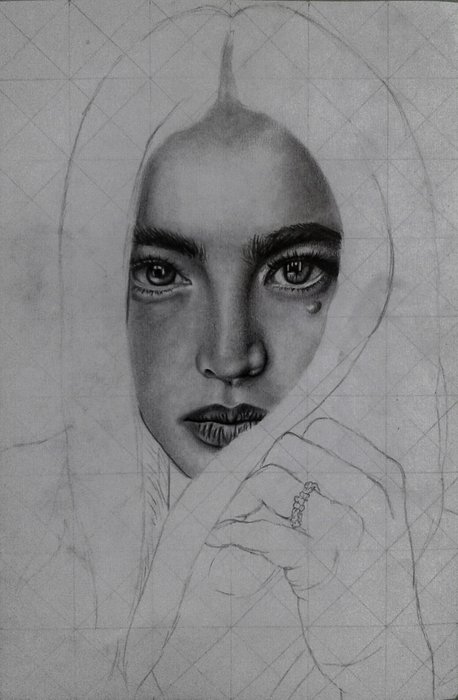
Voila! I finished adding more shadows to her face while making sure that the highlights are still there and that is the part where the kneaded eraser comes in really handy because the kneaded eraser is like a clay and you can make like a sharp edge to it to lift some graphite in some small areas of the face but if you don't have a kneaded eraser, you can cut a bit of you eraser and use that instead.
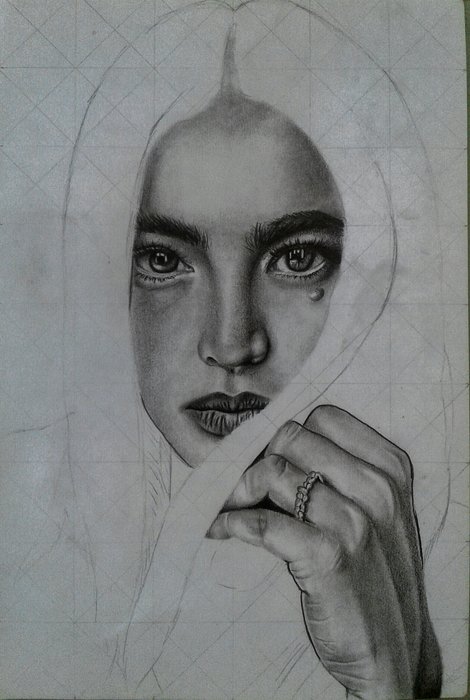
Now sometimes when you're done with the face, you get excited to the hair and then all the graphite would be smudged all over your artwork and I am talking by experience here. Anyway, the next thing I was I added shadows to her hands and I made sure that some of the highlights are there like some of the veins that are visible or just any highlight that you see on your reference photo.
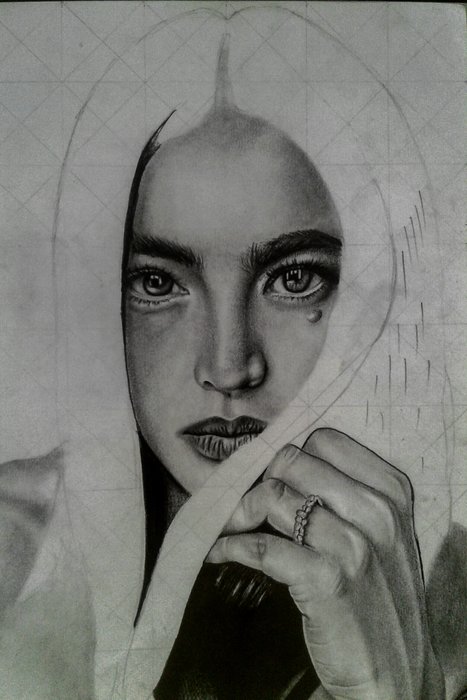
Next is that I added details to her shoulders and as you can see I have marked small lines to a part of her hair and that indicates that in that area, the hair would be really dark that there are no highlights. Also, you can see that there some graphite on the artwork but that is okay because you are not yet done with your work and you can still erase that. And if you those graphite on your artwork, you won't want to keep on erasing them because there is a possibility that you would accidentally crumple the paper and that would not look good.
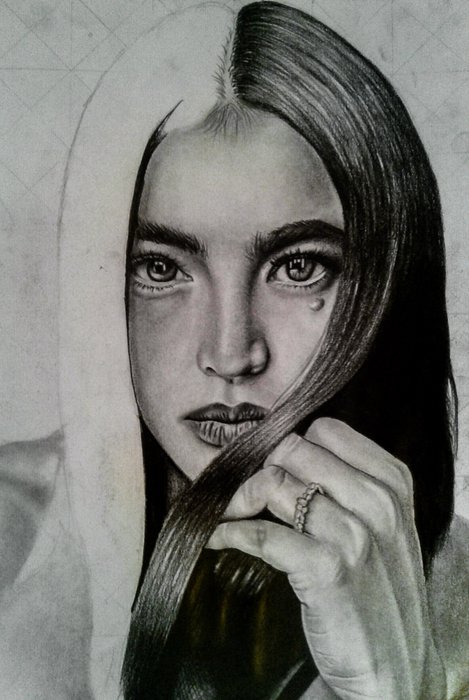
Now we are on the hair. For me, the hair is one of the tiring part of sketching but also definitely fun. As you can see, I didn't really copy the exact same highlight as shown on the reference photo because I am not a pro and my drawing skills is not yet on that level so I did the kind of highlight I wanted. And since I am left handed, I started on the right side of the hair so it wouldn't get really messy. What I did for the hair is that I first used a B pencil then a 2B pencil and then I used 4B pencil to start adding the darker strands of the hair and used 4B again but I added more pressure to it so it would be darker and then I used 8B pencil to the really dark parts of the hair and also to make it come out and I also used my 8B to the darkest part of the hair where there no highlights.
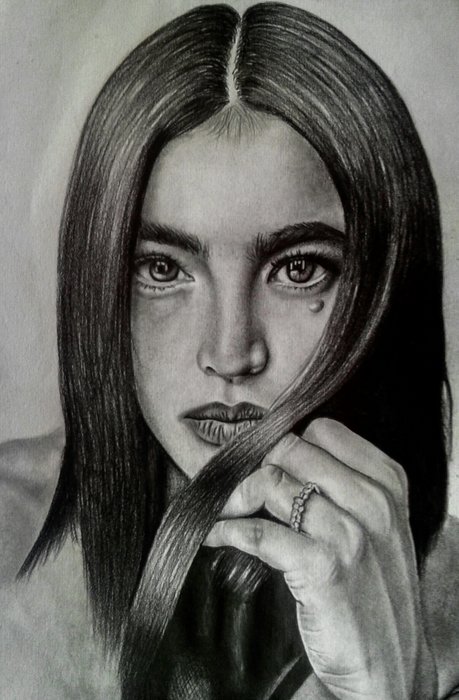
And then I did the same thing on the left side of the hair. As you can see, I have already erased the grid lines and cleared out the graphite that made it look messy earlier. The reason for that is because I am almost done with my work and I have to add more stray hairs. And this is also the part where you add more details, more shadows and some finishing touches.

And there you have it! You have finished your work and as for me, this is my finished work of Anne Curtis! And you have to make sure that you affix your signature.
Oh and before I forget, when sketching or doing something else, you always have to love what you do and have fun because in that way, you will be able to enjoy more what you are doing! I hope you guys love it and I hope that you learned something from me. Follow me to stay updated for more!


Big thanks to @surpassinggoogle for this #ULOG movement. Join us and become a ulogger. Please follow and support our very own @surpassinggoogle, @teardrops, and also @purepinay. Vote @steemgigs as your witness! Thank you all so much! 😊

Lovely lovely lovely,
It came out just perfect.
Congrats @adrnhpyo, You just won 50% upvote from @artzone.curators
Curated by @jacobite
Thank you so much 😍
Congratulations @adrnhpyo, your post has been featured at Best of PH Daily Featured Posts.
You may check the post here.
About @BestOfPH
We are a curation initiative that is driven to promote Filipino authors who
are producing quality and share-worthy contents on Steemit.
See Curation/Delegation Incentive Scheme here. Be sure to leave at least 50SP undelegated on your account.
Follow our trail and vote for curated Pinoy authors. If you are a SteemAuto user, @bestofph is an available trail to follow.
If you want to be part of the community, join us on Discord
Amazing @adrnhpyo, you did it. Congratulation
Thank you!
Try ug gamit ug adsactly or ocd-resteem na hashtag basin diay. Go @adrnhpyo level up na kaau imong blog well done. Kana jud basin ka curie ni
Congratulations @adrnhpyo! You have completed some achievement on Steemit and have been rewarded with new badge(s) :
Click on the badge to view your Board of Honor.
If you no longer want to receive notifications, reply to this comment with the word
STOPTo support your work, I also upvoted your post!
Do not miss the last post from @steemitboard!
Participate in the SteemitBoard World Cup Contest!
Collect World Cup badges and win free SBD
Support the Gold Sponsors of the contest: @good-karma and @lukestokes
nice
This post was shared in the Curation Collective Discord community for curators, and upvoted and resteemed by the @c-squared community account after manual review.
That's undeniably amazing! It looks so realistic 😍
Thank you so much 😍
blagsssss maayoha uuuuuy
Grobeh grobeh HAHAHA
You've received an upvote from @slothicorn! Click Here to Read our New Curation Policy And Updated Rules
(@karmachela)