Grassy wind
Hi,
Sorry for the little silence I have been very busy with University stuff that I had very little time to make anything new.
So, today I wanna do something cool, we gonna use a few tools to make it work.
- Quixel Bridge/Mixer - Bridge is preferred.
- Photoshop/Gimp
- Maya/Blender.
- Unreal Engine 4.
Quit some tools eh? Well most of them are free to download and use so don't worry about costs.
Gimp - is an open source photo editing software VERY similar to Photoshop.
Blender - same as Gimp but for 3D and it's just like Maya, the only difference are the UI and some tiny elements that are hardly ever used by pro's or actually needed.
Of this guide I'll show examples on all programs except for Gimp because I don'r want to download and install another app also as I mentioned it is just the same as Photoshop so no need to worry.
So first thin first get the apps!
Ok, lets open Bridge and search for Clump of Grass, it will give you a few results but we want the dense and "Wild Grass" so make sure you down load the 2 maps that are the same as in the screenshot:
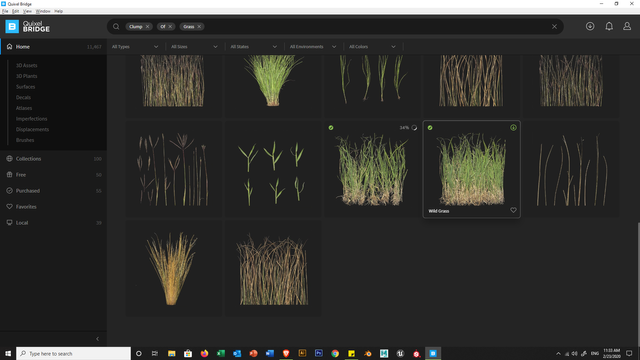
Now, some people would ask: "Do I need ALL the maps for this file?"
Well... No, You just need the Albedo, Normal, Roughness, Translucency and Opacity.
Also, 2K resolution is just fine, you can also get the 4K but it's really not necessary, we are just doing some nice grass wind effect for demo, later you can use the same framework for other applications.
If you got both files, let do some quick editing on them, go ahead and open the files location, right click it and you will have the option to open the file location and it should open the folder with the files.
Open the opacity map in Photoshop, now this map is great but we really don't need THAT much of an info, we want to keep keep it to a minimum + I doubt that anyone is interested to see the bottom of the grass...
So, mark about 1/3-1/2 of the image with white, this will make out computer to process less info when drawing the image.
Tip: In order not to "destroy" the map, make a new layer do the white filling and save the image but change the name by adding a number so you can use the original map later if you want to make so adjustments.
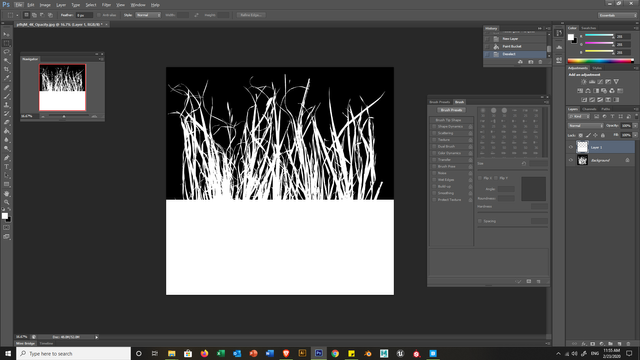
And do EXACTLY the same with the other Grass files.
That was not too hard right? Ok now come then little creative part, lets open Maya and make the Grass objects, I will do the Blender right after it.
NOTE!!! Make sure your scale is the same as in Unreal 4, if you are not sure how so here is how:
- go to Display -> Grid and click on the little square.
- Units length and width should be 1000 and Grid lines 100.
- Press ok, and adjust the view
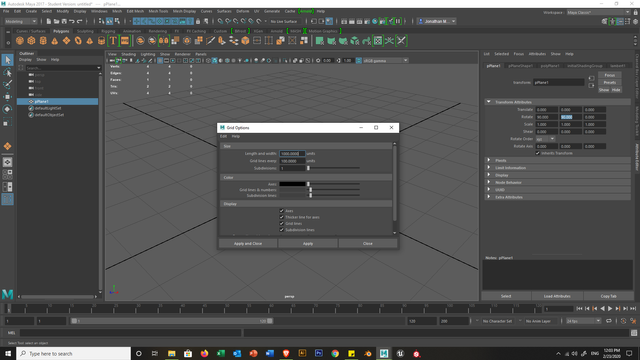
Now, we gonna make a Plane, I snap to the grid by holding X and made it 4x4 tiles, rotate it until it stands, because our grass is not flat... it's stand straight and tall, I recommend 90 on the Z and 90 on the Y.
And now lets give it some looks, right click the plane and go to "Assign new material", on the menu that open choose Lambert.
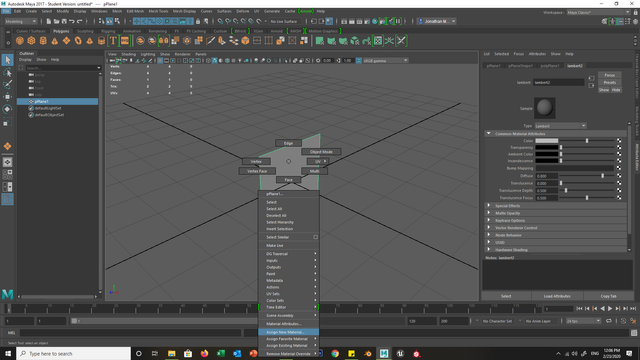
Cool, now navigate in the object menu to the Lambert tab and click the on colour bar at the little black and white square, it will open a little menu, choose "file", then look back the the Lambert tap and you will have the option to add a file, navigate there till you find you Albedo map.
Tip: if you did not set a new destination in Bridge it's most likely in My Documents > Megascans Library -> Downloaded -> Atlas -> Wild_Grass.
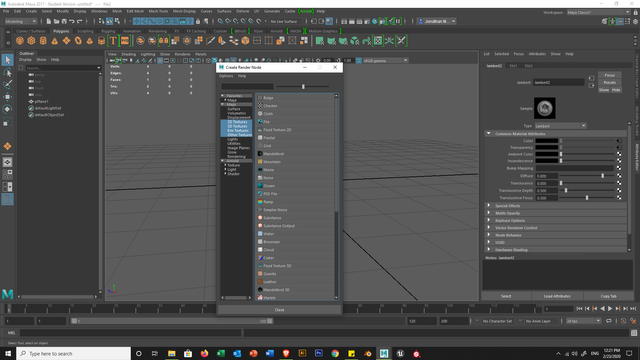
So, for some people, after they chose the image file they will see nothing, that is a common "problem" on you tool bar on the viewport there is a little circle with a tile, or a little icon near the light bulb, click it and you should see the image on the plane.
But we are not done yet!
In the Lambert tab, we need to assign the Opacity map, to do this we do the same as we did with the Albedo but this time not on the colour, but on the Transparency slot, load the one that we just edited in Photopshop.
You should get something like this.
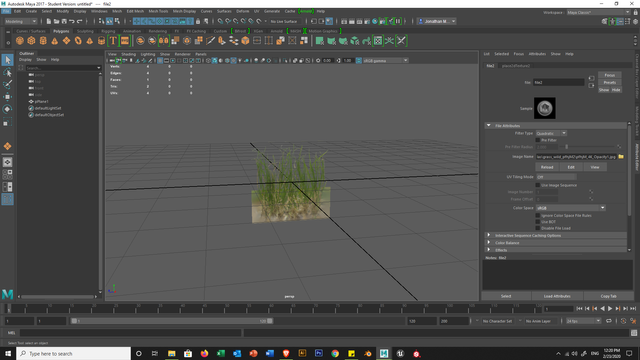
Awesome, now we need to make just a tiny adjustment, our plane is big and contain a lot of info, we can reduce it a little buy cutting some "empty" spaces out, so zoom in to the plane and use the cut tool to remove empty areas, but keep in mind you don't wanna go over board, just slightly trim to keep it nice and even.
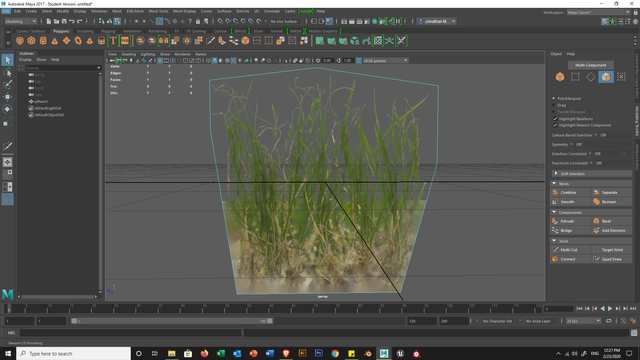
Great! Now lets give it a little functionality, make a few cuts, so when we drop it into Unreal it can bend and move.
So, make about 2-3 cuts in the 1/2 or 1/3 of the plane horizontally.
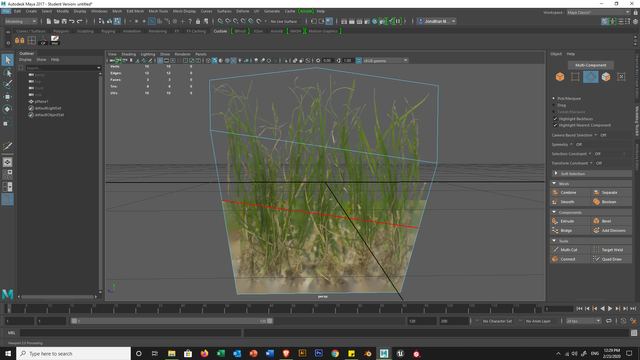
Keep in mind it doesn't have to be perfect after all grass in the wind don't bend that smoothly and perfectly.
and now we will do the same but vertically, but we gonna bend it ourselves, just to give it a little depth.
Make about 3-5 cuts and move them accordingly, and by that I mean move one and skip the next.
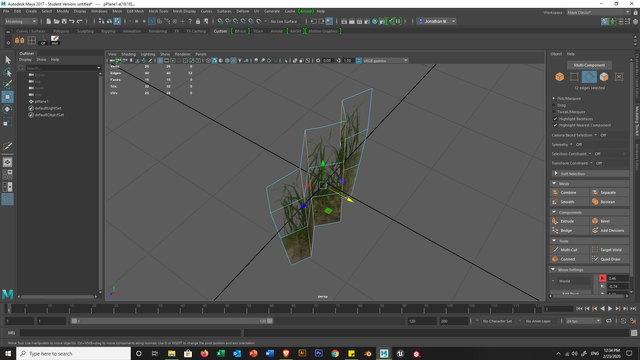
The is getting some nice bend and depth, and now... yup we got another one to do, so you can "Hide" this plane and make a new one and do EXACTLY the same thing but with the other maps we downloaded from before.
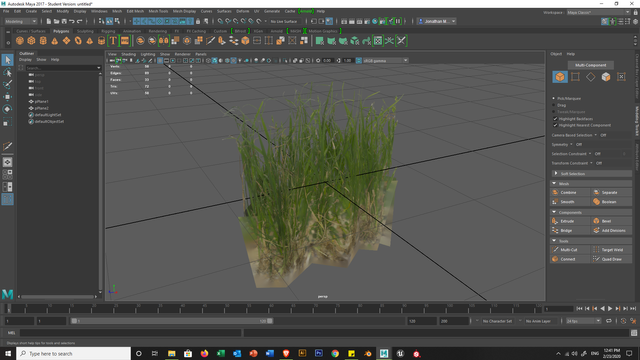
You should get something that looks more or less like this when both are exposed and moves one against each other, we want them to cross over so it will give the effect of a dense grass.
Now save this to a FBX file and that's it!
Blender users, in Blender first make sure you are on the correct scale setting:
- Scene options -> Units - Metric, Unit scale - 0.001.
- view Setting set to +/- 50.
Ok, lets get rid of the Camera, Light and box and create a Plane.
Luckly Blender does a good job and make the right size we need, now rotate X and Z by 90 and we are good to go!
Head over to the shading Panel, add a new Image Texture and browse the Albedo map, connect colour to Principled BSDF Base Colour.
Next, add another image texture and this time choose the Opacity map and connect the COLOUR to the Alpha, yes I know it's a bit strange but trust me on this one.
Cool, on the Material tab look down at the Settings, on the Blend Mode choose Alpha Blend, Now you should get it all sorted, easy right?
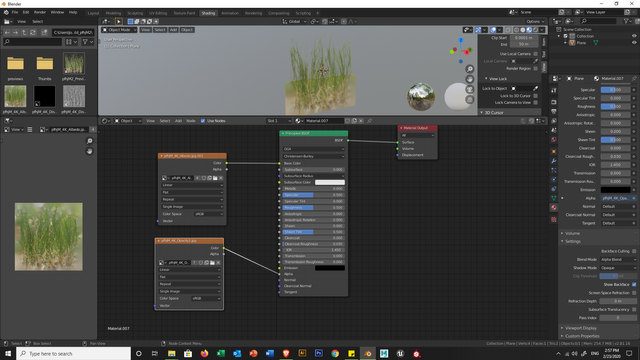
Now same thing with Maya, if you don't see the Texture, all you need to do is click the Viewport Shading option, it located on the upper right corner near the live render.
Now, go to Edit mode and cut the excess part of the plane, use the Knife Tool and don't go too much overbaord.
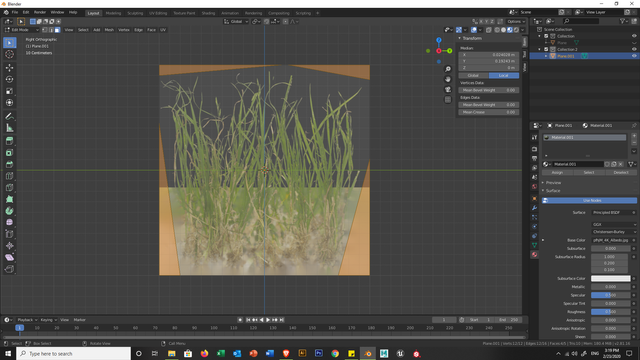
And of course let add some vertical and horizontal cuts to make our plane more flexible.
Don't forget to give a little distortion.
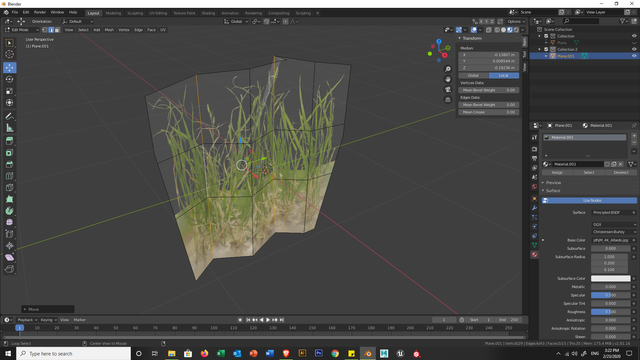
I recommend to make 2 collections so you won't be cutting the same plane over and over.
And now make another plane and do EXACTLY the same as before but this time with the other maps.
Don't forget to give the 2nd plane a different distortion so it will contradict the other one.
That is it! We are done creating and getting out hand dirty with editing and cutting and shaping.
Now the fun part, but more technical.
Open Unreal engine and create an empty project.
NOTE: Make sure to exclude Starter content!!! It will save you a lot of space.
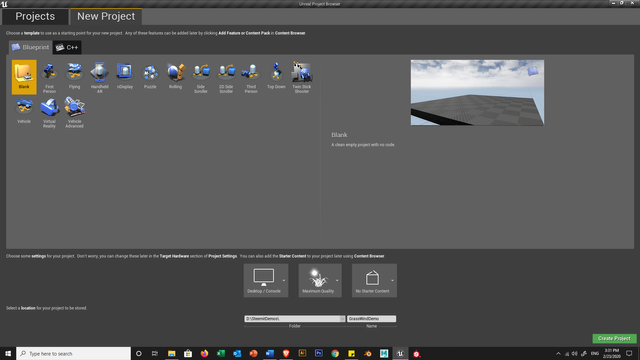
Once it's loaded, lets create 2 folders, 1 named Textures and the others Materials.
If you are not sure how to do it, right clock on the content browser and make new folder.
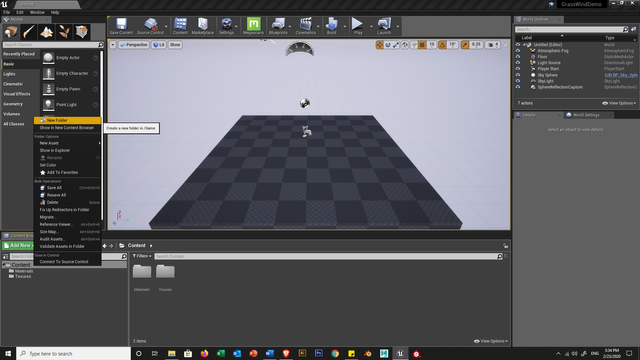
Great now go into the Texture folder and make another folder make Grass1 and Grass2, you also skip this and simpky import all the textures but for the sake of clean order lets make those folders.
Once they are made import the textures in my right click in each folder and Import or drag the textures into the folder form your computer folder.
This may take a few second depend on you PC.
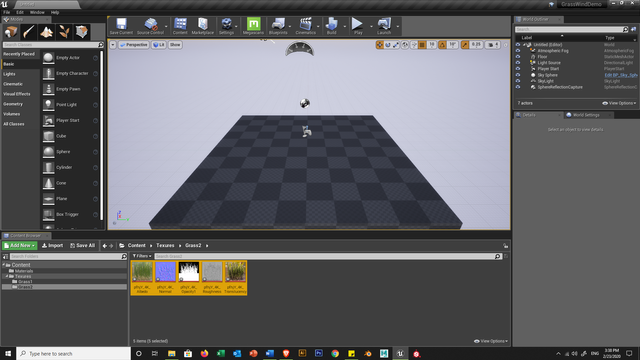
All done, now lets go back to our Main Content Folder and make a new folder, again you can skip this, and make a Mesh folder and import our meshes in.
Now, once you do this Unreal will check with you how you want to Import the files, before you press anything, on the Mesh sector there is a little triangle/arrow that looks down clock it and more options will pop in.
Search for "Combine Meshes", this is important as Unreal will bring them separated and we don't really want this.
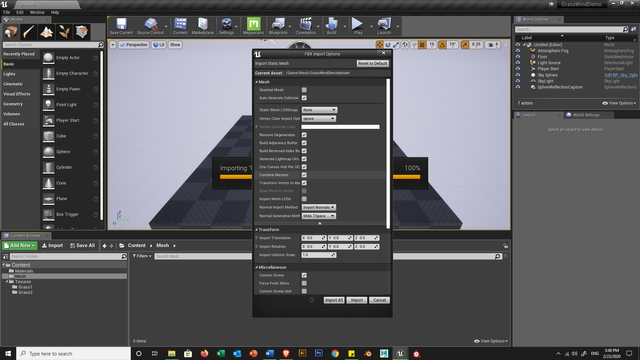
Most probably Unreal will throw some kind of warning message about smoothing, ignore it it's not relevant for now.
Also, Unreal will create some materials and other stuff, don't worry we aren't gonna use it do either ignore it or delete it, I usually ignore it.
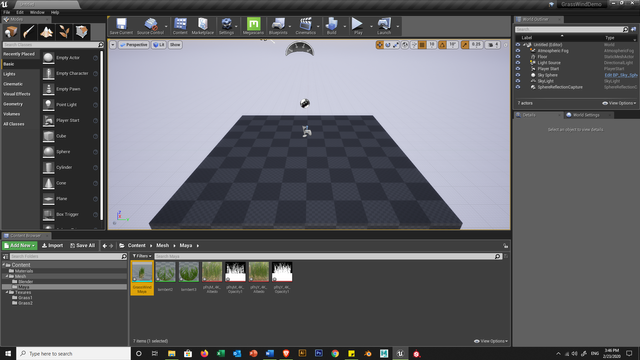
Cool, you notice I got 2 folder one of Blender and one for Maya it's just for this demo you should have just one so again don't sweat about it :)
Now, let go to the Material folder and make some materials and wind effect!
Right click in the Materials folder and create New Material, name it "M_GrassWind", the name does not really matter but again for the sake of good order lets do it this way, also do not use space or anything under score or capitals and lowers to name your stuff.
So, here things gets a little messy and complicated!
I'll go slow and explain each step carefully.
First thing lets add our Albedo map in by dragging the map in or right click and type in the node creator Texture Sample and then on the left browse for the Albedo map, just remember we use Grass1 for this material.
Right click the texture node and convert it to Parameter, name as what it is, in this case it's the Albedo, so the same for all other textures.
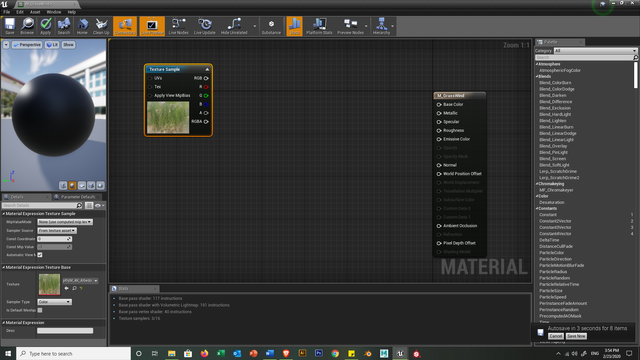
Now, under the texture node hold 3 on your keyboard and right click, this will create a Vector 3 node, we want this because we may want to later change the Albedo map colours, now right click thus node and convert it to a Parameter.
This difference from just simple Vector 3 to a Parameter is that Parameter is and editable node that can be used later while not in the Material Editor.
In the paramter values put all on 1, so yuo should get a white colour.
Ok one more quick thing put your courser on the right of both of the node and hold "M" and right click, this will create and Multiply node.
This node it a utility node that simply take 2 values and multiply what value they hold and give an output, we will use many of these later on so just remember the operation of Multiply.
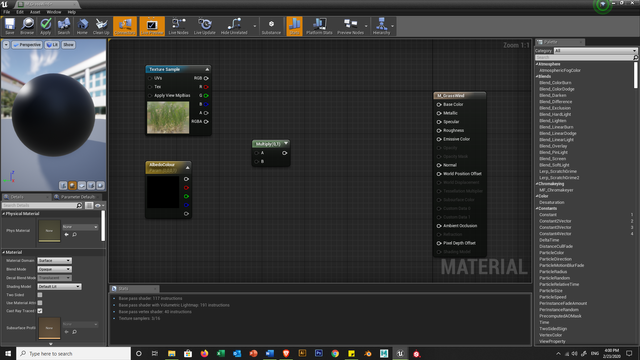
Connect the RGB of the Texture and the RGB of the vector to the Multiply Node, and lets make another Multiply node right next to it and connect.
Under it hold "1" and right click, this will create 1 input, it's a simple 0-1 input node, right clock it and Convert to Parameter again, change the Default value to 1, and connect it to the new Multiply we made a second ago.
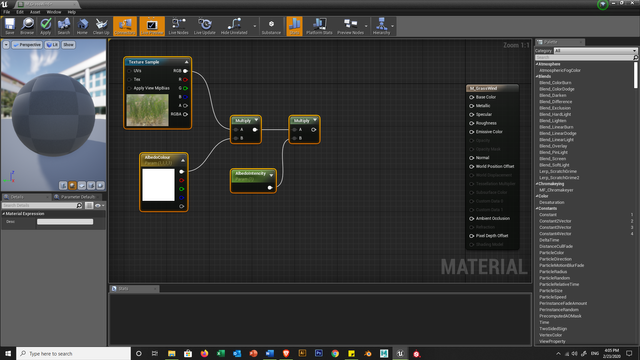
One last step, drag from the Multiply node and type "Clamp", and leave it as is.
So, explanation: What we did her is to give us control later on the material properties.
At first we call the Texture map and call for a colour and mix them together with a Multiply node, then we add a simple 1-0 parameter to give us more control on how strong we want this effect to take place, the Clamp node is just to make sure we can't go into crazy values and numbers as they matter none...
A bit of advanced info: Textures and Materials are in theory physical items, in computer language it's all binary code that translates into numerical values that "makes" things visuals, so that is why we are using Multiply, Add, Subtract and other mathematical operators.
Cool, now lets add the Normal map, it's very much the same as the Albedo, add a TextureSample and remember how we added the Vector 3, press 3 and right click, as for name we can call the new Vector parameter: "Normal Intensity", don't forget to set it's values to 1.
And connect them with a Multiply node.
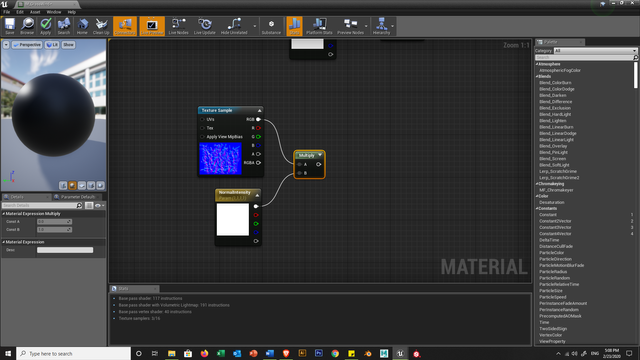
A little tip: you can press at anytime on the little arrow on the top of each node to see a quick preview of how it may look after each manipulation, in our example you won't see much as we are just laying basic configuration which we will change later.
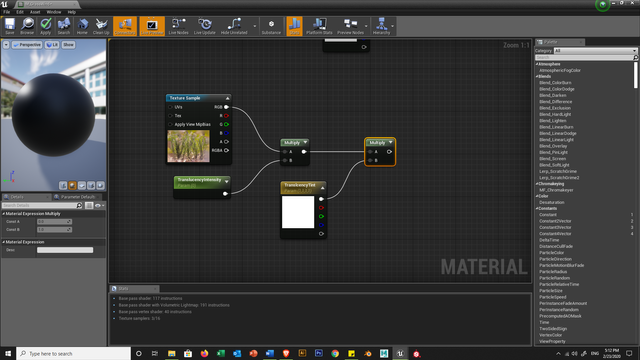
Ok, now time of the Translucency, before you rush and the same this time we gonna flip the order, so add the Map and this time add a "1" and, Again, Convert to Parameter and name it Translucency Intensity, set it's value to 1 as well, we do this because translucency is a bit gentle and we wan to keep it more under control or else our grass will look completely transparent... and this is not want we really want... right?
So, connect both of them with a Multiply and add a "3" and make it as a Parameter and change all the values again to 1 so we have a nice white.
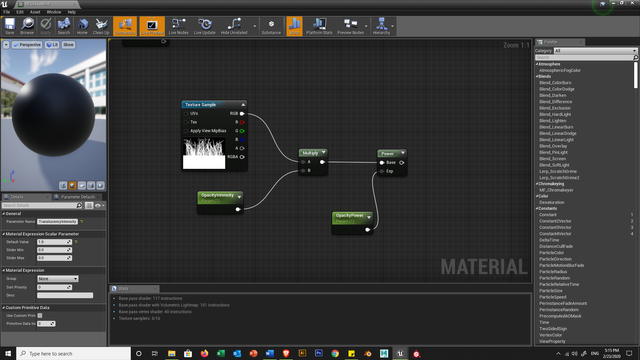
Now, Opacity, add them map as usual, and now lets add a "1" and call it Opacity Intensity, use a Multiply and connect them.
And here is a new thing! make another "1" and call it Opacity Power, this time we gonna add a Power node, right click and type Power.
Now connect the Multiply with the power and the "1".
Again, don't forget to set the parameters values to 1.
Ready to make some wind?
move to the left a little and right click, type Simple Grass Wind, so as you can see it had 4 inputs, this little node is a great simple way to create wind effect, it's not perfect and have some limited control none the less it's an excellent simple tool to add to any scene to generate some wind effects.
For the use of this we will create 3 - "1"'s and a single "3", Yes, convert them to parameters, for the first we will name it as "Wind Intensity" for the second "Wind Weight" and then "Wind Speed".
For the Vector 3, it's a little tricky you could name it as Wind offset, problem is... how can a colour be a number? well for that we just gonna give this name and set the value for only the Red as 1, so you should get, Red.
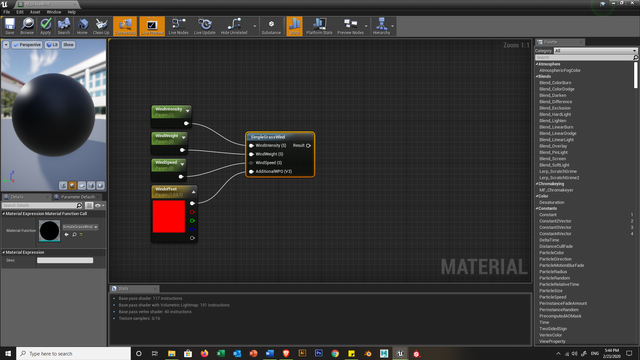
Now we will make the wind ripple effects on the grass, for that we will use Time, so right click and add a Time node, and add a "3" and Convert and name it Wind Direction, connect with Multiply.
So far so good, no lets add World Position, so type Position and you will see World Position, the full node name is "Absolute World Position", this time we will connect the Multiply and the world position with an Add node, for this hold "A" and right click!
All this will be connected to a node that will generate a simple animation, so type Noise and add it the graph.
In the Noise node we need to do some adjustments:
- Scale - Set it to somewhere about 0.00075-80, we don't need it to be too strong at all.
- turn off turbulence, it's really not needed though we are doing wind..
- Levels - lets put it on 2 or even 3.
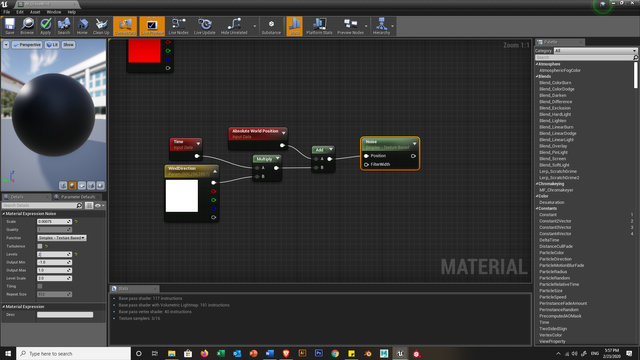
And to finalize this we will add, a "1" with a value of 10, yes we can go beyond 1 because we want to the effect to be relatively strong, and name it "Strong Wind Intensity" and connect it with a Multiply node with the Noise.
To finish this whole animation we will Clamp it and use 1-x, also known and OneMinus which will invert the effect.
Form here we will connect a few node but before that we'll do just 2 more things then connect all together and get a nice wind effect.
So lets find a spot and make a "1", and name it Specular, yes we could have use the Map image from Bridge/Mixer but we really don't need that much of an info, In the values put 0.10.
Make an Add node and connect just one, and make a "1" and name it Specular Bias with value of 1.
And do EXACTLY the same or simply copy and paste above it, and this time name it Roughness, for the Roughness main node put a value of 0.75, we need our grass to be just slightly with a hit of shine and not completely opaque.
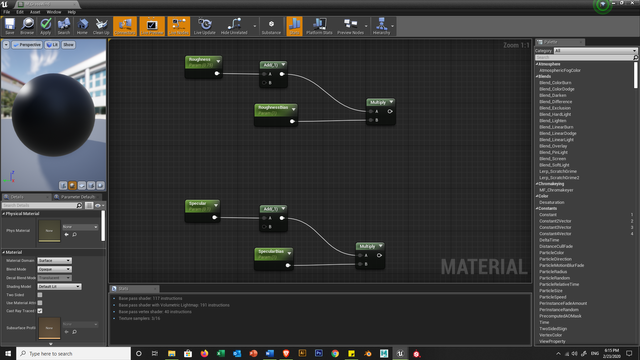
And now the spaghetti begins!
Lets first set the Material properties to fit our nodes.
So lets change the materiel blend mode to masked, Shader Model to Two sided Foliage, and don't forget to set the two sided on.
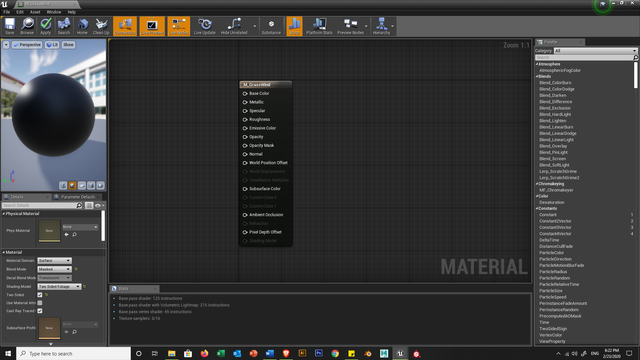
Now we can connect the Roughness and Specular to the respective inputs,
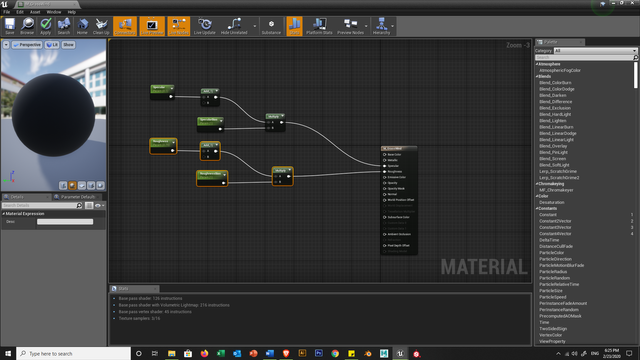
And now lets connect the Opacity to the Opacity Mask
Also make and Add node ("A") and connect it to the World Position.
From B connect it to the Multiply node just before the Clamp we made with the Strong Wind parameter.
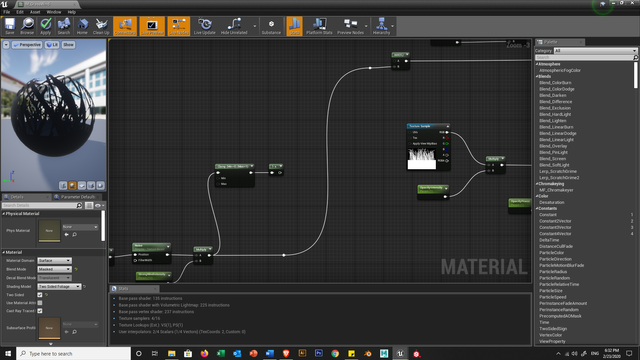
2 things:
- To make those "Points" on the way to straighten the links just double click them.
- Our material starts to move a little bit!
Lets continue, from the 1-x we can draw a link to the Roughness and Specular as the both have and Add node that miss one link.
And the SimpleGrassWind? Connect it to the Add node that we got from the World Position, or simply put, the last missing link in the Add node from before.
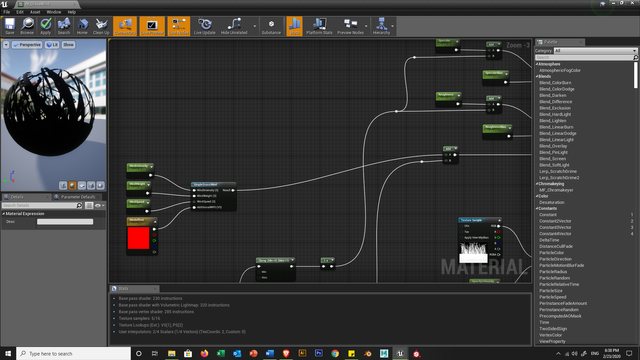
Almost there!
Normal map should connect to Normal input in the Material node and with the the Translucency should go to subsurface colour.
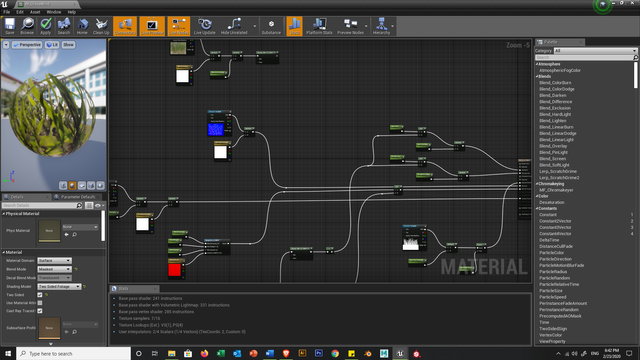
Now, all we got left to do is connect the Albedo, this is where we just need to make sure the from the 1-x we connect it to another Clamp where we put the values instead of 0 and 1, we put 0.55 and 1.
then add to a Multiply and connect with the Albedo.
From that last Multiply connect it to Base Colour and THATS IT!
Remember I said spaghetti?
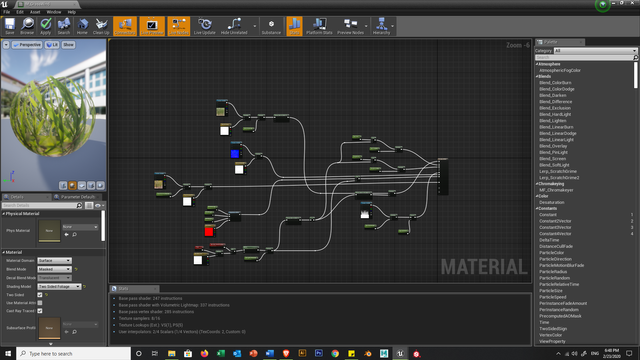
Ok, save this Material and close this window.
Back in the content browser right click on the Material and press on "Create Material Instance", make 2 of these.
Now, instead of doing this for the send texture file, we just gonna open the second instance and replace the maps there!
Don't forget to rename this Material instances Grass1 and Grass2 or how ever you want it to.
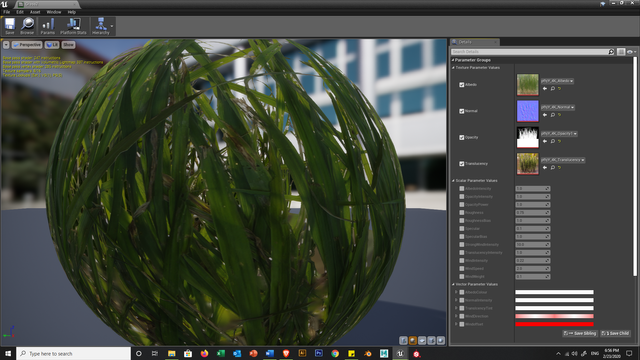
Now, in the view port let click on the Landscape button and you will see the grid in green.
This will show you how large or small the landscape the engine will generate.
On the Left side of the screen you can change the settings, I set on 7x7 as I won't make it too large.
Click the Create button and then feel free to sculpt the terrain as much as you want, don't forget to use the smooth tool to make the land slightly more natural.
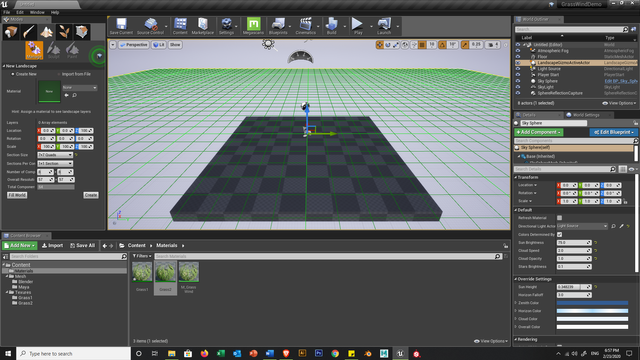
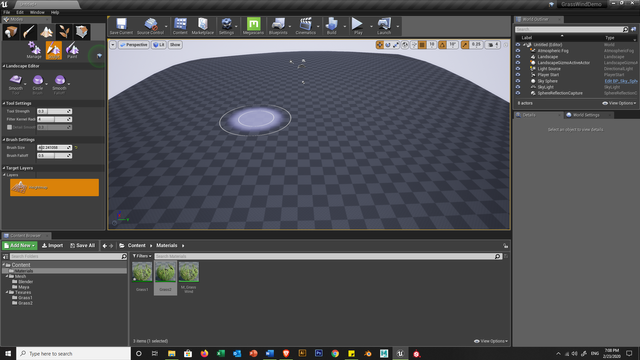
Ok, now we just need to prepare the Grass Mashed and we are good to go!
Navigate back to the Mesh Folder (if you listen to me and did it) or just find the Mesh we created and open the Grass mash.
In the window you will note that there are Materials assigned to it but it's static, these are the materials we added back in Maya/Blender.
So, now that we have our dynamic materials simply change both materials to Grass1 and Grass2.
depending on the parameter we put in the Materials it; might look kind wired how everything moves but just a little more more before we get it done.
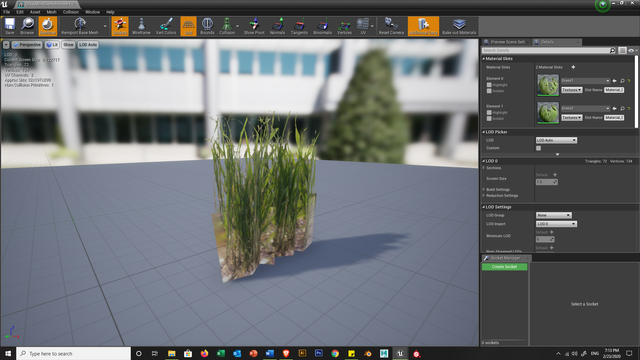
Now that our Mesh have the right Material we can go to the Foliage section and add this Mesh to the foliage bar.
Simply drag the Mesh into the bar and it will populate.
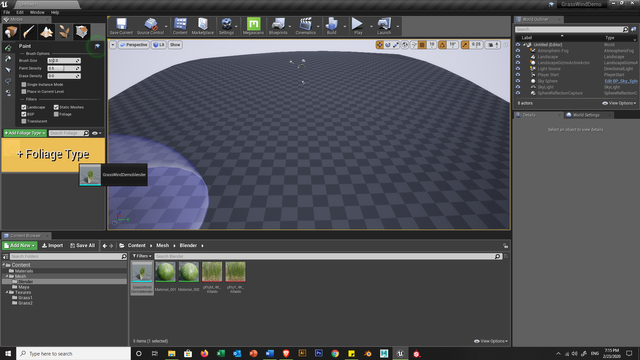
Lets set the brush to what we want by clicking the Mesh in the Foliage bar, and... Paint!
Now, this is the point where I stop and let you be creative!
You can increase the light a little bit and even add some Skylight to have a little softer tint.
either way you can tweak the grass colour and all it's setting by simply use the Instances that we created, even better get other maps and put them instead like... wheat? dry grass? other Foliage... it's up to you.
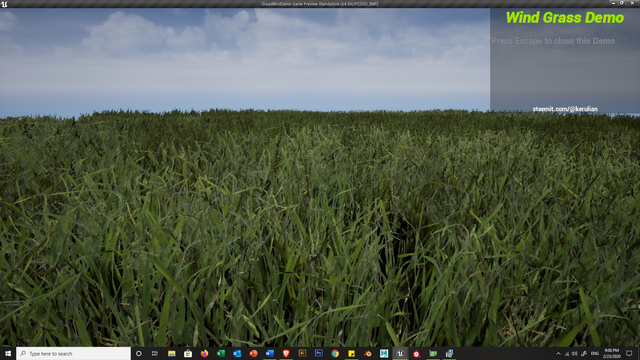
I'll just quickly make some playable program so you guy can download and enjoy or just make it your self.
Download link for demo.
https://drive.google.com/drive/folders/1-MPrZi2sq9OxwLOQsEFCSGMgb34PxmaV?usp=sharing
Congratulations @kerulian! You have completed the following achievement on the Steem blockchain and have been rewarded with new badge(s) :
You can view your badges on your Steem Board and compare to others on the Steem Ranking
If you no longer want to receive notifications, reply to this comment with the word
STOPTo support your work, I also upvoted your post!
Vote for @Steemitboard as a witness to get one more award and increased upvotes!
According to the Bible, The Mark of a True Witness: No More, No Less
Watch the Video below to know the Answer...
(Sorry for sending this comment. We are not looking for our self profit, our intentions is to preach the words of God in any means possible.)
Comment what you understand of our Youtube Video to receive our full votes. We have 30,000 #SteemPower. It's our little way to Thank you, our beloved friend.
Check our Discord Chat
Join our Official Community: https://steemit.com/created/hive-182074