Applying filter effects to image view in android development
What Will I Learn?
- Integrate the image filter library using gradle dependency
- Creating the imageview to be filtered and change the scaleType
- Apply filter effects to the imageview
Requirements
- Android Studio 3.0 (recommended)
- Gradle dependencies
- Understanding of android development using Java
Difficulty
- Basic
Tutorial Contents
Filter effects are used to change the appearance of an image or part of an image by altering the shades and colors of the pixels in some manner. For example, we give some contrast, brightness, color over lay and so on to an image. Filter effects are often used in social media application like instagram, facebook, path, snapchat, etc. In this tutorial, you will learn how to apply filter effects to image view in android. Okay, let's get started.
Integrate project via gradle
This is the most important step and don't forget this step. First of all, go to build.gradle (module:app) and add this dependency line compile 'com.github.zomato:androidphotofilters:1.0.1'. After done, hit the sync button to be able to use this photo filter library. See this image for the reference.
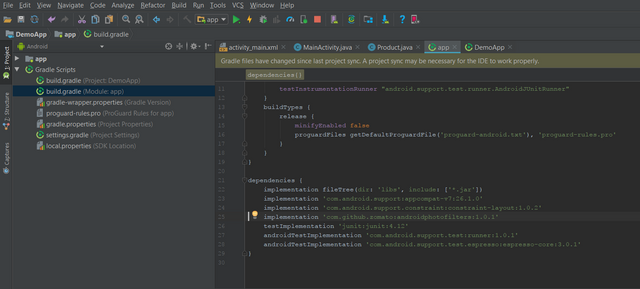
After completed, we are going to the next step. Because we can use the photofilter library now.
Creating the image and applying some effects
The next thing we are gonna do is to create the image view. Go to your activity or fragment layout.xml. We are creating the imageview that use constraintlayout as its parent. Note that our image view will have constraintTop to top of parent and constraintLeft to left of parent. So, our image is position on top left on the screen. And, we change the scaleType to centerCrop to make the image resize proportionally. Write these xml code in your layout xml,
<?xml version="1.0" encoding="utf-8"?>
<android.support.constraint.ConstraintLayout xmlns:android="http://schemas.android.com/apk/res/android"
    xmlns:app="http://schemas.android.com/apk/res-auto"
    xmlns:tools="http://schemas.android.com/tools"
    android:id="@+id/container"
    android:layout_width="match_parent"
    android:layout_height="match_parent"
    tools:context="com.professional.andri.demoapp.MainActivity">

    <ImageView
        android:id="@+id/image_for_filter"
        android:layout_width="match_parent"
        android:layout_height="300dp"
        android:scaleType="centerCrop"
        android:src="@drawable/task_3"
        app:layout_constraintTop_toTopOf="parent"
        app:layout_constraintLeft_toLeftOf="parent"/>

</android.support.constraint.ConstraintLayout>
Note that we also give the image id, so we can reference it to our Java class later. And we have the height to fixed size which is 300 dp.
Okay, now let's move on to our activity class. Don't forget to get the reference and attach to an image view variable first using this line ImageView imageView = findViewById(R.id.image_for_filter);.
Make sure to run your app first to see if the image already scale to centerCrop and its default before using filter.
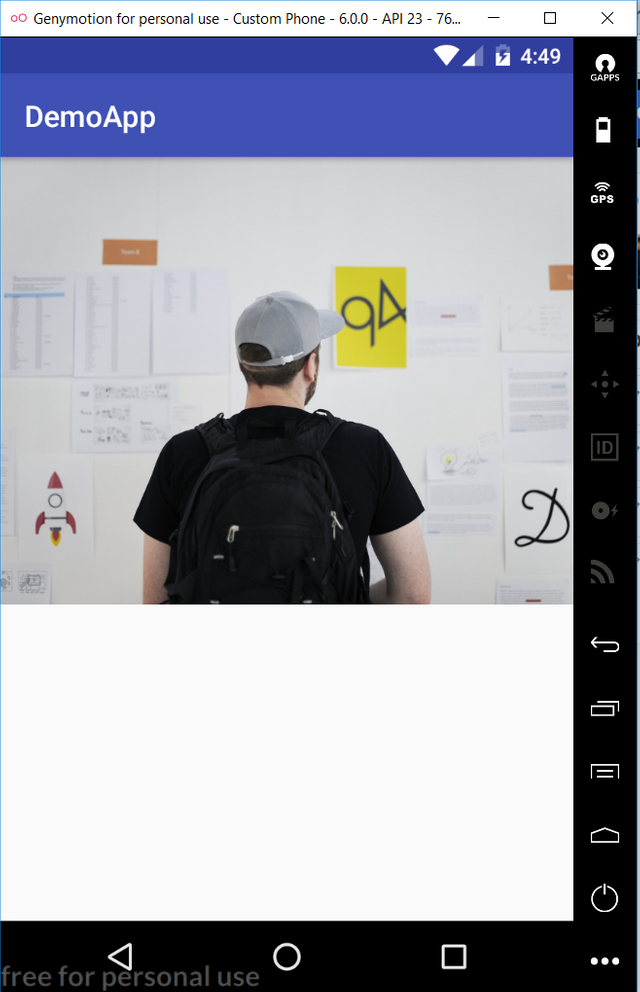
Next, we are going to import the photo filter module to our class to be able to use the image filter library properly. Below the declaration of the class, write this code.
static
    {
        System.loadLibrary("NativeImageProcessor");
    }
It will looks like this in your class.

The next thing we are gonna apply is to apply the filter. Follow these steps:
- Instantiate the Filter library first using this line
Filter imageFilter = new Filter(); - After that, we add the subfilter to that our declared imageFilter. Write down this code.
imageFilter.addSubFilter(new ColorOverlaySubfilter(100, .2f, .5f, .0f));. This color overlay subfilter that we wrote has 4 parameters. The first parameter is the depth value ranging from 0-255 {Defining intensity of color overlay}. The second parameter until the fourth parameter are red, green and blue value consecutively that between 0 - 1. So, i used the 0.2 f red value, 0.5 green value and 0.0 blue value. - Next, we must to this step, otherwise it will leads to illegalstateexception error because by default decodeResource returns immutable copy of bitmap which can't be modified . We need to change the bitmap factory options to be mutable so we can modify the bitmap of an image then we can apply filter there. Write these codes.
BitmapFactory.Options opts = new BitmapFactory.Options();
opts.inMutable = true;
- Then, we change our image view to bitmap by decodeResource using the image view we have and opts that we made earlier so we can apply filter in it. Write this code .
Bitmap bitmap = BitmapFactory.decodeResource(getResources(),
                R.drawable.task_3, opts);
- After done, we are going to process the filter using the
processFiltermethod that receive bitmap as its parameter. Write this line.Bitmap outputImage = imageFilter.processFilter(bitmap); - And set the image bitmap to see the filter effect using
setImageBitmapmethod and give the outputImage that we store the process of the filter. Write this code.
imageView.setImageBitmap(outputImage);. After all have been done, try to run your app.
You should see something like this. Notice the difference with the normal image view above that we run before.
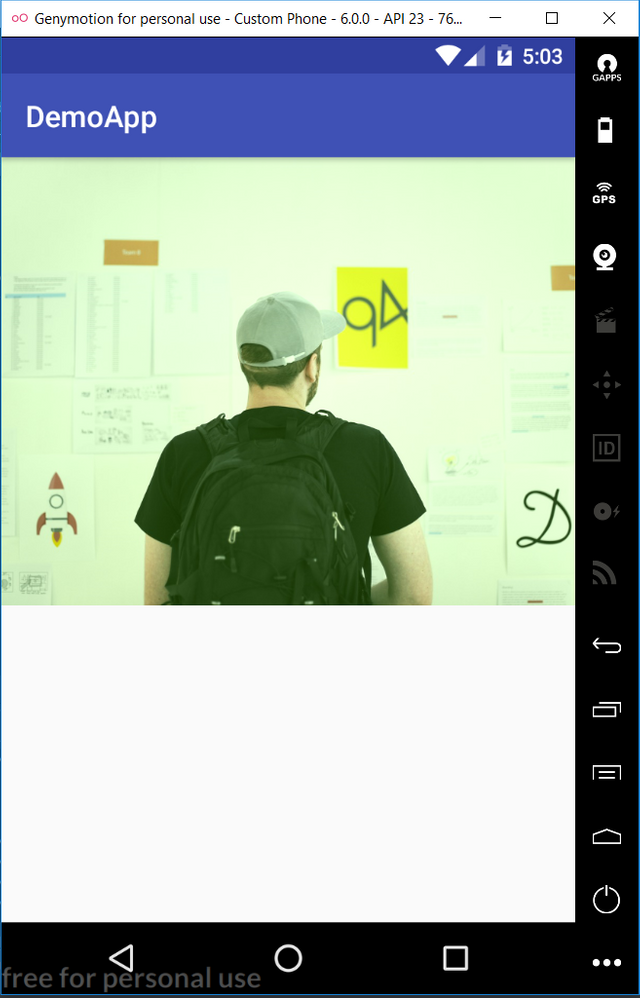
Of course we can apply additional subfilter such as tone effect though. In the filter part, add these lines.
Filter imageFilter = new Filter();
Point[] rgbKnots;
rgbKnots = new Point[3];
rgbKnots[0] = new Point(0, 0);
rgbKnots[1] = new Point(175, 139);
rgbKnots[2] = new Point(255, 255);
 imageFilter.addSubFilter(new ColorOverlaySubfilter(100, .2f, .5f, .0f));
 imageFilter.addSubFilter(new ToneCurveSubfilter(rgbKnots, null, null, null));
Notice we are using Point array that represent geometry that is from the photo library. See the newToneCurveSubfilter(rgbKnots, null, null, null));. That is we add the subfilter to the image.
The result will be like this.
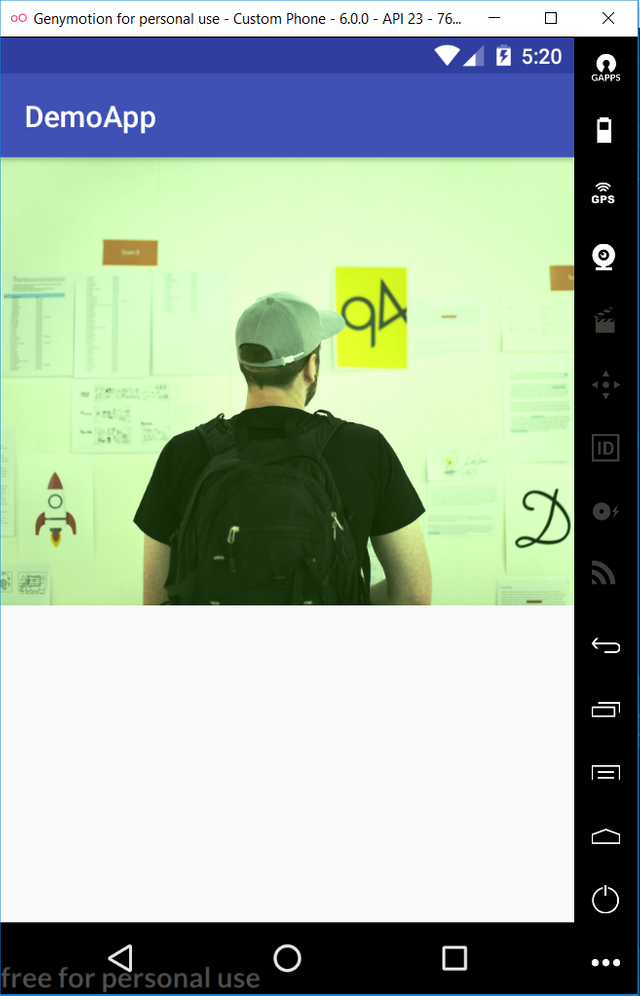
Also, we can have additional subfilter again using brightness and another filter just add the subfilter to the filter instance that follow the above steps. If we add brightness and constrast to the subfilter using these codes.
imageFilter.addSubFilter(new BrightnessSubfilter(30));
imageFilter.addSubFilter(new ContrastSubfilter(1.1f));
It will results like this.
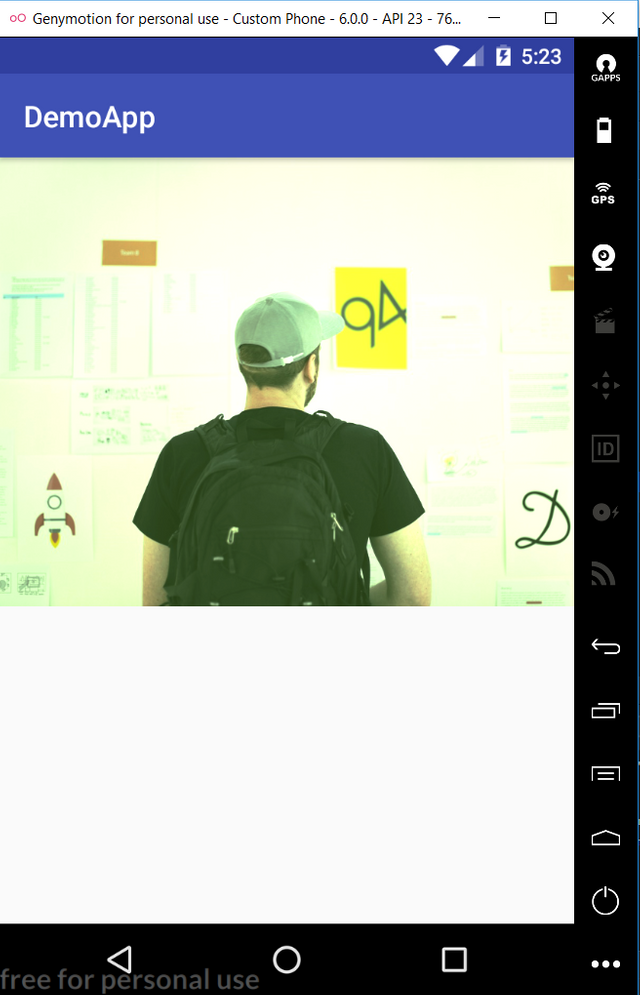
This is the final Java code. You can play around with the code of course depending on your need.
package com.professional.andri.demoapp;

import android.graphics.Bitmap;
import android.graphics.BitmapFactory;
import android.os.Bundle;
import android.support.v7.app.AppCompatActivity;
import android.widget.ImageView;

import com.zomato.photofilters.geometry.Point;
import com.zomato.photofilters.imageprocessors.Filter;
import com.zomato.photofilters.imageprocessors.subfilters.BrightnessSubfilter;
import com.zomato.photofilters.imageprocessors.subfilters.ColorOverlaySubfilter;
import com.zomato.photofilters.imageprocessors.subfilters.ContrastSubfilter;
import com.zomato.photofilters.imageprocessors.subfilters.ToneCurveSubfilter;

public class MainActivity extends AppCompatActivity {
    static
    {
        System.loadLibrary("NativeImageProcessor");
    }

    @Override
    protected void onCreate(Bundle savedInstanceState) {
        super.onCreate(savedInstanceState);
        setContentView(R.layout.activity_main);

        ImageView imageView = findViewById(R.id.image_for_filter);
        Filter imageFilter = new Filter();
        Point[] rgbKnots;
        rgbKnots = new Point[3];
        rgbKnots[0] = new Point(0, 0);
        rgbKnots[1] = new Point(175, 139);
        rgbKnots[2] = new Point(255, 255);
        imageFilter.addSubFilter(new ColorOverlaySubfilter(100, .2f, .5f, .0f));
        imageFilter.addSubFilter(new ToneCurveSubfilter(rgbKnots, null, null, null));
        imageFilter.addSubFilter(new BrightnessSubfilter(30));
        imageFilter.addSubFilter(new ContrastSubfilter(1.1f));

        BitmapFactory.Options opts = new BitmapFactory.Options();
        opts.inMutable = true;
        Bitmap bitmap = BitmapFactory.decodeResource(getResources(),
                R.drawable.task_3, opts);

        Bitmap outputImage = imageFilter.processFilter(bitmap);
        imageView.setImageBitmap(outputImage);


    }
}
The difference of normal image view and the the image with some filter effects.
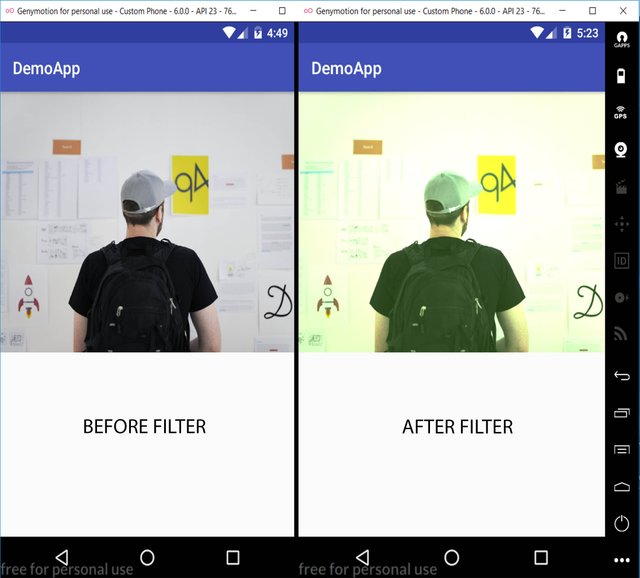
Okay, we're done. This kind of library also often used as the background effect of an app. You can also play around with the effect you want and dive in. Thank you for reading this guide.
Posted on Utopian.io - Rewarding Open Source Contributors
Thank you for the contribution. It has been approved.
You can contact us on Discord.
[utopian-moderator]
Hey @andrixyz I am @utopian-io. I have just upvoted you!
Achievements
Community-Driven Witness!
I am the first and only Steem Community-Driven Witness. Participate on Discord. Lets GROW TOGETHER!
Up-vote this comment to grow my power and help Open Source contributions like this one. Want to chat? Join me on Discord https://discord.gg/Pc8HG9x
Congratulations @andrixyz! You received a personal award!
Click here to view your Board
Do not miss the last post from @steemitboard:
Congratulations @andrixyz! You received a personal award!
You can view your badges on your Steem Board and compare to others on the Steem Ranking
Vote for @Steemitboard as a witness to get one more award and increased upvotes!