Firebase firestore in the forum application #17: Switch auth button and Create function toggle button
Repository
What Will I Learn?
- Switch auth button
- Create function toggleButton()
Requirements
- Basic Javascript
- Install Firebase
Resources
- Firebase-https://firebase.google.com/
Difficulty
Basic
Tutorial Content
In this tutorial, I will continue the tutorial series which is still related to the previous tutorial. In previous tutorials we have succeeded in creating a partial template on the application that we are using, now we can use it in various parts of the template. for those of you who are just following this tutorial, I suggest you follow my tutorial before. In this tutorial, I will continue the next tutorial to check whether the user is logged in and logged out.
Switch auth button
Here we will add additional functions when we log in to our Firebase forum application, if you look at our current application, the logout button immediately appears when we load the application we are using. You can see examples like in the picture below:
We can see in the picture above, that the logout button immediately appears even though we are not already logged in. Of course, this is a mistake if we don't fix it. To fix this we can use onAuthStateChanged(). This function will be called when we auth we change as when logging out and logging in.
- Create switch button
In this section, I will create a function that can set switches between buttons on the forum application that we have created. So later this function will set whether we have logged in or not. We will use this function in the onAuthStateChanged() function. For more details we can see in the example like the following:
var currentUser = null;
auth.onAuthStateChanged(function(user){
    if (user) {
        currentUser = user
        if(document.getElementById('owner_id').value == user.uid)
            document.getElementById('btn-edit').classList.remove('is-hidden')

        var elements = document.getElementsByClassName('replies-btn');
        for (var i = 0; i < elements.length; i++ ) {
        if(elements[i].getAttribute('owner-id') == user.uid) {
                elements[i].classList.remove('is-hidden')
            }
        }
        toggleLogin()
    } else {
        console.log("Logout")
        toggleLogin()
    }
});
This function we will add if else {} when the user has not logged in or logged out. I will create a function named toggleLogin ().
So when we don't get a response to the user callback, we will run the toggleLogin() function.
- Create toggleLogin()
In this part we will create the toggleLogin () function, that we have defined in the onAuthStateChanged () function. This function will toggle the class="is-hidden" that we have put on the <div> wrapper of each type button. Which button we will have there are two types of login and logout buttons. The following are the types of buttons in our forum application.
Login button type
    <button class="btn btn-danger" type="button" name="button" onclick="login('gmail')">Login Gmail</button>
    <button class="btn btn-primary" type="button" name="button" onclick="login('fb')">Login FB</button>
    <button class="btn btn-info" type="button" name="button" onclick="login('twitter')">Login Twitter</button>
We have several ways to login, namely from Gmail, Facebook and Twitter. These three buttons are grouped into the login button.On each button we have a login function that has the parameters of each login type login('fb').
Logout button type
<button class="btn btn-success" type="button" name="button" onclick="logout()">Log out</button>
And the second type of button is the logout button, on this button only has one button. On this button, we have a function that will be used to log out on the application logout().
For its function we can see in the sample code below:
auth.js
function toggleLogin() {
    document.getElementById('logout-wrapper').classList.toggle('is-hidden');
    document.getElementById('login-wrapper').classList.toggle('is-hidden');
}
We can see in the code above, we have created the toggleLogin () function. In this function we will get elements from id="logout-wrapper" and id="login-wrapper. We can use the toggle function to make the switch button function on the auth. e will toggle is the class="is-hidden" .classList.toggle('is-hidden');
- Modified auth button template
We have made the system in the onAuthStateChange function and now we need to modify the template we use at home.hbs. In this template, I will create a div wrapper from each type button. So we will give this wrapper an id as a marker so that later we can adjust the appearance. For more details, we can see the example below:
home.hbs
    <div id="login-wrapper">
        <button class="btn btn-danger" type="button" name="button" onclick="login('gmail')">Login Gmail</button>
       <button class="btn btn-primary" type="button" name="button" onclick="login('fb')">Login FB</button>
       <button class="btn btn-info" type="button" name="button" onclick="login('twitter')">Login Twitter</button>
    </div>
    <div id="logout-wrapper" class="is-hidden">
        <button class="btn btn-success" type="button" name="button" onclick="logout()">Log out</button>
    </div>
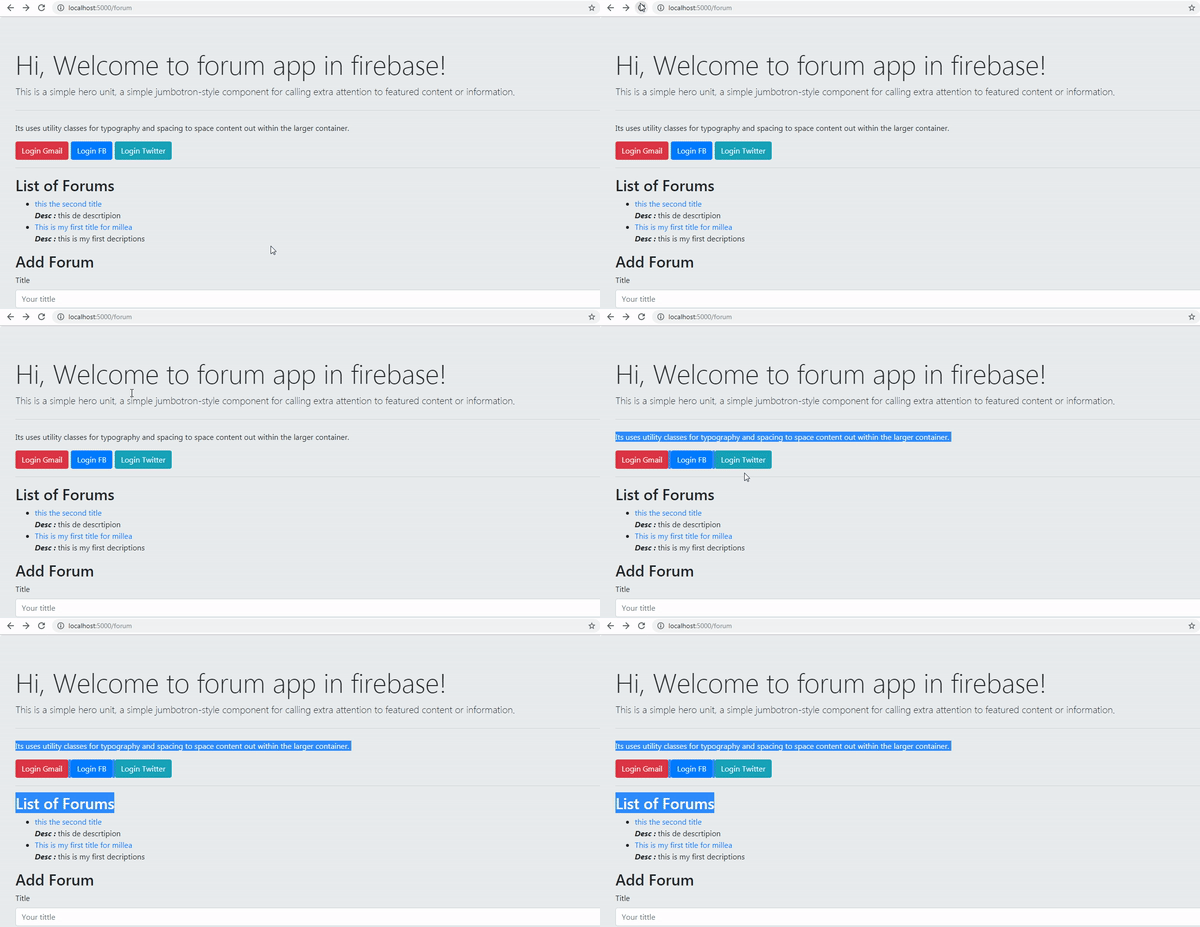
We can see in the picture above we have made two wrappers, the first is logout-wrapper and login wrapper. we have used both of these wrappers in the toggleLogin () function. By default we will use class = "is-hidden" in logout-wrapper because before the user successfully logs in we will hide the logout button first. For more details, we can see the demonstration below:
.gif)
We can see in the picture above, the picture above is a display when we have not logged in the application that we made. in the next part, we will also use the switch button on the forum-detail.hbs template.
- Switch button in forum-detail
Well in this section we will also apply the same thing in forum-detail.hbs. In this template, we will also use the logout-wrapper and login-wrapper. For more details, we can see in the example below:
forum-details.hbs
<div class="jumbotron">
    <h1 class="display-4">Hi, This the single forum. you can see any detail!</h1>
    <hr class="my-4">
    <p>It uses utility classes for typography and spacing to space content out within the larger container.</p>
    <div id="login-wrapper">
        <button class="btn btn-danger" type="button" name="button" onclick="login('gmail')">Login Gmail</button>
       <button class="btn btn-primary" type="button" name="button" onclick="login('fb')">Login FB</button>
       <button class="btn btn-info" type="button" name="button" onclick="login('twitter')">Login Twitter</button>
    </div>
    <div id="logout-wrapper" class="is-hidden">
        <button class="btn btn-success" type="button" name="button" onclick="logout()">Log out</button>
    </div>
    <hr>
    <h2>Forum {{forum.title}}</h2>
    <p>{{forum.desc}} <span><i>by: <b>{{forum.user.username}}</b></i></span></p>
    <input type="hidden" name="owner_uid" id="owner_id" value="{{forum.user.user_id}}">
    <input type="hidden" name="forum_id" id="forum_id" value="{{forum.id}}">
    <a href="#" class="btn btn-info is-hidden" id="btn-edit" onclick="showEditForm()">Edit</a>
</div>
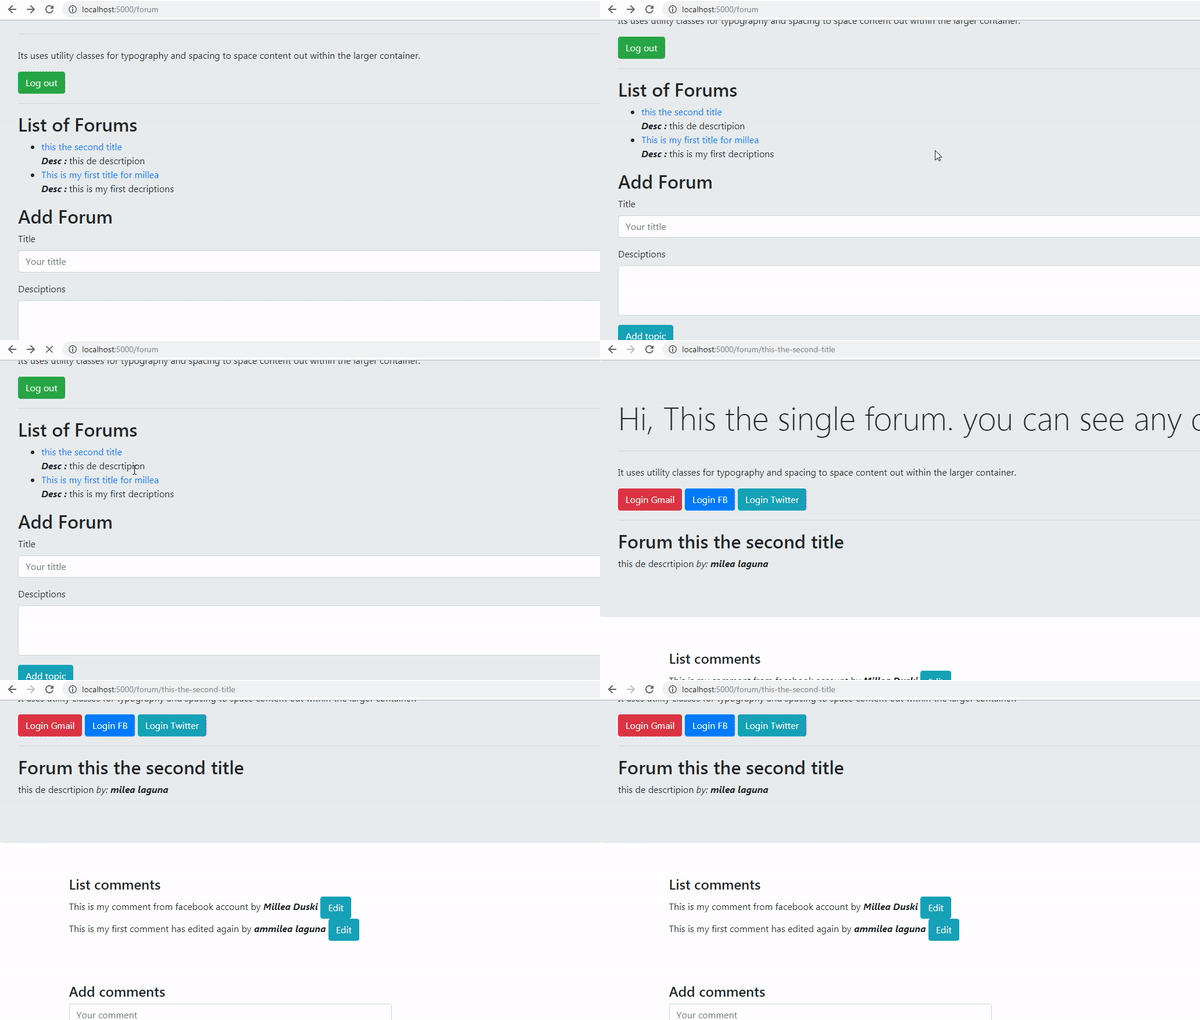
We can see in the picture above we have<div id = "login-wrapper"> and <div id = "logout-wrapper">. Well to find out if our function is running well in forum-detail.hbs we can do the test below:
.gif)
Well, we have successfully implemented the switch button system on the two templates we use at home.hbs and forum-detail.hbs. thank you for following this tutorial. hopefully, it will be useful for you, thank you
Curriculum
- Forum app
Firebase app#1, Firebase app#2, Firebase app#3, Firebase app#4, Firebase app#5, Firebase app#6, Firebase app#7, Firebase app#8, Firebase app#9, Firebase app#10,
Thank you for your contribution @duski.harahap.
After reviewing your contribution, we suggest you following points:
Your tutorial is very neat and explained. Good job!
Thanks for following some of our suggestions in your previous tutorials.
Thank you for your work in developing this tutorial.
Looking forward to your upcoming tutorials.
Your contribution has been evaluated according to Utopian policies and guidelines, as well as a predefined set of questions pertaining to the category.
To view those questions and the relevant answers related to your post, click here.
Need help? Chat with us on Discord.
[utopian-moderator]
Thank you for your review, @portugalcoin! Keep up the good work!
Hey, @duski.harahap!
Thanks for contributing on Utopian.
We’re already looking forward to your next contribution!
Get higher incentives and support Utopian.io!
Simply set @utopian.pay as a 5% (or higher) payout beneficiary on your contribution post (via SteemPlus or Steeditor).
Want to chat? Join us on Discord https://discord.gg/h52nFrV.
Vote for Utopian Witness!