Kivy: Getting Started with Kivy | Cover Basics | Tutorial #1
What Will I Learn?
From today we are going to start our Kivy tutorials, In these tutorials we'll teach you how to develop an Android App using Kivy Library. This is our first tutorial, here we'll discuss the Kivy installation and its basic that'll help us in later in creating our App.
- Basics of Kivy
- Run Simple Program in Kivy
Requirements
- Programming Essentials
- Intermediate level Python
- OOP
- Want to learn advance programming
Difficulty
- Intermediate
Tutorial Contents
- Introduction to Kivy
- Setting Environment for Kivy
- Install Kivy
- Windows
- Mac OS
- Getting Start with Kivy
Introduction to Kivy
Kivy is an Open source library of Python, developed by the Kivy organization that allow you to develop GUI for a wide selection of devices. Kivy is totally free to use and an Open Source Software distributed under the terms of MIT license. Kivy allow you to create the really smooth and user friendly interface of your app and also come up with some inbuilt components so you don’t have to build them all from scratch.
Develop multi-platform applications on Windows, Android, iOS, MacOS, and Linux, means same code for every commonplace platform. The best thing is, Kivy also support the Raspberry Pi.
Kivy was introduced in the EuroPython 2011 as a Python framework and in 2012 Kivy got a $5000 reward from the python Software Foundation for porting it to python 3.3.
Why Kivy?
It is an attractive platform for the developer because of the following reasons:
- It has built-in support for multitouch devices.
- Best way to code in Python for mobile device.
- It replaces the graphical interface like HTML and CSS
- Provide a single platform for multiple OS
What Kivy offers?
Kivy includes all the elements for building an application such as:
- Kivy include all the GUI's components like button, Text, Input, and most important all the layouts.
- It come up with wide variety for widgets that support multitouch.
- also allow you to create custom widgets
- Contains a graphic library using only OpenGL ES 2 and based on Vertex Buffer Object and shaders.
- and a lot more, you'll explore further in this tutorials series.
Kivy emerges as a successor of PyMT and is recommended for new projects.
Setting Environment for Kivy
As we mentioned above Kivy is a Library of Python, So, to work with kivy you first of all need the Python installed on your device. To install Python simply go to python website, Pyhton come up in two version python 2 and python 3, select the version you want to install on your OS, download it in your device and runs the setup.
Note: We are using Python 2 for this tutorial series.
After this you require a text editor, use whatever you want, here in this tutorial series we'll use PyCharm (a Python IDE). PyCharm offers two versions, first one is Enterprise which is paid version and second is Community version which is free to use. Its upon you which version you prefer. Here we are using community version for this tutorial series.
Install Kivy
Before we start do our work with Kivy, we need to install it on our device. The installation process of kivy differs on different OS. So, here We'll show you separately how to install it on Window and MacOS.
Install on Windows
To install the Kivy on windows you first need to install the latest version of the pip and wheel, if you already have it then upgrade it. Use this command to install or upgrade pip and wheel. Open your CMD as administrator and write the following commands.
python -m pip install --upgrade pip wheel setuptools
Then install the dependencies
For Python 2
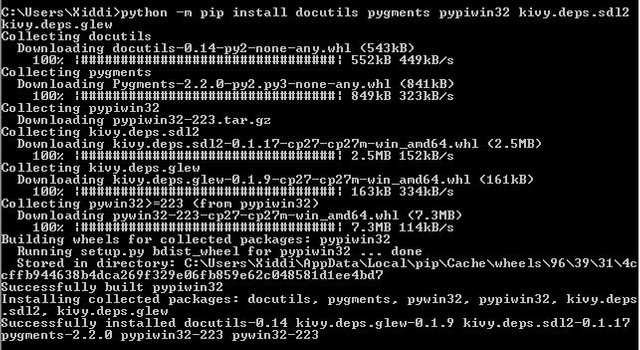
python -m pip install docutils pygments pypiwin32 kivy.deps.sdl2 kivy.deps.glew
Here we are using Python 2, so we execute the above command If you are using Python 3 then use the below command.
For Python 3
python -m pip install kivy.deps.angle
Then install another one for both
python -m pip install kivy.deps.gstreamer
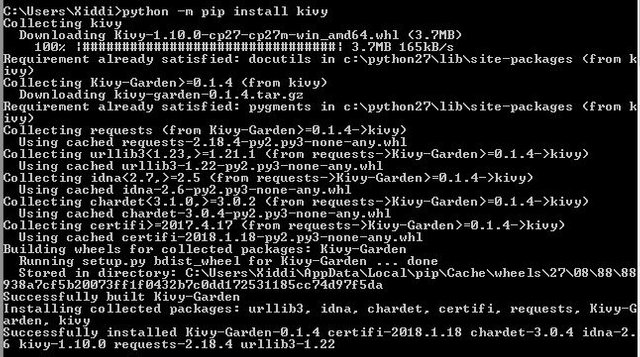
Once you install the dependencies now your device is ready to install Kivy. To install Kivy write the command
python -m pip install kivy
Finally, Kivy is installed on your window device and now we'll move to start work with Kivy.
Run First Program
To run your first program in Kivy, first of all create a new folder with First App name in this path C:\Users\Your User Name \PycharmProjects on your PC. Then open PyCharm and open this new created folder in the PyCharm. Now Create a new python File with name first_prog.py and save it in the First App folder.
Now write this code in first_prog.py, We explain it in just a moment.
# imports kivy library
import kivy

# include the latest version of the kivy
kivy.require('1.10.0')

# impost the app class of the kivy
from kivy.app import App


# Execute the method run method of **App** class
App().run()
And press the Ctrl + Shift + F10 button on your Keyboard or right click on the editor body and click on run.
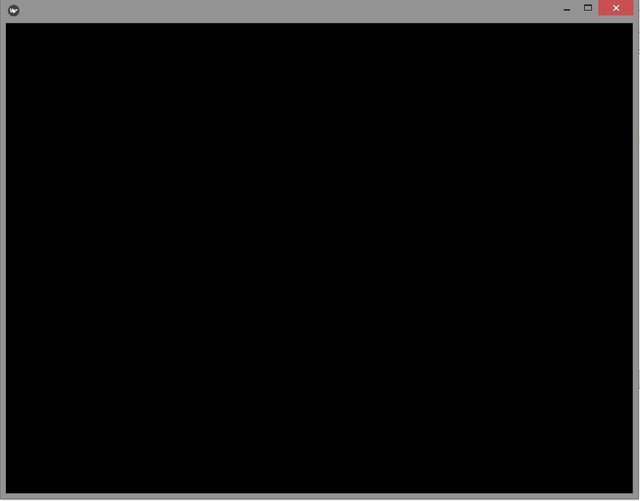
This will open a window on your computer with black background.
Here above in the code we import the App class from kivy, the **App **class provides the basis for our application. In order to develop our application we'll create the child class of the App class and then execute its run() method to run our application.
.run() execute the app in standalone mode.
The window pop-ups because of the App class. Here in our code we instantiate the **App **class and then call its run() method, at the end interpret the program and it opens up a new window.
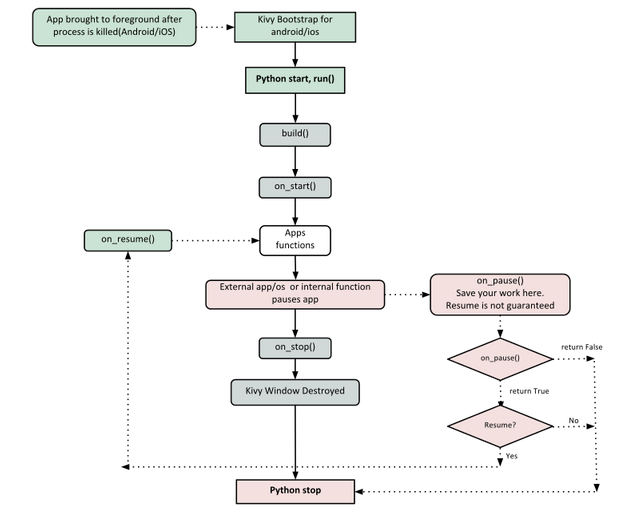
Kivy App Life Cycle
To understand the process behind the program, first you need to understand the Kivy App Life Cycle.
Install on MacOS
The installation of kivy on Mac OS is differ from installation on Windows. First download the Kivy for Python 3 from the kivy.org. To Install Kivy on Mac run these commands in the terminal.
cd <folder where you downloaded Kivy>
Then execute these commands one after another
sudo mv Kivy2.app /Applications/Kivy.app
ln -s /Applications/Kivy.app/Contents/Resources/script /usr/local/bin/kivy
Write the above code after creating file and in PyCharm as we describe above. In Mac OS you can't directly run the program in PyCharm, So, to run the program in Mac OS, open your terminal and write this command
kivy filename.py or python filename.py
It'll open up the same blank window as it did above in Windows.
Getting Start with Kivy
Above we run our first program in Kivy both in Windows and MacOS. Now, further in our tutorial we'll Windows OS to run our program. If you're using Mac them follow the same method as we explain above to run the program.
Here, we'll start our work with some basics of the Kivy.
To Show some text in our application window we'll write the following code.
import kivy
kivy.require('1.10.0')

from kivy.app import App
from kivy.uix.label import Label


class first_prog(App):
    # this method return the content that we want to show in window
    def build(self):
        # Returns the label widget.
        return Label(text="This is our First Program")


if __name__ == "__main__":
    first_prog = first_prog()
    first_prog.run()
Press the Ctrl + Shift + F10
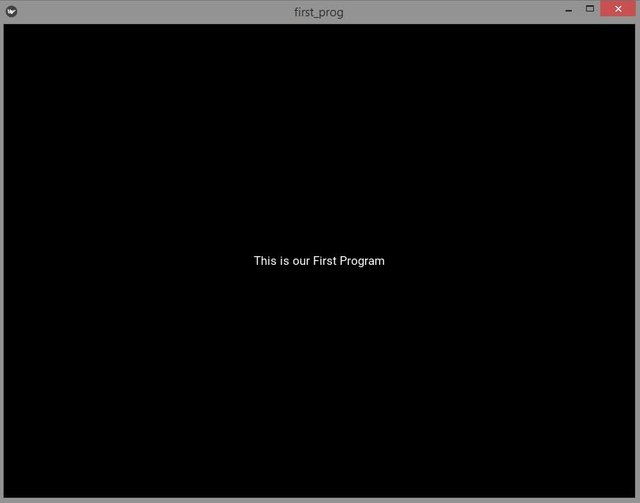
Here you can see it show the text in our app.
If we talk about the code then the above three lines of the code we already explained above. From 4th line
from kivy.uix.label import Label
We import the label widget from the kivy and you can also see the uix, it the module in the kivy that contains all the UI related elements such as widgets and layouts.
class first_prog(App):
Then we created a child class of the App class, this is your application that you are going to develop. This is the way we inherits the App class. This means App class is parent class of the first_prog and first_prog inherits all the method and attributes of the App class.
def build(self): Here, we override the build method of the App class, this method initialize your application. you can see it returns a widget, this widget will be used as root widget and added to the window. This method actually returns the contents of our application.
return Label(text="This is our First Program")
Label Widget that responsible for the text in our app.
if __name__ == "__main__":
    first_prog = first_prog()
    first_prog.run()
At the end we created the object of the class and execute the run() method. We explained above the run() method in detail.
Now, If you want to add a button in your app, just replace the label word with button in our above program.
import kivy
kivy.require('1.10.0')

from kivy.app import App
from kivy.uix.button import Button


class first_prog(App):
    # this method return the content that we want to show in window
    def build(self):
        # Returns the label widget.
        return Button(text="This is our First Program")


if __name__ == "__main__":
    first_prog = first_prog()
    first_prog.run()
Here above we use the button widget of the Kivy. See the output
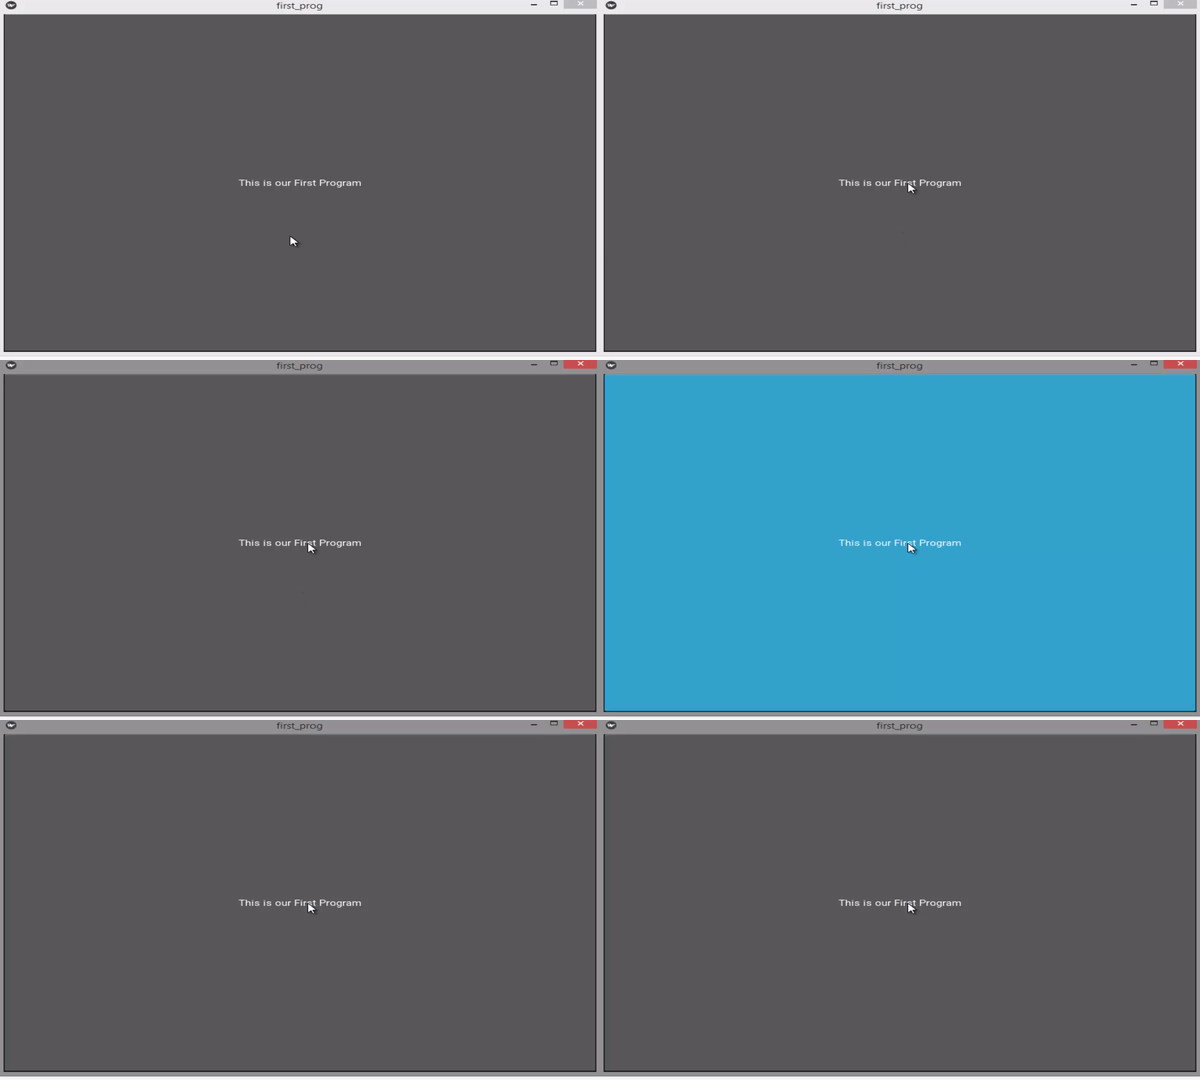
As you can see in the output, when ever we click on the button it turns blue. The button in on the whole screen of the window. Later in the tutorial, we'll also learn how to resize the button and set its position on the window. But first we cover all the basics of the kivy.
KV Language
As you know kivy is the library of the python, But Kivy come up with its own language that allow you the separate the logic from the presentation. This means that your all logical code will be in separate file and the UI code in another separate file. Isn't this is cool?
Kivy Language, also know as kivylang, it come up really clean syntax that allow you the develop the UI.
For Example: Crate two files with name main.py and text.kv
# main.py
import kivy
kivy.require('1.9.0')

from kivy.app import App
from kivy.uix.button import Label


class TextApp(App):
    # This returns the content we want in the window
    def build(self):
        # Return a label widget with Hello Kivy
        return Label();


if __name__ == "__main__":

    textapp = TextApp()
    textapp.run()
# text.kv
<Label>:
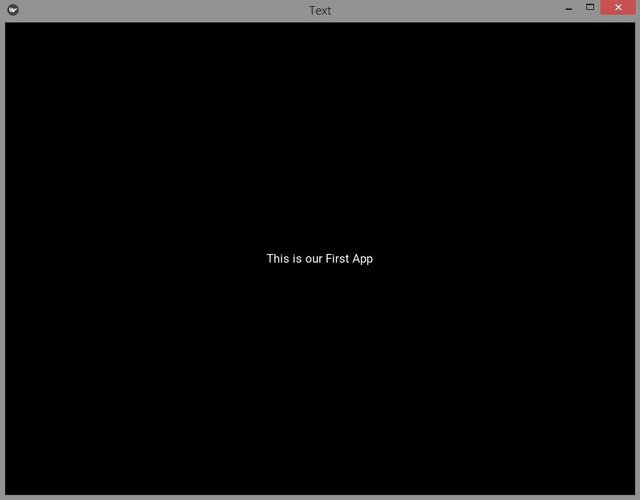
    text: "This is our First App"
Run it in pyCharm.
Output:
You can see the we separate logical layer form presentation layer. This works fine, but the question is how kivy knows that these both files are related to each other. This is the little confusing thing. But if you carefully see our python code the our class name is TextApp that we inherits form App class. And now see the .kv file name its name is text. The first part of the class name coincide with the .kv file name. This is the reason kivy understands these both files are related to each other.
For Example: if the .kv file name is box.kv then the class name in the python file must be BoxApp
To change the size of the text add the code in text.kv
<Label>:
    text: "This is our First App"
    font_size: "20sp"
Adding the Input field
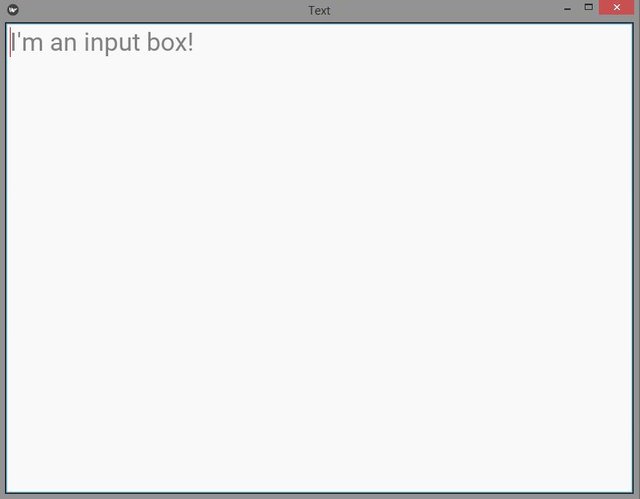
To add the input field in the app, Kivy give us TextInput widget import it in the app and use it.
# main.py
import kivy
kivy.require('1.9.0')

from kivy.app import App
from kivy.uix.textinput import TextInput


class TextApp(App):
    # This returns the content we want in the window
    def build(self):
        # Return a label widget with Hello Kivy
        return TextInput();


if __name__ == "__main__":

    textapp = TextApp()
    textapp.run()
# text.kv

<TextInput>:
    hint_text: "I'm an input box!"
    font_size: 32
Output:
Curriculum
Posted on Utopian.io - Rewarding Open Source Contributors


Your contribution cannot be approved because it does not follow the Utopian Rules.
You can contact us on Discord.
[utopian-moderator]