GIMP (open-source) tutorial: Quickmask
Introduction
Photos can be digitally altered to come up with visually stunning images. This can be done by using the Photoshop software or through raster graphics editor. Some of these programs are offered for free to online users like the GIMP software.
Editing a photo can be a tedious process, but if the intention is to create visuals that are captivating then investing time and effort is needed. The good thing about using GIMP, other than the software being a free and open source editor, is it is fairly easy to use.
The Vignette Effect
To create a dramatic impression, you can work on adding the vignette effect on your photo. This photography style refers to the reduction of brightness at the borders of the snap, while the image’s center remains vibrant.
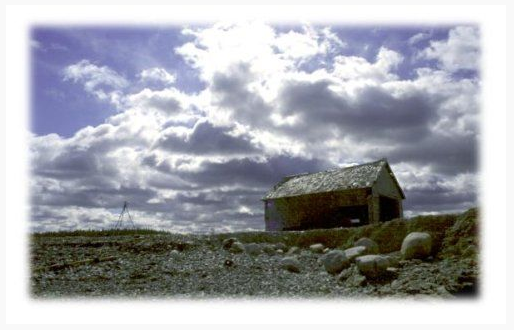
The QuickMask feature of GIMP can be used to achieve this effect. It was first introduced on the GIMP 1.1.7 version of the software. The functionality includes the paintbrush, plug-in filter, and eraser, among others. These pixel-changing tools are convenient means of altering a portion of the photo.
Step 1
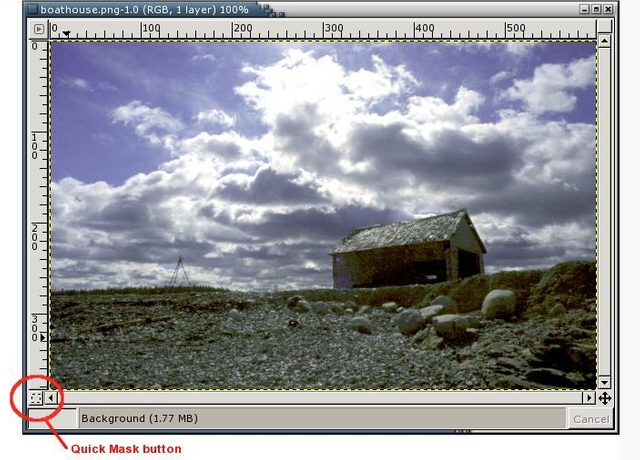
Just like in any other photo editing tool, the first thing to do is to load the picture you want to work on. Once the photo has been successfully loaded, locate the QuickMask control button. This function is located on the bottom-left side of the photo you have just uploaded.
Step 2
Next is to make a rectangular selection on the image. This can be done by dragging your mouse across the photo and capturing a portion of the image using the rectangular selection tool. The area outside the rectangle is where you will apply the vignette effect.
Click on the QuickMask icon located at the bottom-left corner of the image.

Step 3
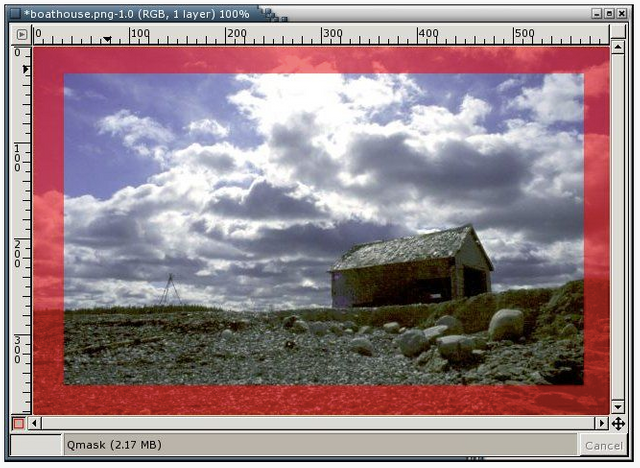
A translucent red mask will appear on your image. The mask is the border of your photo where the effect will be applied.
If you are to click on the dashed QuickMask button again, you can go back to the normal selection mode. In this mode, the reverse will happen: everything that doesn’t have a highlight will be selected, while anything that has the red mask will not.
Right click on the photo and choose the filters from the menu. We will play with this effect
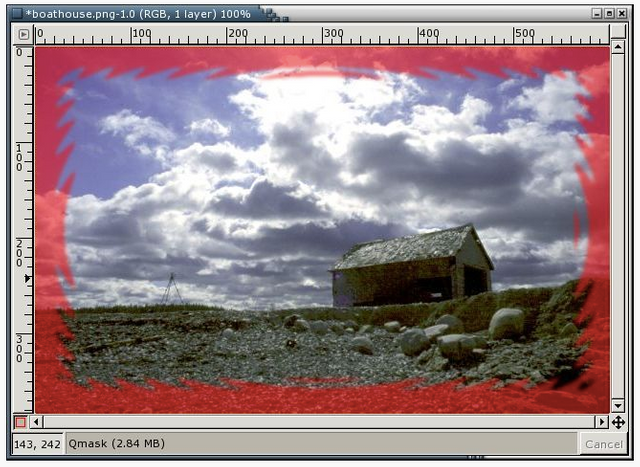
Filters → Distorts → Waves
Apply the chosen filter and notice what happened to the red mask.
Step 4
Work on adding another effect to the way mask. This time choose the following filter:
Filters → Blur → Gaussian Blur (RLE)

Step 5
Once the wavy soft edges of the mask appear, click on the QuickMask button again. This will convert the mask back into a selection.
Step 6
Notice how QuickMask made the selection follow the mask. From here, you can make modifications to the selection and even make a new selection.
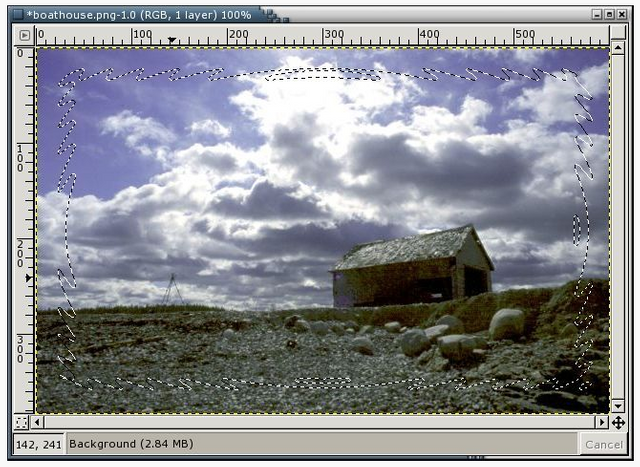
For this quick tutorial, our last step is to add a soft white fade into the background. This can be achieved by right-clicking on the image and choose these options:
Select → Invert
Edit → Fill with BG Color
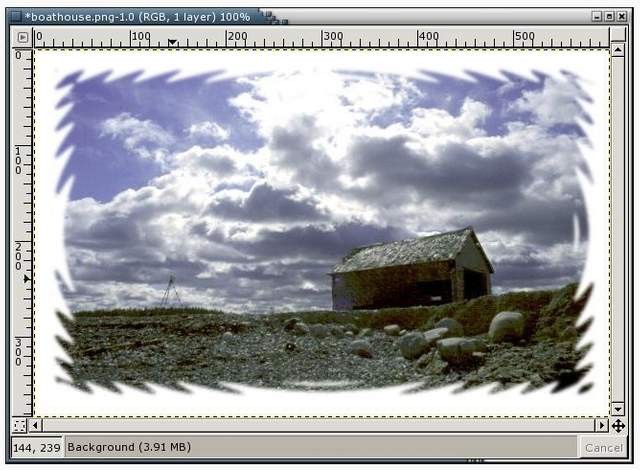
There are several other effects that you can explore to further enhance your image.
Among these options include
Filters → Noise → Spread
You can set the vertical and horizontal to 11 to achieve this effect.
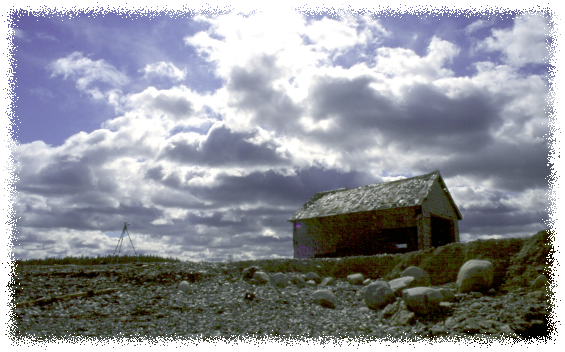
Exploring the blurring option and choosing
the plugin:
Filters → Distorts →Newsprint will yield this filter.
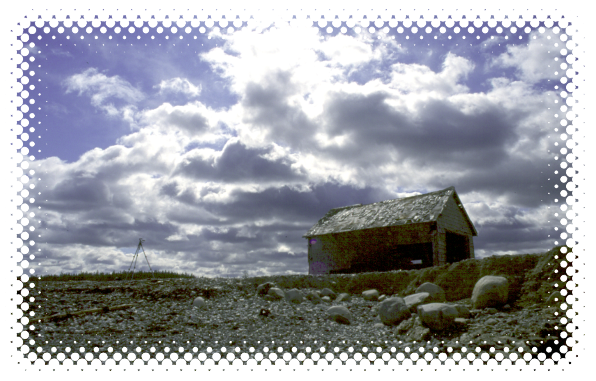
Lastly, you can skip blurring and still go with Waves plus this option:
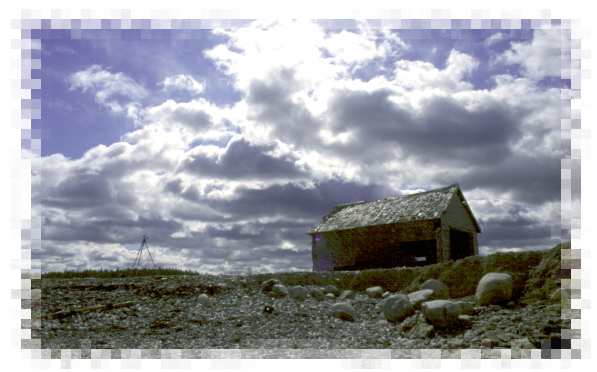
Filters →Blur → Pixelize to achieve this effect
THANK YOU
Posted on Utopian.io - Rewarding Open Source Contributors
Thank you for the contribution. It has been approved.
You can contact us on Discord.
[utopian-moderator]
Hey @osblog I am @utopian-io. I have just upvoted you!
Achievements
Suggestions
Get Noticed!
Community-Driven Witness!
I am the first and only Steem Community-Driven Witness. Participate on Discord. Lets GROW TOGETHER!
Up-vote this comment to grow my power and help Open Source contributions like this one. Want to chat? Join me on Discord https://discord.gg/Pc8HG9x