How to use Bootstrap-slider
In this tutorial we will learn about bootstrap-slider. Bootstrap-slider is javascript library for modify slider with bootstrap as framework css.
What Will I Learn?
- Installing Bootstrap from CDN
- Installing Bootstrap-slider from CDN
- Using Bootstrap-slider to make slider
Requirements
- Knowledge of HTML and CSS
- Knowledge of Bootstrap (Framework CSS)
- Knowledge of Javascript
Difficulty
- Basic
Tutorial Contents
Before we start using bootstrap-slider we must have a project file. You can make project file with anything name as you prefer. Then in project file must declare some code, include installing bootstrap with CDN.
Installing
To installing bootstrap and bootstrap slider we must import the library source using CDN. Then put bootstrap and bootstrap-slider css before end of </head> head tag and import bootstrap-slider javascript library and put before end of </body> body tag. Here is the code:
<html>
  <head>
    <title>Bootstrap Slider</title>
    <link rel="stylesheet" href="https://cdnjs.cloudflare.com/ajax/libs/twitter-bootstrap/3.3.7/css/bootstrap.min.css">
    <link rel="stylesheet" href="https://cdnjs.cloudflare.com/ajax/libs/bootstrap-slider/10.0.0/css/bootstrap-slider.min.css">
  </head>
  <body>
    <script src="https://cdnjs.cloudflare.com/ajax/libs/bootstrap-slider/10.0.0/bootstrap-slider.min.js"></script>
  </body>
</html>
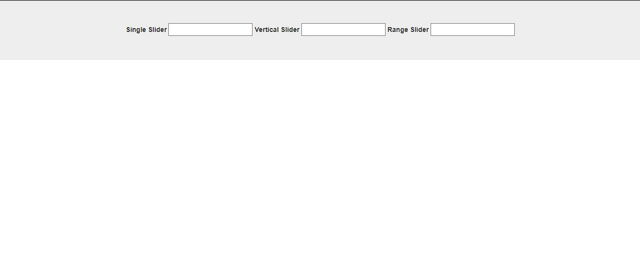
Now, we successfully installing bootstrap-slider with blank page.
Usage
To start using bootstrap-slider we must declare some element tag to trigger the slider, in this tutorial I'll make 3 sample of slider. First slider to initialize basic slider with basic as id name. Second, initialize vertical id to make vertical slider and then range to make slider with range value. Here are the codes:
<html>
  <head>
    <title>Bootstrap Slider</title>
    <link rel="stylesheet" href="https://cdnjs.cloudflare.com/ajax/libs/twitter-bootstrap/3.3.7/css/bootstrap.min.css">
    <link rel="stylesheet" href="https://cdnjs.cloudflare.com/ajax/libs/bootstrap-slider/10.0.0/css/bootstrap-slider.min.css">
  </head>
  <body>
      <div class="jumbotron text-center">
      <label>Single Slider</label>
      <input id="basic" type="text" data-slider-min="0" data-slider-max="100" data-slider-step="5" data-slider-value="15"/>
      <label>Vertical Slider</label>
      <input id="vertical" type="text" data-slider-min="0" data-slider-max="100" data-slider-step="10" data-slider-value="25"/>
      <label>Range Slider</label>
      <input id="range" type="text"/>
    </div>
    <script src="https://cdnjs.cloudflare.com/ajax/libs/bootstrap-slider/10.0.0/bootstrap-slider.min.js"></script>
  </body>
</html>
This code declare 3 input for triggering the slider. The view just show 3 label and input with jumbotron component from bootstrap css. In basic and vertical input we initialize some data to setup value of the slider. In this tutorial we initialize min and max data slider for set minimum and maximum value of slider. data-slider-value to set the current value and data-step to setup interval value of slider. It's look like:

Now to show the slider must add some code in script tag and put in before end of body tag. Then we initialize javascript code for rendering the input element to slider. First, we declare code for make basic slider and we use the basic id to triggering the slider. Here the code:
<html>
  <head>
    <title>Bootstrap Slider</title>
    <link rel="stylesheet" href="https://cdnjs.cloudflare.com/ajax/libs/twitter-bootstrap/3.3.7/css/bootstrap.min.css">
    <link rel="stylesheet" href="https://cdnjs.cloudflare.com/ajax/libs/bootstrap-slider/10.0.0/css/bootstrap-slider.min.css">
  </head>
  <body>
      <div class="jumbotron text-center">
      <label>Single Slider</label>
      <input id="basic" type="text" data-slider-min="0" data-slider-max="100" data-slider-step="5" data-slider-value="15"/>
      <label>Vertical Slider</label>
      <input id="vertical" type="text" data-slider-min="0" data-slider-max="100" data-slider-step="10" data-slider-value="25"/>
      <label>Range Slider</label>
      <input id="range" type="text"/>
    </div>
    <script src="https://cdnjs.cloudflare.com/ajax/libs/bootstrap-slider/10.0.0/bootstrap-slider.min.js"></script>
    <script>
      var slider = new Slider("#basic", {
        tooltip: 'always'
      });
    </script>
  </body>
</html>
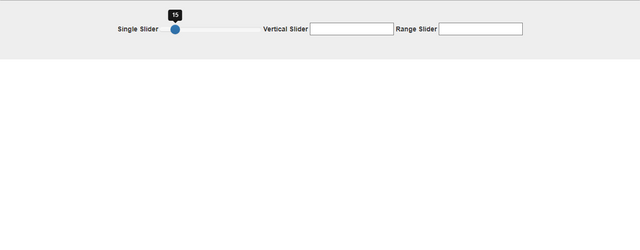
This code to make single slider with tooltip to show the value of slider. its look like:

Next step for second slider we use the vertical id to make vertical slider. With data option from input element. Now, we code slider to render vertical slider. Here are the code:
<html>
  <head>
    <title>Bootstrap Slider</title>
    <link rel="stylesheet" href="https://cdnjs.cloudflare.com/ajax/libs/twitter-bootstrap/3.3.7/css/bootstrap.min.css">
    <link rel="stylesheet" href="https://cdnjs.cloudflare.com/ajax/libs/bootstrap-slider/10.0.0/css/bootstrap-slider.min.css">
  </head>
  <body>
      <div class="jumbotron text-center">
      <label>Single Slider</label>
      <input id="basic" type="text" data-slider-min="0" data-slider-max="100" data-slider-step="5" data-slider-value="15"/>
      <label>Vertical Slider</label>
      <input id="vertical" type="text" data-slider-min="0" data-slider-max="100" data-slider-step="10" data-slider-value="25"/>
      <label>Range Slider</label>
      <input id="range" type="text"/>
    </div>
    <script src="https://cdnjs.cloudflare.com/ajax/libs/bootstrap-slider/10.0.0/bootstrap-slider.min.js"></script>
    <script>
      var slider = new Slider("#basic", {
        tooltip: 'always'
      });
     var slider = new Slider("#vertical", {
        orientation: 'vertical',
        tooltip: 'always'
      });
    </script>
  </body>
</html>
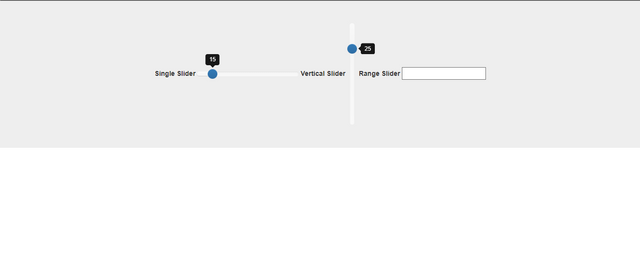
The different of basic slider with vertical slider is option value. To make vertical slider we just put orientation option to vertical value and we can see vertical slider.

Last, we setup for range slider. In this slider we setup data-slider in javascript code. so bootstrap-slider is flexible to setup the data. Here is the code:
<html>
  <head>
    <title>Bootstrap Slider</title>
    <link rel="stylesheet" href="https://cdnjs.cloudflare.com/ajax/libs/twitter-bootstrap/3.3.7/css/bootstrap.min.css">
    <link rel="stylesheet" href="https://cdnjs.cloudflare.com/ajax/libs/bootstrap-slider/10.0.0/css/bootstrap-slider.min.css">
  </head>
  <body>
      <div class="jumbotron text-center">
      <label>Single Slider</label>
      <input id="basic" type="text" data-slider-min="0" data-slider-max="100" data-slider-step="5" data-slider-value="15"/>
      <label>Vertical Slider</label>
      <input id="vertical" type="text" data-slider-min="0" data-slider-max="100" data-slider-step="10" data-slider-value="25"/>
      <label>Range Slider</label>
      <input id="range" type="text"/>
    </div>
    <script src="https://cdnjs.cloudflare.com/ajax/libs/bootstrap-slider/10.0.0/bootstrap-slider.min.js"></script>
    <script>
      var slider = new Slider("#basic", {
        tooltip: 'always'
      });
     var slider = new Slider("#vertical", {
        orientation: 'vertical',
        tooltip: 'always'
      });
      var slider = new Slider("#range", {
        min: 0,
        max: 100,
        value: [50, 80],
        range: true,
        tooltip: 'always'
      });
    </script>
  </body>
</html>
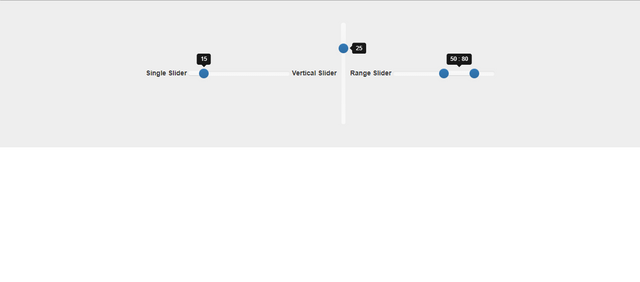
In this code we setup value from 0 to 100 for min and max data-slider and setup value in array to make range slider in this case setup value from 50 to 80 and setup tooltip to always show value of the slider. It's look like:

Conclusion
This tutorial just showed you a base practise. You can setup and modify the slider as you need, just play around the bootstrap-slider library. If you want see more options and documentation of this library you can find here bootstrap-slider.
If you want see the demo and fully code of this tutorial you can check here:
See the Pen Bootstrap-slider by Rio Dwi Prabowo (@riyos94) on CodePen.
Posted on Utopian.io - Rewarding Open Source Contributors
Thank you for the contribution. It has been approved.
You can contact us on Discord.
[utopian-moderator]
Hey @riyo.s94 I am @utopian-io. I have just upvoted you!
Achievements
Suggestions
Get Noticed!
Community-Driven Witness!
I am the first and only Steem Community-Driven Witness. Participate on Discord. Lets GROW TOGETHER!
Up-vote this comment to grow my power and help Open Source contributions like this one. Want to chat? Join me on Discord https://discord.gg/Pc8HG9x