Tutorial Install Genymotion di PC
Genymotion adalah sebuah aplikasi Emulator Android atau Android Virtual Device (AVD) dimana kamu bisa menjalankan aplikasi Android di komputer kamu. Dengan menggunakan Genymotion kamu bisa mencoba aplikasi Android gratis di komputer kamu. Genymotion memiliki performa yang cepat sehingga tidak menyulitkan ketika digunakan. Untuk kamu yang pernah menggunakan BlueStacks, maka Genymotion merupakan emulator serupa tetapi memiliki performa lebih cepat, dilengkapi dengan sensor seperti baterai, GPS dan Akselerometer.
Genymotion is an Android or Android Device Emulator application (AVD) where you can run Android applications on your computer. By using Genymotion you can try free Android apps on your computer. Genymotion has a fast performance so it is not difficult when used. For you who have used BlueStacks, Genymotion is a similar but faster performing emulator, equipped with sensors such as battery, GPS and Accelerometer.
Cara Instal Genymotion :
how to install genymotion :
[Step 1] Anda harus daftar akun Genymotion dulu dan dapatkan Genymotion terbaru secara gratis. Silahkan Daftar DISINI Klick Sign Up untuk Daftar,lalu masukkan Alamat Email dan password Anda. Setelah anda berhasil Daftar Silahkan anda buka Email anda dan Konfirmasikan Email yg sudah di kirimkan pihak Genymotion kepada anda.
You must first register your Genymotion account and get the latest Genymotion for free. Please Register HERE Klick Sign Up for List, then enter your Email Address and password. After you successfully Register Please open your email and Confirm Email that has been sent the Genymotion to you.
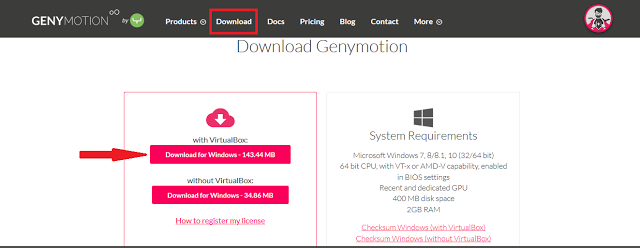
[Step 2] Selanjutnya Login dengan akun anda dan Download aplikasi Genymotion dengan cara pilih Download - With Virtual Box.
Next Login with your account and Download Genymotion application by selecting Download - With Virtual Box.
[Step 3] Setelah aplikasi Genymotion sudah kalian download, instal seperti biasa, Proses instal biasanya memakan waktu kurang lebih 5 menitan dan tunggu sampai proses instal selesai sampai muncul tampilan instalVirtualBox, jika muncul VirtualBox seperti gambar dibawh ini jangan di close tapi lakukan instal virtualbox tersebut dan ikuti langkah-langkah.
After the Genymotion application you have downloaded, install as usual, Install process usually takes approximately 5 minutes and wait until the install process is complete until the display appears instalVirtualBox, if it appears VirtualBox as shown below do not close but do install virtualbox and follow the steps, step.

[Step 4] Tekan tombol Next untuk melanjutkan instal virtualBox sampai muncul tampilan seperti pada gambar dibawah ini.
Press the Next button to continue installing virtualBox until the display appears as shown below.
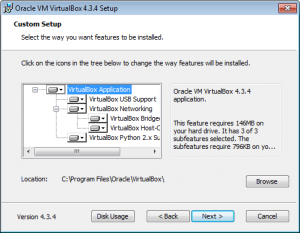
[Step 5] Tidak usah dihiraukan pada tampilan diatas,langsung aja tekan tombol Next dan sampai muncul tampilan seperti pada gambar dibawah ini.
Do not be ignored in the above display, immediately wrote press the Next button and until the display appears as in the picture below.
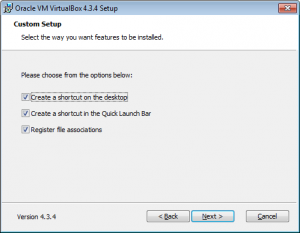
[Step 6] Secara default pada pilihan cek tersebut sudah tercentang semua akan tetapi jika tidak ingin merubah silahkan saja dan langsung tekan tombol Next sampai muncul tampilan seperti pada gambar dibawah ini.
By default on the check option is checked all but if not want to change please just and immediately press the Next button until the display appears as shown below.
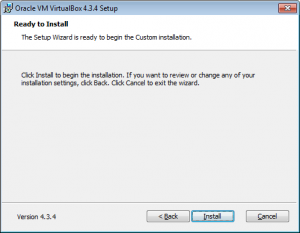
[Step 7] Pada tampilan di atas baru akan dimulai instal aplikasi pada komputer dan tekan tombol Install, maka akan muncul tampilan proses instal seperti pada gambar dibawah ini.
In the above view will begin to install the application on the computer and press the Install button, it will display the installation process as shown below.
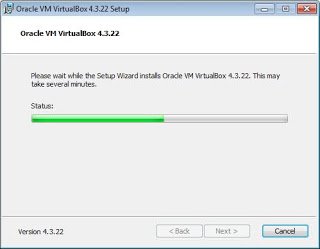
[Step 8] Pada proses instal ini lumayan cukup lama kurang lebihnya 5 menitan dan tunggu sampai selesai maka akan muncul tampilan seperti pada gambar dibawah ini
In the install process is quite long enough for less than 5 minutes and wait until finished it will appear as shown in the picture below
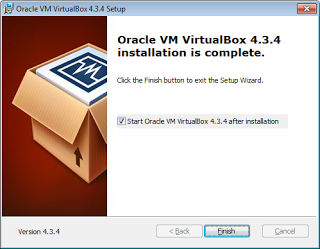
[Step 9] Jika ingin menjalankan virtualbox maka centang pada Start Oracle VM VirtualBox, kemudian tekan tombol Finish maka akan akan melanjutkan proses instal genymotion, ketika proses instal virtualbox selesai itu berarti proses instal genymotion juga sudah selsai seperti pada gambar dibawah ini.
If you want to run virtualbox then check on Start Oracle VM VirtualBox, then press Finish button will will continue the process of installing genymotion, when the process of install virtualbox is finished that means installation process genymotion also have selsai like in picture below.
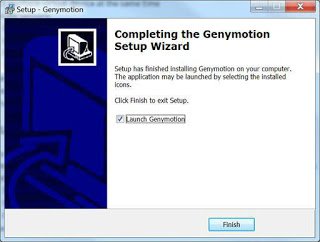
[step 10] Centang pada Launch genymotion dengan tujuan ketika tombol Finish ditekan aplikasi genymotion dapat langsung berjalan.Tunggu beberapa detik aplikasi akan terbuka seperti pada gambar dibawah ini
Check on Launch genymotion with the purpose when the Finish button is pressed genymotion application can be directly running. Wait a few seconds the application will open as shown below
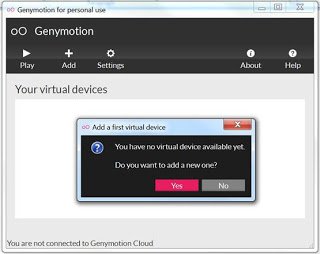
[Step 11] Pada halaman ini terdapat sebuah peringatan untuk membuat device baru yang nantinya digunakan sebagai emulator.maka pilih saja tombol Yes dan akan muncul tampilan login seperti pada gambar dibawah ini.
On this page there is a warning to create a new device that will be used as emulator. Then just select the Yes button and the login screen will appear as shown below.
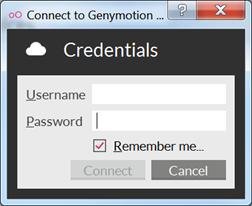
[Step 12] Sebelum melakukan login pada genymotion pastikan komputer teman koneksi dengan internet. Jika sudah terkoneksi dengan internet masukan akun genymotion yang telah dibuat, masukan username dan password dan pastikan centang Remember me agar akun anda tersimpan di setting genymotion dan tidak perlu sign in lagi. Jika sudah tekan tombol Connect dan akan muncul tampilan seperti pada gambar dibawah ini.
Before logging on genymotion make sure your friends computer connection with internet. If already connected to the internet input genymotion account that has been created, enter the username and password and make sure to check Remember me to keep your account in genymotion setting and no need to sign in again. If you already press the Connect button and will appear as shown in the picture below.
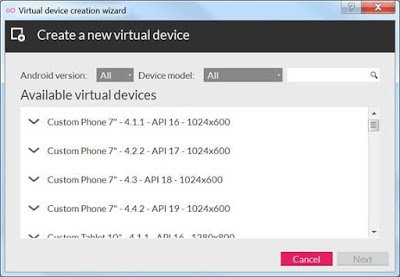
[step 13] Pilih salah satu device yang terdapat pada genymotion, pada tutorial ini saya menggunakan Google Nexus 7 - 4.3 - API 18 - 800x1280 (sesuaikan dengan spech komputer karena akan berpengaruh terhadap kinerja komputer) lalu tekan tombol Next dan akan muncul tampilan seperti pada gambar dibawah ini
Select one of the devices found in genymotion, in this tutorial I use Google Nexus 7 - 4.3 - API 18 - 800x1280 (adjust to computer spech as it will affect computer performance) then press Next button and will appear as shown in the picture below
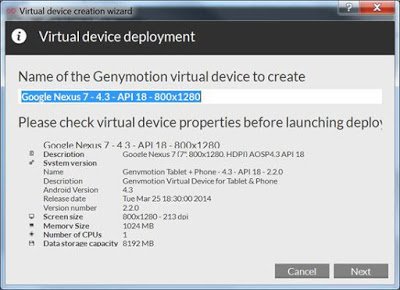
[Step 14] Tampilan gambar diatas hanya menerangkan informasi secara lengkap mengenai device yang telah diuat, langsung saja tekan tombol Next dan akan muncul tampilan seperti pada gambar dibawah ini.
Display the picture above just explain the complete information about the device that has been strengthened, just press the Next button and will appear as shown in the picture below.
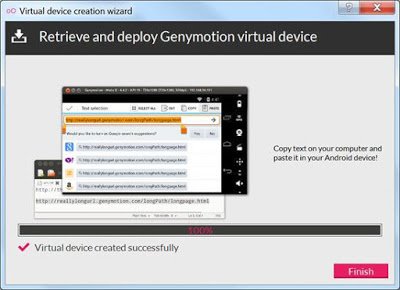
Proses download aplikasi default dari genymotion, proses download ini kira kira membutuhkan waktu kurang lebih 10 menitan tergantung koneksi kalian, memang cukup lama proses download ini dan tunggu sampai proses download selesai. Jika sudah selsai tekan tombol Finish dan akan muncul tampilan seperti pada gambar dibawah ini.
The process of downloading the default application from genymotion, this download process approximately takes about 10 minutes depending on your connection, it is quite a long process of downloading this and wait until the download is complete. If it is finished press the Finish button and will appear as shown in the picture below.
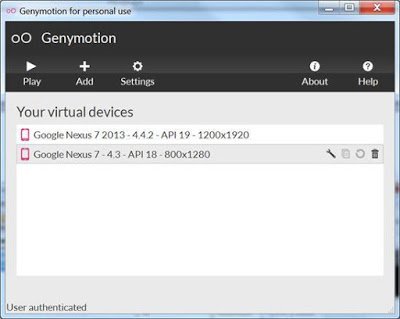
[Step 16] Proses download selesai tinggal jalankan device dengan cara klik pada device yang sudah dibuat tadi lalu takan Play dan akan muncul tampilan proses loading untuk menjalankan emulator genymotion dan tunggu beberapa menit dan akan muncul tampilan seperti pada gambar dibawah ini.
The download process is finished live run the device by clicking on the device that was made earlier then takan Play and will display the loading process to run the emulator genymotion and wait a few minutes and will appear as shown in the picture below.
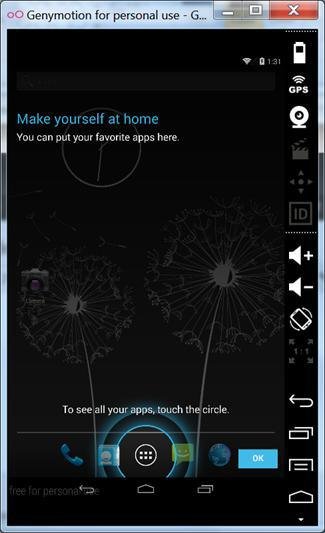
well, now you can enjoy android simulator.
Thank for visiting my blog, re-steem, upvote and follow @taufik
Posted on Utopian.io - Rewarding Open Source Contributors
Helo, apa kabar @taufik? Kami upvote yah..
Oke. Thanks
Hi! I am a robot. I just upvoted you! I found similar content that readers might be interested in:
http://teknologinyata.blogspot.com/2016/05/cara-menginstal-genymotion-dan-plugin.html
Your contribution cannot be approved because the contribution category you have chosen requires your post to be in English. See the Utopian Rules.
You can contact us on Discord.
[utopian-moderator]